1. Introduction
The Grails Spring Security plugins provide production-ready authentication and authorization for Apache Grails applications. Built on Spring Security, these plugins offer sensible defaults with extensive configuration options, enabling you to secure your Grails applications quickly while retaining full flexibility for customization.
1.1. About This Documentation
Starting with Grails 7, all Spring Security plugin documentation is combined into a single reference guide. This document covers the Core plugin and all official extension plugins:
-
Core — The foundation plugin providing authentication, authorization, domain classes, request mappings, and security infrastructure.
-
ACL — Access Control List support for fine-grained domain object security.
-
CAS — Central Authentication Service (CAS) single sign-on integration.
-
LDAP — Lightweight Directory Access Protocol authentication and user lookup.
-
OAuth2 — OAuth 2.0 provider integration for delegated authentication.
-
REST — Stateless token-based authentication for RESTful APIs, with support for JWT, GORM, Memcached, Redis, and Grails Cache token storage backends.
-
UI — Administrative user interface for managing users, roles, and request mappings.
1.2. Repository
All plugins are developed in a single repository at github.com/apache/grails-spring-security. Prior to Grails 7, each extension plugin was maintained in its own separate repository. The consolidation into a mono-repository simplifies dependency management, ensures consistent versioning, and makes it easier to contribute.
1.3. Getting Started
If you are new to Grails Spring Security, start with the Core Plugin Introduction section, which covers installation, configuration, and a quick-start tutorial. Once you have the core plugin working, you can add any combination of extension plugins to meet your application’s needs.
1.4. Compatibility
| Plugin Version | Grails Version | Spring Security Version |
|---|---|---|
7.0.x |
7.0.x |
6.x |
6.0.x |
6.x |
5.8.x |
5.x |
5.x |
5.x |
For information on upgrading from previous versions, see the Upgrading section.
2. What’s New
2.1. Mono-Repository
All Grails Spring Security plugins - Core, ACL, CAS, LDAP, OAuth2, REST, and UI - are now developed and released from a single repository. This means all plugins share the same version number and are guaranteed to be compatible with each other within a release.
2.2. Apache Software Foundation
The plugins have transitioned to the Apache Software Foundation.
The group ID has changed from org.grails.plugins to org.apache.grails, and artifact names have been updated.
See the Upgrading section for a full mapping of old to new coordinates.
2.3. Unified Versioning
All plugins now share a single version ({projectVersion}), aligned with the Grails BOM.
You no longer need to manage individual plugin versions - the Grails BOM handles version resolution automatically when using a Grails Gradle plugin.
2.4. Spring Security 6.x
The underlying Spring Security framework has been upgraded to version 6.x (from 5.8.x in the Grails 6 era). This brings the latest security enhancements, bug fixes, and alignment with the Spring Boot 3.x ecosystem.
2.5. Combined Documentation
This documentation is the first combined reference guide covering all Spring Security plugins in one place. Previously, each plugin had its own separate documentation site. Individual plugin guides are still available for quick reference, but this combined guide is the primary documentation going forward.
2.6. Grails 7 Compatibility
All plugins are built against Grails 7 and require Java 17 as the baseline. They leverage the new Grails BOM, unified Gradle plugin infrastructure, and the Apache Groovy 4.x runtime.
3. Upgrading from Previous Versions
This section provides upgrade guides for migrating your Spring Security plugin configuration between major versions.
3.1. Upgrading to 7.x (from Grails 6 / Spring Security 5.x)
This guide covers upgrading the Grails Spring Security plugins from the Grails 6.x era (plugin versions 5.x/6.x, Spring Security 5.8.x) to the Grails 7.x era (plugin version 7.x, Spring Security 6.x).
For the full Grails framework upgrade guide (Java 17 baseline, Groovy 4, coordinate changes, Gradle updates, etc.), see the Grails 7 Upgrade Guide.
3.1.1. Repository Consolidation
The previously separate Spring Security plugin repositories have been consolidated into a single mono-repository: apache/grails-spring-security. This repository now contains the core plugin and all extension plugins (ACL, CAS, LDAP, OAuth2, REST, and UI).
3.1.2. Dependency Changes
All artifacts have moved to the org.apache.grails group.
The most notable change is that spring-security-core has been renamed to grails-spring-security (dropping the -core suffix).
Update your build.gradle dependencies as follows:
| Old Dependency | New Dependency |
|---|---|
|
|
|
|
|
|
|
|
|
|
|
|
|
|
|
|
|
|
|
|
|
|
Example
A typical Spring Security Core dependency change:
// Before (Grails 6)
implementation 'org.grails.plugins:spring-security-core:6.1.1'

// After (Grails 7)
implementation 'org.apache.grails:grails-spring-security'| With the unified Grails BOM, versions are managed automatically when using a Grails Gradle plugin. You no longer need to specify the version explicitly. |
3.1.3. REST Plugin Token Storage Submodules
If you use the Spring Security REST plugin with a specific token storage backend, note the following renames:
-
spring-security-rest-gormis nowgrails-spring-security-rest-datamapping(reflecting the rename of GORM to Grails Data Mapping) -
spring-security-rest-grailscacheis nowgrails-spring-security-rest-grails-cache -
spring-security-rest-memcachedis nowgrails-spring-security-rest-memcached -
spring-security-rest-redisis nowgrails-spring-security-rest-redis
3.1.4. Spring Security 6.x Changes
The underlying Spring Security framework has been upgraded from 5.8.x to 6.x. Key changes that may affect your application:
-
Jakarta EE namespace: Spring Security 6 uses
jakarta.servletinstead ofjavax.servlet. See the Spring Security Migration Guide for details. -
Security filter chain configuration: The
WebSecurityConfigurerAdapterhas been removed in Spring Security 6. If you have custom security configurations extending this class, you will need to migrate to the component-based approach described in Spring Security without the WebSecurityConfigurerAdapter. The Grails Spring Security plugin handles the core filter chain configuration internally through thegrails.plugin.springsecurity.*namespace, so for most apps no migration is needed. However, user-defined@Bean SecurityFilterChain,@Bean WebSecurityCustomizer,@Bean AuthenticationManager, and@Bean UserDetailsManagerbeans are not automatically wired into the plugin’s filter chain, authentication providers, or user lookup. See the "Coexistence with the component-based Spring Security configuration model" section in the Installation chapter for the full coexistence matrix and the equivalent plugin configuration for each pattern. -
Default security behaviors: Some default behaviors have changed in Spring Security 6 (e.g., CSRF protection, session management). Review the Spring Security reference documentation for the complete list of changes.
3.1.5. Automated Migration
The coordinate rename script from the Grails core repository also handles Spring Security artifacts. Running it will update your Gradle files automatically:
./rename_gradle_artifacts.sh -l my/project/locationThe script is located in the etc/bin directory of the grails-core repository.
3.1.6. Configuration Compatibility
The grails.plugin.springsecurity.* configuration namespace remains unchanged.
Your existing application.groovy or application.yml security configuration should work without modification after updating the dependencies.
If you encounter any issues during the upgrade, please file an issue at the GitHub repository.
4. Core Plugin
4.1. Introduction to the Spring Security Plugin
The Spring Security plugin simplifies the integration of Spring Security into Grails applications. The plugin provides sensible defaults with many configuration options for customization. Nearly everything is configurable or replaceable in the plugin and in Spring Security itself, which makes extensive use of interfaces.
This guide documents configuration defaults and describes how to configure and extend the Spring Security plugin for Grails applications.
4.1.1. Installation
Prerequisites
Ensure you have the following set up:
-
A Grails project
-
A working internet connection
Installation Steps
-
Open your Grails project.
-
Locate your
build.gradlefile in the root directory of your project. -
Add the Spring Security Core Plugin dependency to the
dependenciessection in yourbuild.gradle:dependencies { // ... other dependencies implementation 'org.apache.grails:grails-spring-security:8.0.0-SNAPSHOT' } -
Save the
build.gradlefile. -
Open a terminal or command prompt.
-
Navigate to your project’s root directory using the
cdcommand. -
Run the following Gradle command to update your project’s dependencies:
./gradlew clean build -
The Spring Security Core Plugin 8.0.0-SNAPSHOT is now installed and integrated into your Grails project.
-
You can start using the plugin’s features and commands in your application.
-
Run the s2-quickstart script to generate domain classes and add the initial configuration settings in
application.groovy:./grailsw s2-quickstart com.yourapp User Role
Spring Boot Auto-Configuration
The plugin automatically excludes Spring Boot’s servlet security auto-configuration classes (such as SecurityAutoConfiguration, SecurityFilterAutoConfiguration, UserDetailsServiceAutoConfiguration, the OAuth2 client/resource-server/authorization-server starters, and the SAML2 relying-party starter) that conflict with the plugin’s own security setup. This means you do not need to manually add spring.autoconfigure.exclude entries to your application.yml.
While the plugin is active, grails.plugin.springsecurity.* is the authoritative configuration namespace for security. Spring Boot’s spring.security.* properties are not merged into the plugin configuration. Use the plugin’s keys to configure security; do not mix them with Boot’s spring.security.* keys.
|
Coexistence with the component-based Spring Security configuration model
Spring Security 5.7 deprecated and Spring Security 6 removed WebSecurityConfigurerAdapter, replacing it with a component-based configuration model that registers individual @Bean components (see Spring Security without the WebSecurityConfigurerAdapter). This plugin pre-dates that model and provides equivalent functionality through the grails.plugin.springsecurity.* configuration namespace, but it now blends the most common component-based patterns automatically. You can configure security from either side (or both) and the effective configuration is the union of both sources.
| Spring component-based pattern | Blending behaviour with this plugin active | Disable via |
|---|---|---|
|
Auto-merged into the plugin’s |
|
|
Auto-merged into the plugin’s |
|
|
For each additional |
|
|
If |
|
|
Still a no-op. The plugin does not use Spring’s |
n/a |
|
Conflicts with the plugin’s |
n/a |
LDAP factory beans ( |
Coexist but are not wired into the plugin’s authentication providers. |
Use the |
To delegate the entire servlet security stack to Spring Boot’s component-based model (and stop using the plugin’s grails.plugin.springsecurity.* configuration), disable the excluder via the property below.
If you need to disable this automatic exclusion - for example, to delegate the entire servlet security stack to Spring Boot instead of the plugin - set the following property in application.yml:
grails:
  plugin:
    springsecurity:
      excludeSpringSecurityAutoConfiguration: false
Disabling the exclusion is intentionally a footgun. The plugin can no longer guarantee that its filter chain is the only servlet security stack in the application context, and a startup WARN will be logged.
|
Verifying Installation
To verify that the plugin has been successfully installed, you can run a simple test:
-
In your Grails project, create a new controller or use an existing one.
-
Add a secure annotation, such as
@Secured(['ROLE_USER']), to a method in your controller. -
Run your Grails application using the command:
./gradlew bootRun -
Access the URL associated with the method you secured. If the plugin is correctly installed, it should enforce the security constraint you defined.
4.1.2. Configuration and Customization
The Spring Security plugin’s configuration is primarily managed within the grails-app/conf/application.groovy file, although an alternative is to house plugin configuration within application.yml. Default values are stored in the grails-app/conf/DefaultSecurityConfig.groovy file, with additional application-specific settings appended to application.groovy (or application.yml). This configuration structure involves merging default and custom values, giving precedence to application-specific settings.
Environment-Specific Configuration
This configuration approach accommodates environment-specific needs. For instance, during development, you might require less restrictive security rules compared to a production environment. To handle environment-specific parameters, utilize the environments block.
Property Prefix and Overrides
To distinguish these configuration properties from others in Grails or from different plugins, all the plugin-specific configuration properties begin with grails.plugin.springsecurity. When overriding these properties, ensure to use the grails.plugin.springsecurity prefix. For example:
grails.plugin.springsecurity.password.algorithm = 'bcrypt'Integration with CXF Grails Plugin
If your application incorporates the CXF Grails plugin, it’s crucial to arrange the dependencies correctly. Place the CXF dependency above the Spring Security plugin within the dependencies block, as shown below:
dependencies {
    implementation 'org.grails.plugins:cxf:3.1.1'
    // CXF above security.
    implementation 'org.apache.grails:grails-spring-security:8.0.0-SNAPSHOT'
}
4.1.3. Quick Start Guide
Getting started with the plugin is simple and efficient. Follow these steps to enhance the security of your Grails application:
Begin by installing the Spring Security plugin into your Grails project. Add the following dependency to your build.gradle:
implementation 'org.apache.grails:grails-spring-security:8.0.0-SNAPSHOT'After installation, execute the s2-quickstart initialization script. This sets up essential classes and configurations required for the plugin’s functionality. In your terminal, run:
./gradlew runCommand -Pargs="s2-quickstart com.yourapp User Role"If you are installing into a Grails plugin instead of an application, you must make sure you are using the web-plugin profile. Otherwise dependencies will not be met.
Running the same command will inject the spring beans into your GrailsPlugin classes doWithSpring method.
Plugin Configuration and Setup
The Spring Security plugin streamlines configuration and setup through a combination of steps:
-
Programmatic Servlet API Configuration:
Unlike earlier versions that utilized `web.xml`, the plugin now registers its servlet API configuration, including the Spring Security filter chain, programmatically.
-
Configure Spring Beans:
The plugin configures Spring beans within the application context to implement various functionality components. Dependency management automatically handles the selection of appropriate jar files.
By following these steps, your Grails application will be ready to leverage the Spring Security plugin for enhanced security. While in-depth knowledge of Spring Security isn’t mandatory, having a basic understanding of its underlying implementation can be helpful. For more details, refer to the [Spring Security documentation](https://https://docs.spring.io/spring-security/reference/7.0.4/).
4.2. What’s New in Grails Spring Security Core Plugin 6.0.0
This release is more than just an upgrade; it’s a transformative step towards elevating your application’s security, compatibility, and development experience. Get ready to embark on a journey of enhancements that will empower you to build robust, modern web applications. Let’s dive into the exciting changes that version 6.0.0 brings.
4.2.1. Elevated Security and Compatibility
Version 6.0.0 of the Grails Spring Security Core Plugin brings enhanced security features and improved compatibility with Grails 6. With a revamped underlying Spring Security framework powered by version 5.8.6, your application gains access to the latest security enhancements and bug fixes, safeguarding it against evolving threats and vulnerabilities.
4.2.2. Streamlined Commands for Grails 6
One of the notable improvements is the seamless transition to Grails 6. The plugin now offers upgraded commands that are fully compatible with Grails 6. This is a vital enhancement as it ensures your existing scripts remain functional without compatibility issues. The familiar commands like s2-quickstart have been refined, enabling you to trigger them using Gradle tasks. For example, you can now execute:
./grailsw s2-quickstart com.yourapp User RoleThis aligns perfectly with Grails 6’s development landscape, making your application’s migration smoother than ever before.
4.2.3. Effortless Documentation Navigation
We understand the importance of hassle-free documentation navigation. With the Internal Docs task now enhanced, generating documentation becomes a breeze. But that’s not all – we’ve introduced a slick select drop-down feature. This feature allows you to effortlessly switch between documentation for different releases. Whether you’re exploring the latest version or revisiting older ones, finding the information you need has never been easier.
4.2.4. Embracing the Grails 6 Framework
In the ever-evolving world of web development, the Grails Spring Security Core Plugin is keeping pace. Version 6.0.0 ensures seamless integration with Grails 6, enabling you to harness the cutting-edge features and improvements of the Grails framework. This integration ensures that your application can leverage both the power of Grails and the robust security features of the plugin.
4.3. Domain Classes
By default the plugin uses regular Grails domain classes to access its required data. It’s easy to create your own user lookup code though, which can access a database or any other source to retrieve user and authority data. See Custom UserDetailsService for how to implement this.
To use the standard user lookup you’ll need at a minimum a "person" and an "authority" domain class. In addition, if you want to store URL <==> Role mappings in the database (this is one of multiple approaches for defining the mappings) you need a "requestmap" domain class. If you use the recommended approach for mapping the many-to-many relationship between "person" and "authority", you also need a domain class to map the join table.
To use the user/group lookup you’ll also need a "group" domain class. If you are using the recommended approach for mapping many-to-many relationship between "person" and "group" and between "group" and "authority" you’ll need a domain class for each to map the join tables. You can still additionally use "requestmap" with this approach.
The s2-quickstart script creates initial domain classes for you. You specify the package and class names, and it creates the corresponding domain classes. After that you can customize them as you like. You can add additional properties, methods, and so on, as long as the core security-related functionality remains.
4.3.1. Person Class
Spring Security uses an Authentication object to determine whether the current user is allowed to perform a secured action, such as accessing a URL, manipulating a secured domain object, invoking a secured method, and so on. This object is created during login. Typically overlap occurs between the need for authentication data and the need to represent a user in the application in ways that are unrelated to security. The mechanism for populating the authentication is completely pluggable in Spring Security; you only need to provide an implementation of UserDetailsService and implement its one method, loadUserByUsername(String username).
By default the plugin uses a Grails "person" domain class to manage this data. username, enabled, and password are the default names of the core required properties. You can easily plug in your own implementation (Custom UserDetailsService), and rename the class, package, and properties. In addition, you should define an authorities property to retrieve roles; this can be a property or a getAuthorities() method, and it can be defined through a traditional GORM many-to-many or a custom mapping.
Assuming you choose com.mycompany.myapp as your package, and User as your class name, you’ll generate this class:
User.groovypackage com.mycompany.myapp
import groovy.transform.EqualsAndHashCode
import groovy.transform.ToString
import grails.compiler.GrailsCompileStatic
@GrailsCompileStatic
@EqualsAndHashCode(includes = 'username')
@ToString(includes = 'username', includeNames = true, includePackage = false)
class User implements Serializable {
private static final long serialVersionUID = 1
String username
String password
boolean enabled = true
boolean accountExpired
boolean accountLocked
boolean passwordExpired
Set<Role> getAuthorities() {
(UserRole.findAllByUser(this) as List<UserRole>)*.role as Set<Role>
}
static constraints = {
password blank: false, password: true
username blank: false, unique: true
}
static mapping = {
password column: '`password`'
}
}Optionally, you can add other properties such as email, firstName, and lastName, convenience methods, and so on:
User.groovypackage com.mycompany.myapp
import groovy.transform.EqualsAndHashCode
import groovy.transform.ToString
import grails.compiler.GrailsCompileStatic
@GrailsCompileStatic
@EqualsAndHashCode(includes='username')
@ToString(includes='username', includeNames=true, includePackage=false)
class User implements Serializable {
private static final long serialVersionUID = 1
String username
String password
boolean enabled = true
String email (1)
String firstName (1)
String lastName (1)
boolean accountExpired
boolean accountLocked
boolean passwordExpired
def someMethod() { (2)
...
}
Set<Role> getAuthorities() {
(UserRole.findAllByUser(this) as List<UserRole>)*.role as Set<Role>
}
static constraints = {
password blank: false, password: true
username blank: false, unique: true
}
static mapping = {
password column: '`password`'
}
}| 1 | Other properties |
| 2 | Convenience methods |
The getAuthorities() method is analagous to defining static hasMany = [authorities: Authority] in a traditional many-to-many mapping. This way GormUserDetailsService can call user.authorities during login to retrieve the roles without the overhead of a bidirectional many-to-many mapping.
The class and property names are configurable using these configuration attributes:
| Property | Default Value | Meaning |
|---|---|---|
userLookup.userDomainClassName |
none |
User class name |
userLookup.usernamePropertyName |
" |
User class username property |
userLookup.passwordPropertyName |
" |
User class password property |
userLookup.authoritiesPropertyName |
" |
User class role collection property |
userLookup.enabledPropertyName |
" |
User class enabled property |
userLookup.accountExpiredPropertyName |
" |
User class account expired property |
userLookup.accountLockedPropertyName |
" |
User class account locked property |
userLookup.passwordExpiredPropertyName |
" |
User class password expired property |
userLookup.authorityJoinClassName |
none |
User/Role many-many join class name |
4.3.2. Authority Class
The Spring Security plugin uses an "authority" class to represent a user’s roles in the application. In general this class restricts URLs to users who have been assigned the required access rights. A user can be granted multiple roles to indicate various access rights in the application, and should have at least one. A basic user who can access only non-restricted resources but can still authenticate is a bit unusual. Spring Security usually functions fine if a user has no granted authorities, but fails in a few places that assume one or more. So if a user authenticates successfully but has no granted roles, the plugin grants the user a "virtual" role, ROLE_NO_ROLES. Thus the user satisfies Spring Security’s requirements but cannot access secure resources, as you would not associate any secure resources with this role.
|
Note that you aren’t required to use roles at all; an application with simple security requirements could use the |
Like the "person" class, the "authority" class has a default name, Authority, and a default name for its one required property, authority.
If you want to use another existing domain class, it simply has to have a property for name. As with the name of the class, the names of the properties can be whatever you want - they’re specified in grails-app/conf/application.groovy.
Assuming you choose com.mycompany.myapp as your package, and Role as your class name, you’ll generate this class:
Role.groovypackage com.mycompany.myapp
import groovy.transform.EqualsAndHashCode
import groovy.transform.ToString
import grails.compiler.GrailsCompileStatic
@GrailsCompileStatic
@EqualsAndHashCode(includes='authority')
@ToString(includes='authority', includeNames=true, includePackage=false)
class Role implements Serializable {
private static final long serialVersionUID = 1
String authority
static constraints = {
authority blank: false, unique: true
}
static mapping = {
cache true
}
}The class and property names are configurable using these configuration attributes:
| Property | Default Value | Meaning |
|---|---|---|
authority.className |
none |
Role class name |
authority.nameField |
" |
Role class role name property |
|
Role names must start with " The role names should be primarily an internal implementation detail; if you want to display friendlier names in a UI, it’s simple to remove the prefix first. |
4.3.3. PersonAuthority Class
The typical approach to mapping the relationship between "person" and "authority" is a many-to-many. Users have multiple roles, and roles are shared by multiple users. This approach can be problematic in Grails, because a popular role, for example, ROLE_USER, will be granted to many users in your application. GORM uses collections to manage adding and removing related instances and maps many-to-many relationships bidirectionally. Granting a role to a user requires loading all existing users who have that role because the collection is a Set. So even though no uniqueness concerns may exist, Hibernate loads them all to enforce uniqueness. The recommended approach in the plugin is to map a domain class to the join table that manages the many-to-many, and using that to grant and revoke roles to users.
Like the other domain classes, this class is generated for you, so you don’t need to deal with the details of mapping it. Assuming you choose com.mycompany.myapp as your package, and User and Role as your class names, you’ll generate this class:
UserRole.groovypackage com.mycompany.myapp
import grails.gorm.DetachedCriteria
import groovy.transform.ToString
import org.codehaus.groovy.util.HashCodeHelper
import grails.compiler.GrailsCompileStatic
@GrailsCompileStatic
@ToString(cache=true, includeNames=true, includePackage=false)
class UserRole implements Serializable {
private static final long serialVersionUID = 1
User user
Role role
@Override
boolean equals(other) {
if (other instanceof UserRole) {
other.userId == user?.id && other.roleId == role?.id
}
}
@Override
int hashCode() {
int hashCode = HashCodeHelper.initHash()
if (user) {
hashCode = HashCodeHelper.updateHash(hashCode, user.id)
}
if (role) {
hashCode = HashCodeHelper.updateHash(hashCode, role.id)
}
hashCode
}
static UserRole get(long userId, long roleId) {
criteriaFor(userId, roleId).get()
}
static boolean exists(long userId, long roleId) {
criteriaFor(userId, roleId).count()
}
private static DetachedCriteria criteriaFor(long userId, long roleId) {
UserRole.where {
user == User.load(userId) &&
role == Role.load(roleId)
}
}
static UserRole create(User user, Role role, boolean flush = false) {
def instance = new UserRole(user: user, role: role)
instance.save(flush: flush)
instance
}
static boolean remove(User u, Role r) {
if (u != null && r != null) {
UserRole.where { user == u && role == r }.deleteAll()
}
}
static int removeAll(User u) {
u == null ? 0 : UserRole.where { user == u }.deleteAll() as int
}
static int removeAll(Role r) {
r == null ? 0 : UserRole.where { role == r }.deleteAll() as int
}
static constraints = {
role validator: { Role r, UserRole ur ->
if (ur.user?.id) {
UserRole.withNewSession {
if (UserRole.exists(ur.user.id, r.id)) {
return ['userRole.exists']
}
}
}
}
}
static mapping = {
id composite: ['user', 'role']
version false
}
}The helper methods make it easy to grant or revoke roles. Assuming you have already loaded a user and a role, you grant the role to the user as follows:
User user = ...
Role role = ...
UserRole.create user, role
Revoking a role is similar:
User user = ...
Role role = ...
UserRole.remove user, role
The class name is the only configurable attribute:
| Property | Default Value | Meaning |
|---|---|---|
userLookup.authorityJoinClassName |
none |
User/Role many-many join class name |
4.3.4. Group Class
The plugin provides you the option of creating an access inheritance level between "person" and "authority": the "group". The next three classes you will read about (including this one) are only used in a "person"/"group"/"authority" implementation. Rather than granting authorities directly to a "person", you can create a "group", map authorities to it, and then map a "person" to that "group". For applications that have a one or more groups of users who need the same level of access, having one or more "group" instances makes managing changes to access levels easier because the authorities that make up that access level are encapsulated in the "group", and a single change will affect all of the users.
If you run the s2-quickstart script with the group name specified and use com.mycompany.myapp as your package and RoleGroup and Role as your class names, you’ll generate this class:
RoleGroup.groovypackage com.mycompany.myapp
import grails.gorm.DetachedCriteria
import groovy.transform.ToString
import org.codehaus.groovy.util.HashCodeHelper
import grails.compiler.GrailsCompileStatic
@GrailsCompileStatic
@ToString(cache=true, includeNames=true, includePackage=false)
class RoleGroupRole implements Serializable {
private static final long serialVersionUID = 1
RoleGroup roleGroup
Role role
@Override
boolean equals(other) {
if (other instanceof RoleGroupRole) {
other.roleId == role?.id && other.roleGroupId == roleGroup?.id
}
}
@Override
int hashCode() {
int hashCode = HashCodeHelper.initHash()
if (roleGroup) {
hashCode = HashCodeHelper.updateHash(hashCode, roleGroup.id)
}
if (role) {
hashCode = HashCodeHelper.updateHash(hashCode, role.id)
}
hashCode
}
static RoleGroupRole get(long roleGroupId, long roleId) {
criteriaFor(roleGroupId, roleId).get()
}
static boolean exists(long roleGroupId, long roleId) {
criteriaFor(roleGroupId, roleId).count()
}
private static DetachedCriteria criteriaFor(long roleGroupId, long roleId) {
RoleGroupRole.where {
roleGroup == RoleGroup.load(roleGroupId) &&
role == Role.load(roleId)
}
}
static RoleGroupRole create(RoleGroup roleGroup, Role role, boolean flush = false) {
def instance = new RoleGroupRole(roleGroup: roleGroup, role: role)
instance.save(flush: flush)
instance
}
static boolean remove(RoleGroup rg, Role r) {
if (rg != null && r != null) {
RoleGroupRole.where { roleGroup == rg && role == r }.deleteAll()
}
}
static int removeAll(Role r) {
r == null ? 0 : RoleGroupRole.where { role == r }.deleteAll() as int
}
static int removeAll(RoleGroup rg) {
rg == null ? 0 : RoleGroupRole.where { roleGroup == rg }.deleteAll() as int
}
static constraints = {
role validator: { Role r, RoleGroupRole rg ->
if (rg.roleGroup?.id) {
RoleGroupRole.withNewSession {
if (RoleGroupRole.exists(rg.roleGroup.id, r.id)) {
return ['roleGroup.exists']
}
}
}
}
}
static mapping = {
id composite: ['roleGroup', 'role']
version false
}
}When running the s2-quickstart script with the group name specified, the "person" class will be generated differently to accommodate the use of groups. Assuming you use com.mycompany.myapp as your package and User and RoleGroup as your class names, the getAuthorities() method will be generated like so:
getAuthorities() method when using role groupsSet<RoleGroup> getAuthorities() {
(UserRoleGroup.findAllByUser(this) as List<UserRoleGroup>)*.roleGroup as Set<RoleGroup>
}The plugin assumes the attribute authorities will provide the "authority" collection for each class, but you can change the property names in grails-app/conf/application.groovy. You also must ensure that the property useRoleGroups is set to true in order for GormUserDetailsService to properly retrieve the authorities.
| Property | Default Value | Meaning |
|---|---|---|
useRoleGroups |
|
Whether to use " |
authority.groupAuthorityNameField |
none (the s2-quickstart script uses the name " |
RoleGroup class role collection property |
4.3.5. PersonGroup Class
The typical approach to mapping the relationship between "person" and "group" is a many-to-many. In a standard implementation, users have multiple roles, and roles are shared by multiple users. In a group implementation, users have multiple groups, and groups are shared by multiple users. For the same reason we would use a join class between "person" and "authority", we should use one between "person" and "group". Please note that when using groups, there should not be a join class between "person" and "authority", since "group" resides between the two.
If you run the s2-quickstart script with the group name specified, this class will be generated for you, so you don’t need to deal with the details of mapping it. Assuming you choose com.mycompany.myapp as your package, and User and RoleGroup as your class names, you’ll generate this class:
UserRoleGroup.groovypackage com.mycompany.myapp
import grails.gorm.DetachedCriteria
import groovy.transform.ToString
import org.codehaus.groovy.util.HashCodeHelper
import grails.compiler.GrailsCompileStatic
@GrailsCompileStatic
@ToString(cache = true, includeNames = true, includePackage = false)
class UserRoleGroup implements Serializable {
private static final long serialVersionUID = 1
User user
RoleGroup roleGroup
@Override
boolean equals(other) {
if (other instanceof UserRoleGroup) {
other.userId == user?.id && other.roleGroupId == roleGroup?.id
}
false
}
@Override
int hashCode() {
int hashCode = HashCodeHelper.initHash()
if (user) {
hashCode = HashCodeHelper.updateHash(hashCode, user.id)
}
if (roleGroup) {
hashCode = HashCodeHelper.updateHash(hashCode, roleGroup.id)
}
hashCode
}
static UserRoleGroup get(long userId, long roleGroupId) {
criteriaFor(userId, roleGroupId).get()
}
static boolean exists(long userId, long roleGroupId) {
criteriaFor(userId, roleGroupId).count()
}
private static DetachedCriteria criteriaFor(long userId, long roleGroupId) {
UserRoleGroup.where {
user == User.load(userId) &&
roleGroup == RoleGroup.load(roleGroupId)
}
}
static UserRoleGroup create(User user, RoleGroup roleGroup, boolean flush = false) {
def instance = new UserRoleGroup(user: user, roleGroup: roleGroup)
instance.save(flush: flush)
instance
}
static boolean remove(User u, RoleGroup rg) {
if (u != null && rg != null) {
UserRoleGroup.where { user == u && roleGroup == rg }.deleteAll()
}
}
static int removeAll(User u) {
u == null ? 0 : UserRoleGroup.where { user == u }.deleteAll() as int
}
static int removeAll(RoleGroup rg) {
rg == null ? 0 : UserRoleGroup.where { roleGroup == rg }.deleteAll() as int
}
static constraints = {
user validator: { User u, UserRoleGroup ug ->
if (ug.roleGroup?.id) {
UserRoleGroup.withNewSession {
if (UserRoleGroup.exists(u.id, ug.roleGroup.id)) {
return ['userGroup.exists']
}
}
}
}
}
static mapping = {
id composite: ['roleGroup', 'user']
version false
}
}4.3.6. GroupAuthority Class
The typical approach to mapping the relationship between "group" and "authority" is a many-to-many. In a standard implementation, users have multiple roles, and roles are shared by multiple users. In a group implementation, groups have multiple roles and roles are shared by multiple groups. For the same reason we would use a join class between "person" and "authority", we should use one between "group" and "authority".
If you run the s2-quickstart script with the group name specified, this class will be generated for you, so you don’t need to deal with the details of mapping it. Assuming you choose com.mycompany.myapp as your package, and RoleGroup and Role as your class names, you’ll generate this class:
RoleGroupRole.groovypackage com.mycompany.myapp
import grails.gorm.DetachedCriteria
import groovy.transform.ToString
import org.codehaus.groovy.util.HashCodeHelper
import grails.compiler.GrailsCompileStatic
@GrailsCompileStatic
@ToString(cache=true, includeNames=true, includePackage=false)
class RoleGroupRole implements Serializable {
private static final long serialVersionUID = 1
RoleGroup roleGroup
Role role
@Override
boolean equals(other) {
if (other instanceof RoleGroupRole) {
other.roleId == role?.id && other.roleGroupId == roleGroup?.id
}
}
@Override
int hashCode() {
int hashCode = HashCodeHelper.initHash()
if (roleGroup) {
hashCode = HashCodeHelper.updateHash(hashCode, roleGroup.id)
}
if (role) {
hashCode = HashCodeHelper.updateHash(hashCode, role.id)
}
hashCode
}
static RoleGroupRole get(long roleGroupId, long roleId) {
criteriaFor(roleGroupId, roleId).get()
}
static boolean exists(long roleGroupId, long roleId) {
criteriaFor(roleGroupId, roleId).count()
}
private static DetachedCriteria criteriaFor(long roleGroupId, long roleId) {
RoleGroupRole.where {
roleGroup == RoleGroup.load(roleGroupId) &&
role == Role.load(roleId)
}
}
static RoleGroupRole create(RoleGroup roleGroup, Role role, boolean flush = false) {
def instance = new RoleGroupRole(roleGroup: roleGroup, role: role)
instance.save(flush: flush)
instance
}
static boolean remove(RoleGroup rg, Role r) {
if (rg != null && r != null) {
RoleGroupRole.where { roleGroup == rg && role == r }.deleteAll()
}
}
static int removeAll(Role r) {
r == null ? 0 : RoleGroupRole.where { role == r }.deleteAll() as int
}
static int removeAll(RoleGroup rg) {
rg == null ? 0 : RoleGroupRole.where { roleGroup == rg }.deleteAll() as int
}
static constraints = {
role validator: { Role r, RoleGroupRole rg ->
if (rg.roleGroup?.id) {
RoleGroupRole.withNewSession {
if (RoleGroupRole.exists(rg.roleGroup.id, r.id)) {
return ['roleGroup.exists']
}
}
}
}
}
static mapping = {
id composite: ['roleGroup', 'role']
version false
}
}4.3.7. Requestmap Domain Class
Create and use a domain class to store request mapping entries in the database instead of defining them with annotations
or in application.groovy. This option makes the rules configurable at runtime; you can add, remove and edit rules
without restarting your application.
| Property | Default Value | Meaning |
|---|---|---|
requestMap.className |
none - set to your implementation |
requestmap domain class |
requestMap.urlField |
"url" |
URL pattern property name |
requestMap.configAttributeField |
"configAttribute" |
authority pattern property name |
requestMap.httpMethodField |
"httpMethod" |
HTTP method property name (optional, does not have to exist in the class if you don’t require URL/method security) |
Assuming you choose com.mycompany.myapp as your package, and SecurityMapping as your class name, you’ll generate this class:
package com.mycompany.myapp

import org.springframework.http.HttpMethod

import groovy.transform.EqualsAndHashCode
import groovy.transform.ToString
import grails.compiler.GrailsCompileStatic

@GrailsCompileStatic
@EqualsAndHashCode(includes=['configAttribute', 'httpMethod', 'url'])
@ToString(includes=['configAttribute', 'httpMethod', 'url'], cache=true, includeNames=true, includePackage=false)
class SecurityMapping implements Serializable {

	private static final long serialVersionUID = 1

	String configAttribute
	HttpMethod httpMethod
	String url

	static constraints = {
		configAttribute(blank: false)
		httpMethod(nullable: true)
		url(blank: false, unique: 'httpMethod')
	}

	static mapping = {
		cache(true)
	}
}
To use database entries to guard URLs, see Request Mappings Stored in the Database.
4.4. Configuring Request Mappings to Secure URLs
You can choose among the following approaches to configuring request mappings for secure application URLs. The goal is to map URL patterns to the roles required to access those URLs.
-
@Securedannotations (default approach) - Defining Secured Annotations -
A simple Map in
application.groovy- Static Map -
Requestmapdomain class instances stored in the database - Request Mappings Stored in the Database
You can only use one method at a time. You configure it with the securityConfigType attribute; the value has to be an SecurityConfigType enum value or the name of the enum as a String.
4.4.1. Pessimistic Lockdown
Many applications are mostly public, with some pages only accessible to authenticated users with various roles. In this case, it might make sense to leave URLs open by default and restrict access on a case-by-case basis. However, if your application is primarily secure, you can use a pessimistic lockdown approach to deny access to all URLs that do not have an applicable URL <==> Role request mapping. But the pessimistic approach is safer; if you forget to restrict access to a URL using the optimistic approach, it might take a while to discover that unauthorized users can access the URL, but if you forget to allow access when using the pessimistic approach, no user can access it and the error should be quickly discovered.
The pessimistic approach is the default, and there are two configuration options that apply. If rejectIfNoRule is true (the default) then any URL that has no request mappings (an annotation, entry in controllerAnnotations.staticRules or interceptUrlMap, or a Requestmap instance) will be denied to all users. The other option is fii.rejectPublicInvocations and if it is true (the default) then un-mapped URLs will trigger an IllegalArgumentException and will show the error page. This is uglier, but more useful because it’s very clear that there is a misconfiguration. When fii.rejectPublicInvocations is false but rejectIfNoRule is true you just see the "Sorry, you're not authorized to view this page." error 403 message.
Note that the two settings are mutually exclusive. If rejectIfNoRule is true then fii.rejectPublicInvocations is ignored because the request will transition to the login page or the error 403 page. If you want the more obvious error page, set fii.rejectPublicInvocations to true and rejectIfNoRule to false to allow that check to occur.
To reject un-mapped URLs with a 403 error code, use these settings (or none since rejectIfNoRule defaults to true)
rejectIfNoRulegrails.plugin.springsecurity.rejectIfNoRule = true
grails.plugin.springsecurity.fii.rejectPublicInvocations = falseand to reject with the error 500 page, use these (optionally omit rejectPublicInvocations since it defaults to true):
fii.rejectPublicInvocationsgrails.plugin.springsecurity.rejectIfNoRule = false
grails.plugin.springsecurity.fii.rejectPublicInvocations = trueNote that if you set rejectIfNoRule or rejectPublicInvocations to true you’ll need to configure the staticRules map to include URLs that can’t otherwise be guarded:
controllerAnnotations.staticRules configuration when using rejectIfNoRule or fii.rejectPublicInvocationsgrails.plugin.springsecurity.controllerAnnotations.staticRules = [
[pattern: '/', access: ['permitAll']],
[pattern: '/error', access: ['permitAll']],
[pattern: '/index', access: ['permitAll']],
[pattern: '/index.gsp', access: ['permitAll']],
[pattern: '/shutdown', access: ['permitAll']],
[pattern: '/assets/**', access: ['permitAll']],
[pattern: '/**/js/**', access: ['permitAll']],
[pattern: '/**/css/**', access: ['permitAll']],
[pattern: '/**/images/**', access: ['permitAll']],
[pattern: '/**/favicon.ico', access: ['permitAll']]
]|
Note that the syntax of the The preceding Now in addition to the default mappings, we require an authentication with |
This is needed when using annotations; if you use the grails.plugin.springsecurity.interceptUrlMap map in application.groovy you’ll need to add these URLs too, and likewise when using Requestmap instances. If you don’t use annotations, you must add rules for the login and logout controllers also. You can add Requestmaps manually, or in BootStrap.groovy, for example:
rejectIfNoRule or fii.rejectPublicInvocationsfor (String url in [
'/', '/error', '/index', '/index.gsp', '/**/favicon.ico', '/shutdown',
'/**/js/**', '/**/css/**', '/**/images/**',
'/login', '/login.*', '/login/*',
'/logout', '/logout.*', '/logout/*']) {
new Requestmap(url: url, configAttribute: 'permitAll').save()
}
springSecurityService.clearCachedRequestmaps()The analogous interceptUrlMap settings would be:
interceptUrlMap configuration when using rejectIfNoRule or fii.rejectPublicInvocationsgrails.plugin.springsecurity.interceptUrlMap = [
[pattern: '/', access: ['permitAll']],
[pattern: '/error', access: ['permitAll']],
[pattern: '/index', access: ['permitAll']],
[pattern: '/index.gsp', access: ['permitAll']],
[pattern: '/shutdown', access: ['permitAll']],
[pattern: '/assets/**', access: ['permitAll']],
[pattern: '/**/js/**', access: ['permitAll']],
[pattern: '/**/css/**', access: ['permitAll']],
[pattern: '/**/images/**', access: ['permitAll']],
[pattern: '/**/favicon.ico', access: ['permitAll']],
[pattern: '/login/**', access: ['permitAll']],
[pattern: '/logout/**', access: ['permitAll']]
]In addition, when you enable the switch-user feature, you’ll have to specify access rules for the associated URLs, e.g.
[pattern: '/login/impersonate', access: ['ROLE_ADMIN']],
[pattern: '/logout/impersonate', access: ['permitAll']]
4.4.2. URLs and Authorities
In each approach you configure a mapping for a URL pattern to the role(s) that are required to access those URLs, for example, /admin/user/** requires ROLE_ADMIN. In addition, you can combine the role(s) with SpEL expressions and/or tokens such as IS_AUTHENTICATED_ANONYMOUSLY, IS_AUTHENTICATED_REMEMBERED, and IS_AUTHENTICATED_FULLY. One or more voters (Voters) will process any tokens and enforce a rule based on them:
-
IS_AUTHENTICATED_ANONYMOUSLY
-
signifies that anyone can access this URL. By default the
AnonymousAuthenticationFilterensures an "anonymous"Authenticationwith no roles so that every user has an authentication. The token accepts any authentication, even anonymous. -
The SpEL expression
permitAllis equivalent toIS_AUTHENTICATED_ANONYMOUSLYand is typically more intuitive to use
-
-
IS_AUTHENTICATED_REMEMBERED
-
requires the user to be authenticated through a remember-me cookie or an explicit login.
-
The SpEL expression
isAuthenticated() or isRememberMe()is equivalent toIS_AUTHENTICATED_REMEMBEREDand is typically more intuitive to use
-
-
IS_AUTHENTICATED_FULLY
-
requires the user to be fully authenticated with an explicit login.
-
The SpEL expression
isFullyAuthenticated()is equivalent toIS_AUTHENTICATED_FULLYand is typically more intuitive to use
-
With IS_AUTHENTICATED_FULLY you can implement a security scheme whereby users can check a remember-me checkbox during login and be auto-authenticated each time they return to your site, but must still log in with a password for some parts of the site. For example, allow regular browsing and adding items to a shopping cart with only a cookie, but require an explicit login to check out or view purchase history.
For more information on IS_AUTHENTICATED_FULLY, IS_AUTHENTICATED_REMEMBERED, and IS_AUTHENTICATED_ANONYMOUSLY, see the Javadoc for AuthenticatedVoter
|
The plugin isn’t compatible with Grails both actions will be allowed if the user has permission to access the The workaround is to create separate forms without using |
4.4.3. Comparing the Approaches
Each approach has its advantages and disadvantages. Annotations and the application.groovy Map are less flexible because they are configured once in the code and you can update them only by restarting the application (in prod mode anyway). In practice this limitation is minor, because security mappings for most applications are unlikely to change at runtime.
On the other hand, storing Requestmap entries enables runtime-configurability. This approach gives you a core set of rules populated at application startup that you can edit, add to, and delete as needed. However, it separates the security rules from the application code, which is less convenient than having the rules defined in grails-app/conf/application.groovy or in the applicable controllers using annotations.
URLs must be mapped in lowercase if you use the Requestmap or grails-app/conf/application.groovy map approaches. For example, if you have a FooBarController, its urls will be of the form /fooBar/list, /fooBar/create, and so on, but these must be mapped as /foobar/, /foobar/list, /foobar/create. This mapping is handled automatically for you if you use annotations.
4.4.4. Defining Secured Annotations
You can use an @Secured annotation (either the standard org.springframework.security.access.annotation.Secured or the plugin’s grails.plugin.springsecurity.annotation.Secured which has the same attributes and features but also supports defining a closure as the config attribute to make authorization decisions) in your controllers to configure which roles are required for which actions. To use annotations, specify securityConfigType="Annotation", or leave it unspecified because it’s the default:
securityConfigType as "Annotation"grails.plugin.springsecurity.securityConfigType = "Annotation"You can define the annotation at the class level, meaning that the specified roles are required for all actions, or at the action level, or both. If the class and an action are annotated then the action annotation values will be used since they’re more specific.
For example, given this controller:
package com.mycompany.myapp

import grails.plugin.springsecurity.annotation.Secured

class SecureAnnotatedController {

   @Secured('ROLE_ADMIN')
   def index() {
      render 'you have ROLE_ADMIN'
   }

   @Secured(['ROLE_ADMIN', 'ROLE_SUPERUSER'])
   def adminEither() {
      render 'you have ROLE_ADMIN or SUPERUSER'
   }

   def anybody() {
      render 'anyone can see this' // assuming you're not using "strict" mode,
                                   // otherwise the action is not viewable by anyone
   }
}
you must be authenticated and have ROLE_ADMIN to see /myapp/secureAnnotated (or /myapp/secureAnnotated/index) and be authenticated and have ROLE_ADMIN or ROLE_SUPERUSER to see /myapp/secureAnnotated/adminEither. Any user can access /myapp/secureAnnotated/anybody if you have disabled "strict" mode (using rejectIfNoRule), and nobody can access the action by default since it has no access rule configured.
In addition, you can define a closure in the annotation which will be called during access checking. The closure must return true or false and has all of the methods and properties that are available when using SpEL expressions, since the closure’s delegate is set to a subclass of WebSecurityExpressionRoot, and also the Spring ApplicationContext as the ctx property:
@Secured@Secured(closure = {
assert request
assert ctx
authentication.name == 'admin1'
})
def someMethod() {
...
}Often most actions in a controller require similar access rules, so you can also define annotations at the class level:
package com.mycompany.myapp

import grails.plugin.springsecurity.annotation.Secured

@Secured('ROLE_ADMIN')
class SecureClassAnnotatedController {

   def index() {
      render 'index: you have ROLE_ADMIN'
   }

   def otherAction() {
      render 'otherAction: you have ROLE_ADMIN'
   }

   @Secured('ROLE_SUPERUSER')
   def super() {
      render 'super: you have ROLE_SUPERUSER'
   }
}
Here you need to be authenticated and have ROLE_ADMIN to see /myapp/secureClassAnnotated (or /myapp/secureClassAnnotated/index) or /myapp/secureClassAnnotated/otherAction. However, you must have ROLE_SUPERUSER to access /myapp/secureClassAnnotated/super. The action-scope annotation overrides the class-scope annotation. Note that "strict" mode isn’t applicable here since all actions have an access rule defined (either explicitly or inherited from the class-level annotation).
Additionally, you can specify the HTTP method that is required in each annotation for the access rule, e.g.
package com.mycompany.myapp

import grails.plugin.springsecurity.annotation.Secured

class SecureAnnotatedController {

   @Secured(value = ['ROLE_ADMIN'], httpMethod = 'GET')
   def create() {
      ...
   }

   @Secured(value = ['ROLE_ADMIN'], httpMethod = 'POST')
   def save() {
      ...
   }
}
Here you must have ROLE_ADMIN for both the create and save actions but create requires a GET request (since it renders the form to create a new instance) and save requires POST (since it’s the action that the form posts to).
Securing RESTful domain classes
Since Grails 2.3, domain classes can be annotated with the grails.rest.Resource AST transformation, which will generate internally a controller with the default CRUD operations.
You can also use the @Secured annotation on such domain classes:
@Resource
@Secured('ROLE_ADMIN')
class Thing {

   String name
}
controllerAnnotations.staticRules
You can also define "static" mappings that cannot be expressed in the controllers, such as /** or for JavaScript, CSS, or image URLs. Use the controllerAnnotations.staticRules property.
In application.groovy:
application.groovygrails.plugin.springsecurity.controllerAnnotations.staticRules = [
[pattern: '/js/admin/**', access: ['ROLE_ADMIN']],
[pattern: '/someplugin/**', access: ['ROLE_ADMIN']]
]Or equivalently in application.yml:
application.yml (flow mapping)grails:
plugin:
springsecurity:
controllerAnnotations:
staticRules:
- { pattern: '/js/admin/**', access: ['ROLE_ADMIN'] }
- { pattern: '/someplugin/**', access: ['ROLE_ADMIN'] }Block mapping syntax also works:
application.yml (block mapping)grails:
plugin:
springsecurity:
controllerAnnotations:
staticRules:
- pattern: '/js/admin/**'
access:
- ROLE_ADMIN
- pattern: '/someplugin/**'
access:
- ROLE_ADMINThis example maps all URLs associated with SomePluginController, which has URLs of the form /someplugin/..., to ROLE_ADMIN; annotations are not an option here because you would not edit plugin code for a change like this.
|
The Listing 15. Incorrect - single Map instead of List of Maps
This will fail with: " |
|
When mapping URLs for controllers that are mapped in |
4.4.5. Static Map
To use a static map to secure URLs, first specify securityConfigType="InterceptUrlMap":
securityConfigType as "InterceptUrlMap" in application.groovygrails.plugin.springsecurity.securityConfigType = "InterceptUrlMap"Or in application.yml:
securityConfigType as "InterceptUrlMap" in application.ymlgrails:
plugin:
springsecurity:
securityConfigType: InterceptUrlMapThen define the URL mappings. In application.groovy:
interceptUrlMap in application.groovygrails.plugin.springsecurity.interceptUrlMap = [
[pattern: '/', access: ['permitAll']],
[pattern: '/error', access: ['permitAll']],
[pattern: '/index', access: ['permitAll']],
[pattern: '/index.gsp', access: ['permitAll']],
[pattern: '/shutdown', access: ['permitAll']],
[pattern: '/assets/**', access: ['permitAll']],
[pattern: '/**/js/**', access: ['permitAll']],
[pattern: '/**/css/**', access: ['permitAll']],
[pattern: '/**/images/**', access: ['permitAll']],
[pattern: '/**/favicon.ico', access: ['permitAll']],
[pattern: '/login', access: ['permitAll']],
[pattern: '/login/**', access: ['permitAll']],
[pattern: '/logout', access: ['permitAll']],
[pattern: '/logout/**', access: ['permitAll']]
]Or equivalently in application.yml:
interceptUrlMap in application.ymlgrails:
plugin:
springsecurity:
interceptUrlMap:
- { pattern: '/', access: ['permitAll'] }
- { pattern: '/error', access: ['permitAll'] }
- { pattern: '/index', access: ['permitAll'] }
- { pattern: '/index.gsp', access: ['permitAll'] }
- { pattern: '/shutdown', access: ['permitAll'] }
- { pattern: '/assets/**', access: ['permitAll'] }
- { pattern: '/**/js/**', access: ['permitAll'] }
- { pattern: '/**/css/**', access: ['permitAll'] }
- { pattern: '/**/images/**', access: ['permitAll'] }
- { pattern: '/**/favicon.ico', access: ['permitAll'] }
- { pattern: '/login', access: ['permitAll'] }
- { pattern: '/login/**', access: ['permitAll'] }
- { pattern: '/logout', access: ['permitAll'] }
- { pattern: '/logout/**', access: ['permitAll'] }Add any custom mappings as needed, e.g.
interceptUrlMap mappings in application.groovygrails.plugin.springsecurity.interceptUrlMap = [
...
[pattern: '/secure/**', access: ['ROLE_ADMIN']],
[pattern: '/finance/**', access: ['ROLE_FINANCE', 'IS_AUTHENTICATED_FULLY']]
]interceptUrlMap mappings in application.ymlgrails:
plugin:
springsecurity:
interceptUrlMap:
- { pattern: '/secure/**', access: ['ROLE_ADMIN'] }
- { pattern: '/finance/**', access: ['ROLE_FINANCE', 'IS_AUTHENTICATED_FULLY'] }When using this approach, make sure that you order the rules correctly. The first applicable rule is used, so for example if you have a controller that has one set of rules but an action that has stricter access rules, e.g.
interceptUrlMap order[pattern: '/secure/**', access: ['ROLE_ADMIN', 'ROLE_SUPERUSER']],
[pattern: '/secure/reallysecure/**', access: ['ROLE_SUPERUSER']]then this would fail - it wouldn’t restrict access to /secure/reallysecure/list to a user with ROLE_SUPERUSER since the first URL pattern matches, so the second would be ignored. The correct mapping would be
interceptUrlMap order[pattern: '/secure/reallysecure/**', access: ['ROLE_SUPERUSER']],
[pattern: '/secure/**', access: ['ROLE_ADMIN', 'ROLE_SUPERUSER']]4.4.6. Request Mappings Stored in the Database
With this approach you create and use a domain class to store security mapping entries in the database.
The domain class must have the following properties:
-
url- the secured URL pattern -
httpMethod- the http method for which the rule applies (or null for all methods) -
configAttribute- containing a comma-delimited list of required roles, SpEL expressions, and/or tokens such asIS_AUTHENTICATED_FULLY,IS_AUTHENTICATED_REMEMBERED, andIS_AUTHENTICATED_ANONYMOUSLY
To use database-backed url security mappings, use the following configuration:
grails.plugin.springsecurity.securityConfigType = 'Requestmap'
grails.plugin.springsecurity.requestMap.className = 'com.mycompany.myapp.SecurityMapping'
See Requestmap Domain Class for an example request map domain class.
You create request map entries as you create entries in any Grails domain class:
for (String url in [
      '/', '/error', '/index', '/index.gsp', '/**/favicon.ico', '/shutdown',
      '/assets/**', '/**/js/**', '/**/css/**', '/**/images/**',
      '/login', '/login.*', '/login/*',
      '/logout', '/logout.*', '/logout/*']) {
   new SecurityMapping(url: url, configAttribute: 'permitAll').save()
}

new SecurityMapping(url: '/profile/**',    configAttribute: 'ROLE_USER').save()
new SecurityMapping(url: '/admin/**',      configAttribute: 'ROLE_ADMIN').save()
new SecurityMapping(url: '/admin/role/**', configAttribute: 'ROLE_SUPERVISOR').save()
new SecurityMapping(url: '/admin/user/**',
               configAttribute: 'ROLE_ADMIN,ROLE_SUPERVISOR').save()
new SecurityMapping(url: '/login/impersonate',
               configAttribute: 'ROLE_SWITCH_USER,IS_AUTHENTICATED_FULLY').save()
springSecurityService.clearCachedRequestmaps()
The configAttribute value can have a single value or have multiple comma-delimited values. In this example only users with ROLE_ADMIN or ROLE_SUPERVISOR can access /admin/user/** urls, and only users with ROLE_SWITCH_USER can access the switch-user url (/login/impersonate) and in addition must be authenticated fully, i.e. not using a remember-me cookie. Note that when specifying multiple roles, the user must have at least one of them, but when combining IS_AUTHENTICATED_FULLY, IS_AUTHENTICATED_REMEMBERED, or IS_AUTHENTICATED_ANONYMOUSLY with one or more roles means the user must have one of the roles and satisfy the IS_AUTHENTICATED rule.
Unlike the application.groovy map approach (Static Map), you do not need to revise the request map entry order because the plugin calculates the most specific rule that applies to the current request.
Request Map Cache
Request map entries are cached for performance, but caching affects runtime configurability. If you create, edit, or delete an instance, the cache must be flushed and repopulated to be consistent with the database. You can call springSecurityService.clearCachedRequestmaps() to do this. For example, if you create a RequestSecurityRuleController the save action should look like this (and the update and delete actions should similarly call clearCachedRequestmaps()):
clearCachedRequestmaps()class SecurityMappingController {
def springSecurityService
//...
def save(SecurityMapping mapping) {
if (!mapping.save(flush: true)) {
render(view: 'create', model: [instance: mapping])
return
}
springSecurityService.clearCachedRequestmaps()
flash.message = 'Mapping saved'
redirect(action: 'show', id: mapping.id)
}
}4.4.7. Using Expressions to Create Descriptive, Fine-Grained Rules
Spring Security uses the Spring Expression Language (SpEL), which allows you to declare the rules for guarding URLs more descriptively than does the traditional approach, and also allows much more fine-grained rules. Where you traditionally would specify a list of role names and/or special tokens (for example, IS_AUTHENTICATED_FULLY), with Spring Security’s expression support, you can instead use the embedded scripting language to define simple or complex access rules.
You can use expressions with any of the previously described approaches to securing application URLs. For example, consider this annotated controller:
package com.yourcompany.yourapp

import grails.plugin.springsecurity.annotation.Secured

class SecureController {

   @Secured("hasRole('ROLE_ADMIN')")
   def someAction() {
      ...
   }

   @Secured("authentication.name == 'ralph'")
   def someOtherAction() {
      ...
   }
}
In this example, someAction requires ROLE_ADMIN, and someOtherAction requires that the user be logged in with username "ralph".
The corresponding Requestmap URLs would be
new Requestmap(url: "/secure/someAction",
               configAttribute: "hasRole('ROLE_ADMIN')").save()

new Requestmap(url: "/secure/someOtherAction",
               configAttribute: "authentication.name == 'ralph'").save()
and the corresponding static mappings would be
grails.plugin.springsecurity.controllerAnnotations.staticRulesgrails.plugin.springsecurity.controllerAnnotations.staticRules = [
[pattern: '/secure/someAction', access: ["hasRole('ROLE_ADMIN')"]],
[pattern: '/secure/someOtherAction', access: ["authentication.name == 'ralph'"]]
]The Spring Security docs have a table listing the standard expressions, which is copied here for reference:
| Expression | Description |
|---|---|
|
Returns |
|
Returns |
|
Allows direct access to the principal object representing the current user |
|
Allows direct access to the current |
|
Always evaluates to |
|
Always evaluates to |
|
Returns |
|
Returns |
|
Returns |
|
Returns |
|
the HTTP request, allowing expressions such as " |
In addition, you can use a web-specific expression hasIpAddress. However, you may find it more convenient to separate IP restrictions from role restrictions by using the IP address filter (IP Address Restrictions).
To help you migrate traditional configurations to expressions, this table compares various configurations and their corresponding expressions:
| Traditional Config | Expression |
|---|---|
|
|
|
|
|
|
|
|
|
|
|
|
4.5. Helper Classes
Use the plugin helper classes in your application to avoid dealing with some lower-level details of Spring Security.
4.5.1. SecurityTagLib
The plugin includes GSP tags to support conditional display based on whether the user is authenticated, and/or has the required role to perform a particular action. These tags are in the sec namespace and are implemented in grails.plugin.springsecurity.SecurityTagLib.
ifLoggedIn
Displays the inner body content if the user is authenticated.
Example:
<sec:ifLoggedIn><sec:ifLoggedIn>
Welcome Back!
</sec:ifLoggedIn>ifNotLoggedIn
Displays the inner body content if the user is not authenticated.
Example:
<sec:ifNotLoggedIn><sec:ifNotLoggedIn>
<g:link controller='login' action='auth'>Login</g:link>
</sec:ifNotLoggedIn>ifAllGranted
Displays the inner body content only if all of the listed roles are granted.
Example:
<sec:ifAllGranted><sec:ifAllGranted roles='ROLE_ADMIN,ROLE_SUPERVISOR'>
...
secure stuff here
...
</sec:ifAllGranted>ifAnyGranted
Displays the inner body content if at least one of the listed roles are granted.
Example:
<sec:ifAnyGranted><sec:ifAnyGranted roles='ROLE_ADMIN,ROLE_SUPERVISOR'>
...
secure stuff here
...
</sec:ifAnyGranted>ifNotGranted
Displays the inner body content if none of the listed roles are granted.
Example:
<sec:ifNotGranted><sec:ifNotGranted roles='ROLE_USER'>
...
non-user stuff here
...
</sec:ifNotGranted>loggedInUserInfo
Displays the value of the specified UserDetails property if logged in. For example, to show the username property:
<sec:loggedInUserInfo><sec:loggedInUserInfo field='username'/>If you have customized the UserDetails (e.g. with a custom UserDetailsService) to add a fullName property, you access it as follows:
<sec:loggedInUserInfo> for a nonstandard propertyWelcome Back <sec:loggedInUserInfo field='fullName'/>username
Displays the value of the UserDetails username property if logged in.
<sec:username><sec:ifLoggedIn>
Welcome Back <sec:username/>!
</sec:ifLoggedIn>
<sec:ifNotLoggedIn>
<g:link controller='login' action='auth'>Login</g:link>
</sec:ifNotLoggedIn>ifSwitched
Displays the inner body content only if the current user switched from another user. (See also Switch User.)
<sec:ifSwitched> and <sec:ifNotSwitched><sec:ifLoggedIn>
Logged in as <sec:username/>
</sec:ifLoggedIn>
<sec:ifSwitched>
<form action='${request.contextPath}/logout/impersonate' method='POST'>
<input type='submit' value="Resume as ${grails.plugin.springsecurity.SpringSecurityUtils.switchedUserOriginalUsername}"/>
</form>
</sec:ifSwitched>
<sec:ifNotSwitched>
<sec:ifAllGranted roles='ROLE_SWITCH_USER'>
<form action='${request.contextPath}/login/impersonate'
method='POST'>
Switch to user: <input type='text' name='username'/><br/>
<input type='submit' value='Switch'/> </form>
</sec:ifAllGranted>
</sec:ifNotSwitched>ifNotSwitched
Displays the inner body content only if the current user has not switched from another user.
switchedUserOriginalUsername
Renders the original user’s username if the current user switched from another user.
<sec:switchedUserOriginalUsername><sec:ifSwitched>
<form action='${request.contextPath}/logout/impersonate' method='POST'>
<input type='submit' value="Resume as ${grails.plugin.springsecurity.SpringSecurityUtils.switchedUserOriginalUsername}"/>
</form>
</sec:ifSwitched>access
Renders the body if the specified expression evaluates to true or specified URL is allowed.
<sec:access> with an expression<sec:access expression="hasRole('ROLE_USER')">
You're a user
</sec:access><sec:access> with a URL<sec:access url='/admin/user'>
<g:link controller='admin' action='user'>Manage Users</g:link>
</sec:access>You can also guard access to links generated from controller and action names or named URL mappings instead of hard-coding the values, for example
<sec:access> with a controller and action<sec:access controller='admin' action='user'>
<g:link controller='admin' action='user'>Manage Users</g:link>
</sec:access>or if you have a named URL mapping you can refer to that:
<sec:access> with a URL mapping<sec:access mapping='manageUsers'>
<g:link mapping='manageUsers'>Manage Users</g:link>
</sec:access>For even more control of the generated URL (still avoiding hard-coding) you can use createLink to build the URL, for example
<sec:access> with <g:createLink><sec:access url='${createLink(controller: 'admin', action: 'user', base: '/')}'>
<g:link controller='admin' action='user'>Manage Users</g:link>
</sec:access>Be sure to include the base: '/' attribute in this case to avoid appending the context name to the URL.
noAccess
Renders the body if the specified expression evaluates to false or URL isn’t allowed.
<sec:noAccess><sec:noAccess expression="hasRole('ROLE_USER')">
You're not a user
</sec:noAccess>link
A wrapper around the standard Grails link tag that renders if the specified expression evaluates to true or URL is allowed.
To define the expression to evaluate within the tag itself:
<sec:link> with an expression<sec:link controller='myController' action='myAction' expression="hasRole('ROLE_USER')">My link text</sec:link>To use access controls defined, for example, in the interceptUrlMap:
<sec:link> without an expression<sec:link controller='myController' action='myAction'>My link text</sec:link>By default, nothing will be rendered if the specified expression evaluates to false or URL is not allowed. To render only the text that would have been linked, set the fallback attribute:
<sec:link fallback='true'> without an expression<sec:link controller='myController' action='myAction' fallback='true'>This text will display but won't be linked if the user doesn't have access</sec:link>4.5.2. SpringSecurityService
grails.plugin.springsecurity.SpringSecurityService provides security utility functions. It is a regular Grails service, so you use dependency injection to inject it into a controller, service, taglib, and so on:
def springSecurityServicegetCurrentUser()
Retrieves a domain class instance for the currently authenticated user. During authentication a user/person domain class instance is retrieved to get the user’s password, roles, etc. and the id of the instance is saved. This method uses the id and the domain class to re-load the instance, or the username if the UserDetails instance is not a GrailsUser.
If you do not need domain class data other than the id, you should use the loadCurrentUser method instead.
Example:
getCurrentUser()class SomeController {
def springSecurityService
def someAction() {
def user = springSecurityService.currentUser
...
}
}loadCurrentUser()
Often it is not necessary to retrieve the entire domain class instance, for example when using it in a query where only the id is needed as a foreign key. This method uses the GORM load method to create a proxy instance. This will never be null, but can be invalid if the id doesn’t correspond to a row in the database, although this is very unlikely in this scenario because the instance would have been there during authentication.
If you need other data than just the id, use the getCurrentUser method instead.
Example:
loadCurrentUser()class SomeController {
def springSecurityService
def someAction(Long id) {
def user = springSecurityService.isLoggedIn() ?
springSecurityService.loadCurrentUser() :
null
if (user) {
CreditCard card = CreditCard.findByIdAndUser(id, user)
...
}
...
}
}isLoggedIn()
Checks whether there is a currently logged-in user.
Example:
isLoggedIn()class SomeController {
def springSecurityService
def someAction() {
if (springSecurityService.isLoggedIn()) {
...
}
else {
...
}
}
}getAuthentication()
Retrieves the current user’s Authentication. If authenticated, this will typically be a UsernamePasswordAuthenticationToken.
If not authenticated and the AnonymousAuthenticationFilter is active (true by default) then the anonymous user’s authentication will be returned. This will be an instance of grails.plugin.springsecurity.authentication.GrailsAnonymousAuthenticationToken with a standard org.springframework.security.core.userdetails.User instance as its Principal. The authentication will have a single granted role, ROLE_ANONYMOUS.
Example:
getAuthentication()class SomeController {
def springSecurityService
def someAction() {
def auth = springSecurityService.authentication
String username = auth.username
def authorities = auth.authorities // a Collection of GrantedAuthority
boolean authenticated = auth.authenticated
...
}
}getPrincipal()
Retrieves the currently logged in user’s Principal. If authenticated, the principal will be a grails.plugin.springsecurity.userdetails.GrailsUser, unless you have created a custom UserDetailsService, in which case it will be whatever implementation of UserDetails you use there.
If not authenticated and the AnonymousAuthenticationFilter is active (true by default) then a standard org.springframework.security.core.userdetails.User is used.
Example:
getPrincipal()class SomeController {
def springSecurityService
def someAction() {
def principal = springSecurityService.principal
String username = principal.username
def authorities = principal.authorities // a Collection of GrantedAuthority
boolean enabled = principal.enabled
...
}
}encodePassword()
Hashes a password with the configured hashing scheme. By default the plugin uses bcrypt, but you can configure the scheme with the grails.plugin.springsecurity.password.algorithm attribute in application.groovy. The supported values are bcrypt to use bcrypt, pbkdf2 to use PBKDF2, or any message digest algorithm that is supported in your JDK; see this Java page for the available algorithms.
|
You are strongly discouraged from using MD5 or SHA-1 algorithms because of their well-known vulnerabilities. You should also use a salt for your passwords, which greatly increases the computational complexity of computing passwords if your database gets compromised. See Salted Passwords. |
Example:
encodePassword()class PersonController {
def springSecurityService
def updateAction(Person person) {
params.salt = person.salt
if (person.password != params.password) {
params.password = springSecurityService.encodePassword(password, salt)
def salt = ... // e.g. randomly generated using some utility method
params.salt = salt
}
person.properties = params
if (!person.save(flush: true)) {
render view: 'edit', model: [person: person]
return
}
redirect action: 'show', id: person.id
}
}|
If you are hashing the password in an PersistenceEventListener or in the User domain class (using |
updateRole()
Updates a role and, if you use Requestmap instances to secure URLs, updates the role name in all affected Requestmap definitions if the name was changed.
Example:
updateRole()class RoleController {
def springSecurityService
def update(Role role) {
if (!springSecurityService.updateRole(role, params)) {
render view: 'edit', model: [roleInstance: role]
return
}
flash.message = "The role was updated"
redirect action: show, id: role.id
}
}deleteRole()
Deletes a role and, if you use Requestmap instances to secure URLs, removes the role from all affected Requestmap definitions. If a ``Requestmap`’s config attribute is only the role name (for example, [pattern: '/foo/bar', access: 'ROLE_FOO']), it is deleted.
Example:
deleteRole()class RoleController {
def springSecurityService
def delete(Role role) {
try {
springSecurityService.deleteRole role
flash.message = "The role was deleted"
redirect action: list
}
catch (DataIntegrityViolationException e) {
flash.message = "Unable to delete the role"
redirect action: show, id: params.id
}
}
}clearCachedRequestmaps()
Flushes the Requestmaps cache and triggers a complete reload. If you use Requestmap instances to secure URLs, the plugin loads and caches all Requestmap instances as a performance optimization. This action saves database activity because the requestmaps are checked for each request. Do not allow the cache to become stale. When you create, edit or delete a Requestmap, flush the cache. Both updateRole() and deleteRole() call clearCachedRequestmaps()for you. Call this method when you create a new Requestmap or do other Requestmap work that affects the cache.
Example:
clearCachedRequestmaps()class RequestmapController {
def springSecurityService
def save(Requestmap requestmap) {
if (!requestmap.save(flush: true)) {
render view: 'create', model: [requestmapInstance: requestmap]
return
}
springSecurityService.clearCachedRequestmaps()
flash.message = "Requestmap created"
redirect action: show, id: requestmap.id
}
}reauthenticate()
Rebuilds an Authentication for the given username and registers it in the security context. You typically use this method after updating a user’s authorities or other data that is cached in the Authentication or Principal. It also removes the user from the user cache to force a refresh at next login.
Example:
reauthenticate()class UserController {
def springSecurityService
def update(User user) {
params.salt = user.salt
if (params.password) {
params.password = springSecurityService.encodePassword(params.password, salt)
def salt = ... // e.g. randomly generated using some utility method
params.salt = salt
}
user.properties = params
if (!user.save(flush: true)) {
render view: 'edit', model: [userInstance: user]
return
}
if (springSecurityService.loggedIn &&
springSecurityService.principal.username == user.username) {
springSecurityService.reauthenticate user.username
}
flash.message = "The user was updated"
redirect action: show, id: user.id
}
}4.5.3. SpringSecurityUtils
grails.plugin.springsecurity.SpringSecurityUtils is a utility class with static methods that you can call directly without using dependency injection. It is primarily an internal class but can be called from application code.
authoritiesToRoles()
Extracts role names from an array or Collection of GrantedAuthority.
getPrincipalAuthorities()
Retrieves the currently logged-in user’s authorities. It is empty (but never null) if the user is not logged in.
parseAuthoritiesString()
Splits a comma-delimited String containing role names into a List of GrantedAuthority.
ifAllGranted()
Checks whether the current user has all specified roles (a comma-delimited String of role names). Primarily used by SecurityTagLib.ifAllGranted.
ifNotGranted()
Checks whether the current user has none of the specified roles (a comma-delimited String of role names). Primarily used by SecurityTagLib.ifNotGranted.
ifAnyGranted()
Checks whether the current user has any of the specified roles (a comma-delimited String of role names). Primarily used by SecurityTagLib.ifAnyGranted.
getSecurityConfig()
Retrieves the security part of the Configuration (from grails-app/conf/application.groovy merged with the plugin’s default configuration).
loadSecondaryConfig()
Used by dependent plugins to add configuration attributes.
reloadSecurityConfig()
Forces a reload of the security configuration.
isAjax()
Checks whether the request was triggered by an Ajax call. The standard way is to determine whether X-Requested-With request header is set and has the value XMLHttpRequest. In addition, you can configure the name of the header with the grails.plugin.springsecurity.ajaxHeader configuration attribute, but this is not recommended because all major JavaScript toolkits use the standard name. Further, you can register a closure in application.groovy with the name ajaxCheckClosure that will be used to check if a request is an Ajax request. It is passed the request as its single argument, e.g.
grails.plugin.springsecurity.ajaxCheckClosuregrails.plugin.springsecurity.ajaxCheckClosure = { request ->
// return true or false
}You can also force the request to be treated as Ajax by appending &ajax=true to your request query string.
registerProvider()
Used by dependent plugins to register an AuthenticationProvider bean name.
registerFilter()
Used by dependent plugins to register a filter bean name in a specified position in the filter chain.
isSwitched()
Checks whether the current user switched from another user.
getSwitchedUserOriginalUsername()
Gets the original user’s username if the current user switched from another user.
doWithAuth()
Executes a Closure with the current authentication. The one-parameter version which takes just a Closure assumes that there’s an authentication in the HTTP Session and that the Closure is running in a separate thread from the web request, so the SecurityContext and Authentication aren’t available to the standard ThreadLocal. This is primarily of use when you explicitly launch a new thread from a controller action or service called in request scope, not from a Quartz job which isn’t associated with an authentication in any thread.
The two-parameter version takes a username and a Closure to authenticate as. This is will authenticate as the specified user and execute the closure with that authentication. It restores the authentication to the one that was active if it exists, or clears the context otherwise. This is similar to run-as and switch-user but is only local to the Closure.
4.6. Events
Spring Security fires application events after various security-related actions such as successful login, unsuccessful login, and so on. Spring Security uses two main event classes, AbstractAuthenticationEvent and AbstractAuthorizationEvent.
4.6.1. Event Notification
You can set up event notifications in two ways. The sections that follow describe each approach in more detail.
-
Register an event listener, ignoring events that do not interest you. Spring allows only partial event subscription; you use generics to register the class of events that interest you, and you are notified of that class and all subclasses.
-
Register one or more callback closures in
grails-app/conf/application.groovythat take advantage of the plugin’sgrails.plugin.springsecurity.SecurityEventListener. The listener does the filtering for you.
AuthenticationEventPublisher
Spring Security publishes events using an AuthenticationEventPublisher which in turn fire events using the ApplicationEventPublisher. By default no events are fired since the AuthenticationEventPublisher instance registered is a grails.plugin.springsecurity.authentication.NullAuthenticationEventPublisher. But you can enable event publishing by setting grails.plugin.springsecurity.useSecurityEventListener = true in grails-app/conf/application.groovy.
You can use the useSecurityEventListener setting to temporarily disable and enable the callbacks, or enable them per-environment.
UsernameNotFoundException
Most authentication exceptions trigger an event with a similar name as described in this table:
| Exception | Event |
|---|---|
|
|
|
|
|
|
|
|
|
|
|
|
|
|
|
|
This holds for all exceptions except UsernameNotFoundException which triggers an AuthenticationFailureBadCredentialsEvent just like a BadCredentialsException. This is a good idea since it doesn’t expose extra information - there’s no differentiation between a bad password and a missing user. In addition, by default a missing user will trigger a BadCredentialsException for the same reasons. You can configure Spring Security to re-throw the original UsernameNotFoundException instead of converting it to a BadCredentialsException by setting grails.plugin.springsecurity.dao.hideUserNotFoundExceptions = false in grails-app/conf/application.groovy.
Fortunately all subclasses of AbstractAuthenticationFailureEvent have a getException() method that gives you access to the exception that triggered the event, so you can use that to differentiate between a bad password and a missing user (if hideUserNotFoundExceptions=false).
4.6.2. Registering an Event Listener
Enable events with grails.plugin.springsecurity.useSecurityEventListener = true and create one or more Groovy or Java classes, for example:
MySecurityEventListener.groovypackage com.foo.bar
import org.springframework.context.ApplicationListener
import org.springframework.security.authentication.event.AuthenticationSuccessEvent
class MySecurityEventListener
implements ApplicationListener<AuthenticationSuccessEvent> {
void onApplicationEvent(AuthenticationSuccessEvent event) {
// handle the event
}
}Register the class in grails-app/conf/spring/resources.groovy:
resources.groovyimport com.foo.bar.MySecurityEventListener
beans = {
mySecurityEventListener(MySecurityEventListener)
}4.6.3. Registering Callback Closures
Alternatively, enable events with grails.plugin.springsecurity.useSecurityEventListener = true and register one or more callback closure(s) in grails-app/conf/application.groovy and let SecurityEventListener do the filtering.
Implement the event handlers that you need, for example:
application.groovygrails.plugin.springsecurity.useSecurityEventListener = true
grails.plugin.springsecurity.onInteractiveAuthenticationSuccessEvent = { e, appCtx ->
// handle InteractiveAuthenticationSuccessEvent
}
grails.plugin.springsecurity.onAbstractAuthenticationFailureEvent = { e, appCtx ->
// handle AbstractAuthenticationFailureEvent
}
grails.plugin.springsecurity.onAuthenticationSuccessEvent = { e, appCtx ->
// handle AuthenticationSuccessEvent
}
grails.plugin.springsecurity.onAuthenticationSwitchUserEvent = { e, appCtx ->
// handle AuthenticationSwitchUserEvent
}
grails.plugin.springsecurity.onAuthorizationEvent = { e, appCtx ->
// handle AuthorizationEvent
}None of these closures are required; if none are configured, nothing will be called. Just implement the event handlers that you need.
|
When a user authenticates, Spring Security initially fires an |
4.7. User, Authority (Role), and Requestmap Properties
Properties you are most likely to override are the User and Authority (and Requestmap if you use the database to store mappings) class and property names.
| Property | Default Value | Meaning |
|---|---|---|
userLookup.userDomainClassName |
none |
User class name |
userLookup.usernamePropertyName |
" |
User class username property |
userLookup.usernameIgnoreCase |
" |
Ignore case when searching for usernamePropertyName |
userLookup.passwordPropertyName |
" |
User class password property |
userLookup.authoritiesPropertyName |
" |
User class role collection property |
userLookup.enabledPropertyName |
" |
User class enabled property |
userLookup.accountExpiredPropertyName |
" |
User class account expired property |
userLookup.accountLockedPropertyName |
" |
User class account locked property |
userLookup.passwordExpiredPropertyName |
" |
User class password expired property |
userLookup.authorityJoinClassName |
none |
User/Role many-many join class name |
authority.className |
none |
Role class name |
authority.nameField |
" |
Role class role name property |
requestMap.className |
none |
Requestmap class name |
requestMap.urlField |
" |
Requestmap class URL pattern property |
requestMap.configAttributeField |
" |
Requestmap class role/token property |
4.8. Authentication
The Spring Security plugin supports several approaches to authentication.
The default approach stores users and roles in your database, and uses an HTML login form which prompts the user for a username and password. The plugin also supports other approaches as described in the sections below, as well as add-on plugins that provide external authentication providers such as LDAP, and single sign-on using CAS
4.8.1. Basic and Digest Authentication
To use HTTP Basic Authentication in your application, set the useBasicAuth attribute to true. Also change the basic.realmName default value to one that suits your application, for example:
grails.plugin.springsecurity.useBasicAuth = true
grails.plugin.springsecurity.basic.realmName = "Ralph's Bait and Tackle"| Property | Default | Description |
|---|---|---|
useBasicAuth |
|
Whether to use Basic authentication |
basic.realmName |
" |
Realm name displayed in the browser authentication popup |
basic.credentialsCharset |
" |
The character set used to decode Base64-encoded data |
With this authentication in place, users are prompted with the standard browser login dialog instead of being redirected to a login page.
If you don’t want all of your URLs guarded by Basic authentication, you can partition the URL patterns and apply Basic authentication to some, but regular form login to others. For example, if you have a web service that uses Basic authentication for /webservice/** URLs, you would configure that using the chainMap config attribute:
grails.plugin.springsecurity.filterChain.chainMap = [
[pattern: '/webservice/**', filters: 'JOINED_FILTERS,-exceptionTranslationFilter'],
[pattern: '/**', filters: 'JOINED_FILTERS,-basicAuthenticationFilter,-basicExceptionTranslationFilter']
]In this example we’re using the JOINED_FILTERS keyword instead of explicitly listing the filter names. Specifying JOINED_FILTERS means to use all of the filters that were configured using the various config options. In each case we also specify that we want to exclude one or more filters by prefixing their names with -.
For the /webservice/** URLs, we want all filters except for the standard ExceptionTranslationFilter since we want to use just the one configured for Basic Auth. And for the /** URLs (everything else) we want everything except for the Basic authentication filter and its configured ExceptionTranslationFilter.
Digest Authentication is similar to Basic but is more secure because it does not send your password in obfuscated cleartext. Digest resembles Basic in practice - you get the same browser popup dialog when you authenticate. But because the credential transfer is genuinely hashed (instead of just Base64-encoded as with Basic authentication) you do not need SSL to guard your logins.
| Property | Default Value | Meaning |
|---|---|---|
useDigestAuth |
|
Whether to use Digest authentication |
digest.realmName |
" |
Realm name displayed in the browser popup |
digest.key |
" |
Key used to build the nonce for authentication; it should be changed but that’s not required |
digest.nonceValiditySeconds |
|
How long a nonce stays valid |
digest.passwordAlreadyEncoded |
|
Whether you are managing the password hashing yourself |
digest.createAuthenticatedToken |
|
If |
digest.useCleartextPasswords |
|
If |
Digest authentication has a problem in that by default you store cleartext passwords in your database. This is because the browser hashes your password along with the username and Realm name, and this is compared to the password hashed using the same algorithm during authentication. The browser does not know about your MessageDigest algorithm or salt source, so to hash them the same way you need to load a cleartext password from the database.
The plugin does provide an alternative, although it has no configuration options (in particular the digest algorithm cannot be changed). If digest.useCleartextPasswords is false (the default), then the passwordEncoder bean is replaced with an instance of grails.plugin.springsecurity.authentication.encoding.DigestAuthPasswordEncoder. This encoder uses the same approach as the browser, that is, it combines your password along with your username and Realm name essentially as a salt, and hashes with MD5. MD5 is not recommended in general, but given the typical size of the salt it is reasonably safe to use.
The only required attribute is useDigestAuth, which you must set to true, but you probably also want to change the realm name:
grails.plugin.springsecurity.useDigestAuth = true
grails.plugin.springsecurity.digest.realmName = "Ralph's Bait and Tackle"Digest authentication cannot be applied to a subset of URLs like Basic authentication can. This is due to the password encoding issues. So you cannot use the chainMap attribute here - all URLs will be guarded.
|
Note that since the Digest authentication password encoder is different from the typical encoders you must pass the username as the " to |
4.8.2. Certificate (X.509) Login Authentication
Another authentication mechanism supported by Spring Security is certificate-based, or "mutual authentication". It requires HTTPS, and you must configure the server to require a client certificate (ordinarily only the server provides a certificate). Your username is extracted from the client certificate if it is valid, and you are "pre-authenticated". As long as a corresponding username exists in the database, your authentication succeeds and you are not asked for a password. Your Authentication contains the authorities associated with your username.
The table describes available configuration options.
| Property | Default Value | Meaning |
|---|---|---|
useX509 |
|
Whether to support certificate-based logins |
x509.continueFilterChainOnUnsuccessfulAuthentication |
|
Whether to proceed when an authentication attempt fails to allow other authentication mechanisms to process the request |
x509.subjectDnRegex |
" |
Regular expression for extracting the username from the certificate’s subject name |
x509.checkForPrincipalChanges |
|
Whether to re-extract the username from the certificate and check that it’s still the current user when a valid |
x509.invalidateSessionOnPrincipalChange |
|
Whether to invalidate the session if the principal changed (based on a |
x509.subjectDnClosure |
none |
If set, the plugin’s |
x509.throwExceptionWhenTokenRejected |
|
If |
The details of configuring your server for SSL and configuring browser certificates are beyond the scope of this document. If you use Tomcat, see its SSL documentation. To get a test environment working, see the instructions in this discussion at Stack Overflow.
4.8.3. Remember-Me Cookie
Spring Security supports creating a remember-me cookie so that users are not required to log in with a username and password for each session. This is optional and is usually implemented as a checkbox on the login form; the default auth.gsp supplied by the plugin has this feature.
| Property | Default Value | Meaning |
|---|---|---|
rememberMe.cookieName |
|
remember-me cookie name; should be unique per application |
rememberMe.cookieDomain |
none |
remember-me cookie domain |
rememberMe.alwaysRemember |
|
If |
rememberMe.tokenValiditySeconds |
|
Max age of the cookie in seconds |
rememberMe.parameter |
|
Login form remember-me checkbox name |
rememberMe.key |
|
Value used to encode cookies; should be unique per application |
rememberMe.useSecureCookie |
none |
Whether to use a secure cookie or not; if |
rememberMe.createSessionOnSuccess |
|
Whether to create a session of one doesn’t exist to ensure that the |
rememberMe.persistent |
|
If |
rememberMe.persistentToken.domainClassName |
none |
Domain class used to manage persistent logins |
rememberMe.persistentToken.seriesLength |
16 |
Number of characters in the cookie’s |
rememberMe.persistentToken.tokenLength |
16 |
Number of characters in the cookie’s |
atr.rememberMeClass |
remember-me authentication class |
You are most likely to change these attributes:
-
rememberMe.cookieName. Purely aesthetic as most users will not look at their cookies, but you probably want the display name to be application-specific rather than "grails_remember_me". -
rememberMe.key. Part of a salt when the cookie is hashed. Changing the default makes it harder to execute brute-force attacks. -
rememberMe.tokenValiditySeconds. Default is two weeks; set it to what makes sense for your application.
Persistent Logins
The remember-me cookie is very secure, but for an even stronger solution you can use persistent logins that store the username in the database. See the Spring Security docs for a description of the implementation.
Persistent login is also useful for authentication schemes like Facebook, where you do not manage passwords in your database, but most of the other user information is stored locally. Without a password you cannot use the standard cookie format, so persistent logins enable remember-me cookies in these scenarios.
To use this feature, run the s2-create-persistent-token script. This will create the domain class, and register its name in grails-app/conf/application.groovy. It will also enable persistent logins by setting rememberMe.persistent to true.
4.8.4. Ajax Authentication
The typical pattern of using web site authentication to access restricted pages involves intercepting access requests for secure pages, redirecting to a login page (possibly off-site, for example when using a Single Sign-on implementation such as CAS), and redirecting back to the originally-requested page after a successful login. Each page can also have a login link to allow explicit logins at any time.
Another option is to also have a login link on each page and to use JavaScript to present a login form within the current page in a popup. The JavaScript code submits the authentication request and displays success or error messages as appropriate.
The plugin supports Ajax logins, but you need to create your own client-side code. There are only a few necessary changes, and of course the sample code here is pretty basic so you should enhance it for your needs.
The approach here involves editing your template page(s) to show "You're logged in as ..." text if logged in and a login link if not, along with a hidden login form that is shown using JavaScript.
This example uses jQuery and jqModal, a jQuery plugin that creates and manages dialogs and popups. Download jqModal.js and copy it to grails-app/assets/javascripts, and download jqModal.css and copy it to grails-app/assets/stylesheets.
Create grails-app/assets/javascripts/ajaxLogin.js and add this JavaScript code:
ajaxLogin.jsvar onLogin;
$.ajaxSetup({
beforeSend: function(jqXHR, event) {
if (event.url != $("#ajaxLoginForm").attr("action")) {
// save the 'success' function for later use if
// it wasn't triggered by an explicit login click
onLogin = event.success;
}
},
statusCode: {
// Set up a global Ajax error handler to handle 401
// unauthorized responses. If a 401 status code is
// returned the user is no longer logged in (e.g. when
// the session times out), so re-display the login form.
401: function() {
showLogin();
}
}
});
function showLogin() {
var ajaxLogin = $("#ajaxLogin");
ajaxLogin.css("text-align", "center");
ajaxLogin.jqmShow();
}
function logout(event) {
event.preventDefault();
$.ajax({
url: $("#_logout").attr("href"),
method: "POST",
success: function(data, textStatus, jqXHR) {
window.location = "/";
},
error: function(jqXHR, textStatus, errorThrown) {
console.log("Logout error, textStatus: " + textStatus +
", errorThrown: " + errorThrown);
}
});
}
function authAjax() {
$("#loginMessage").html("Sending request ...").show();
var form = $("#ajaxLoginForm");
$.ajax({
url: form.attr("action"),
method: "POST",
data: form.serialize(),
dataType: "JSON",
success: function(json, textStatus, jqXHR) {
if (json.success) {
form[0].reset();
$("#loginMessage").empty();
$("#ajaxLogin").jqmHide();
$("#loginLink").html(
'Logged in as ' + json.username +
' (<a href="' + $("#_logout").attr("href") +
'" id="logout">Logout</a>)');
$("#logout").click(logout);
if (onLogin) {
// execute the saved event.success function
onLogin(json, textStatus, jqXHR);
}
}
else if (json.error) {
$("#loginMessage").html('<span class="errorMessage">' +
json.error + "</error>");
}
else {
$("#loginMessage").html(jqXHR.responseText);
}
},
error: function(jqXHR, textStatus, errorThrown) {
if (jqXHR.status == 401 && jqXHR.getResponseHeader("Location")) {
// the login request itself wasn't allowed, possibly because the
// post url is incorrect and access was denied to it
$("#loginMessage").html('<span class="errorMessage">' +
'Sorry, there was a problem with the login request</error>');
}
else {
var responseText = jqXHR.responseText;
if (responseText) {
var json = $.parseJSON(responseText);
if (json.error) {
$("#loginMessage").html('<span class="errorMessage">' +
json.error + "</error>");
return;
}
}
else {
responseText = "Sorry, an error occurred (status: " +
textStatus + ", error: " + errorThrown + ")";
}
$("#loginMessage").html('<span class="errorMessage">' +
responseText + "</error>");
}
}
});
}
$(function() {
$("#ajaxLogin").jqm({ closeOnEsc: true });
$("#ajaxLogin").jqmAddClose("#cancelLogin");
$("#ajaxLoginForm").submit(function(event) {
event.preventDefault();
authAjax();
});
$("#authAjax").click(authAjax);
$("#logout").click(logout);
});and create grails-app/assets/stylesheets/ajaxLogin.css and add this CSS:
ajaxLogin.css#ajaxLogin {
padding: 0px;
text-align: center;
display: none;
}
#ajaxLogin .inner {
width: 400px;
padding-bottom: 6px;
margin: 60px auto;
text-align: left;
border: 1px solid #aab;
background-color: #f0f0fa;
-moz-box-shadow: 2px 2px 2px #eee;
-webkit-box-shadow: 2px 2px 2px #eee;
-khtml-box-shadow: 2px 2px 2px #eee;
box-shadow: 2px 2px 2px #eee;
}
#ajaxLogin .inner .fheader {
padding: 18px 26px 14px 26px;
background-color: #f7f7ff;
margin: 0px 0 14px 0;
color: #2e3741;
font-size: 18px;
font-weight: bold;
}
#ajaxLogin .inner .cssform p {
clear: left;
margin: 0;
padding: 4px 0 3px 0;
padding-left: 105px;
margin-bottom: 20px;
height: 1%;
}
#ajaxLogin .inner .cssform input[type="text"],
#ajaxLogin .inner .cssform input[type="password"] {
width: 150px;
}
#ajaxLogin .inner .cssform label {
font-weight: bold;
float: left;
text-align: right;
margin-left: -105px;
width: 150px;
padding-top: 3px;
padding-right: 10px;
}
.ajaxLoginButton {
background-color: #efefef;
font-weight: bold;
padding: 0.5em 1em;
display: -moz-inline-stack;
display: inline-block;
vertical-align: middle;
white-space: nowrap;
overflow: visible;
text-decoration: none;
-moz-border-radius: 0.3em;
-webkit-border-radius: 0.3em;
border-radius: 0.3em;
}
.ajaxLoginButton:hover, .ajaxLoginButton:focus {
background-color: #999999;
color: #ffffff;
}
#ajaxLogin .inner .login_message {
padding: 6px 25px 20px 25px;
color: #c33;
}
#ajaxLogin .inner .text_ {
width: 120px;
}
#ajaxLogin .inner .chk {
height: 12px;
}
.errorMessage {
color: red;
}There’s no need to register the JavaScript files in grails-app/assets/javascripts/application.js if you have this require_tree directive:
application.js//= require_tree .but you can explicitly include them if you want. Register the two CSS files in /grails-app/assets/stylesheets/application.css:
application.css/*
...
*= require ajaxLogin
*= require jqModal
...
*/We’ll need some GSP code to define the HTML, so create grails-app/views/includes/_ajaxLogin.gsp and add this:
_ajaxLogin.gsp<span id="logoutLink" style="display: none;">
<g:link elementId='_logout' controller='logout'>Logout</g:link>
</span>
<span id="loginLink" style="position: relative; margin-right: 30px; float: right">
<sec:ifLoggedIn>
Logged in as <sec:username/> (<g:link elementId='logout' controller='logout'>Logout</g:link>)
</sec:ifLoggedIn>
<sec:ifNotLoggedIn>
<a href="#" onclick="showLogin(); return false;">Login</a>
</sec:ifNotLoggedIn>
</span>
<div id="ajaxLogin" class="jqmWindow" style="z-index: 3000;">
<div class="inner">
<div class="fheader">Please Login..</div>
<form action="${request.contextPath}/login/authenticate" method="POST"
id="ajaxLoginForm" name="ajaxLoginForm" class="cssform" autocomplete="off">
<p>
<label for="username">Username:</label>
<input type="text" class="text_" name="username" id="username" />
</p>
<p>
<label for="password">Password</label>
<input type="password" class="text_" name="password" id="password" />
</p>
<p>
<label for="remember_me">Remember me</label>
<input type="checkbox" class="chk" id="remember_me" name="remember-me"/>
</p>
<p>
<input type="submit" id="authAjax" name="authAjax"
value="Login" class="ajaxLoginButton" />
<input type="button" id="cancelLogin" value="Cancel"
class="ajaxLoginButton" />
</p>
</form>
<div style="display: none; text-align: left;" id="loginMessage"></div>
</div>
</div>And finally, update the grails-app/views/layouts/main.gsp layout to include _ajaxLogin.gsp, adding it after the <body> tag:
main.gsp<html lang="en" class="no-js">
<head>
...
<g:layoutHead/>
</head>
<body>
<g:render template='/includes/ajaxLogin'/>
...
<g:layoutBody/>
</body>
</html>The important aspects of this code are:
-
There is a <span> positioned in the top-right that shows the username and a logout link when logged in, and a login link otherwise.
-
The form posts to the same URL as the regular form,
/login/authenticate, and is mostly the same except for the addition of a "Cancel" button (you can also dismiss the dialog by clicking outside of it or with the escape key). -
Error messages are displayed within the popup <div>.
-
Because there is no page redirect after successful login, the Javascript replaces the login link to give a visual indication that the user is logged in.
-
The Logout link also uses Ajax to submit a POST request to the standard logout url and redirect you to the index page after the request finishes.
-
Note that in the JavaScript
logoutfunction, you’ll need to change the url in thesuccesscallback to the correct post-logout value, e.g.window.location = "/appname";if you have configured the contextPath to be "/appname"
-
How Does Ajax login Work?
Most Ajax libraries include an X-Requested-With header that indicates that the request was made by XMLHttpRequest instead of being triggered by clicking a regular hyperlink or form submit button. The plugin uses this header to detect Ajax login requests, and uses subclasses of some of Spring Security’s classes to use different redirect urls for Ajax requests than regular requests. Instead of showing full pages, LoginController has JSON-generating methods ajaxSuccess(), ajaxDenied(), and authfail() that generate JSON that the login Javascript code can use to appropriately display success or error messages.
To summarize, the typical flow would be
-
click the link to display the login form
-
enter authentication details and click Login
-
the form is submitted using an Ajax request
-
if the authentication succeeds:
-
a redirect to
/login/ajaxSuccessoccurs (this URL is configurable) -
the rendered response is JSON and it contains two values, a boolean value
successwith the valuetrueand a string valueusernamewith the authenticated user’s login name -
the client determines that the login was successful and updates the page to indicate the the user is logged in; this is necessary since there’s no page redirect like there would be for a non-Ajax login
-
-
if the authentication fails:
-
a redirect to
/login/authfail?ajax=trueoccurs (this URL is configurable) -
the rendered response is JSON and it contains one value, a string value
errorwith the displayable error message; this will be different depending on why the login was unsuccessful (bad username or password, account locked, etc.) -
the client determines that the login was not successful and displays the error message
-
-
note that both a successful and an unsuccessful login will trigger the
onSuccessAjax callback; theonErrorcallback will only be triggered if there’s an exception or network issue
4.9. Authentication Providers
The plugin registers authentication providers that perform authentication by implementing the AuthenticationProvider interface.
| Property | Default Value | Meaning |
|---|---|---|
providerNames |
|
Bean names of authentication providers |
Use daoAuthenticationProvider to authenticate using the User and Role database tables, rememberMeAuthenticationProvider to log in with a rememberMe cookie, and anonymousAuthenticationProvider to create an "anonymous" authentication if no other provider authenticates.
To customize this list, you define a providerNames attribute with a list of bean names. The beans must be declared either by the plugin, or yourself in resources.groovy. Suppose you have a custom MyAuthenticationProvider in resources.groovy:
resources.groovyimport com.foo.MyAuthenticationProvider
beans = {
myAuthenticationProvider(MyAuthenticationProvider) {
// attributes
}
}You register the provider in grails-app/conf/application.groovy as:
grails.plugin.springsecurity.providerNamesgrails.plugin.springsecurity.providerNames = [
'myAuthenticationProvider',
'anonymousAuthenticationProvider',
'rememberMeAuthenticationProvider']4.10. Custom UserDetailsService
When you authenticate users from a database using DaoAuthenticationProvider (the default mode in the plugin if you have not enabled OpenID, LDAP, and so on), an implementation of UserDetailsService is required. This class is responsible for returning a concrete implementation of UserDetails. The plugin provides grails.plugin.springsecurity.userdetails.GormUserDetailsService as its UserDetailsService implementation and grails.plugin.springsecurity.userdetails.GrailsUser (which extends Spring Security’s User) as its UserDetails implementation.
You can extend or replace GormUserDetailsService with your own implementation by defining a bean in grails-app/conf/spring/resources.groovy with the same bean name, userDetailsService. This works because application beans are configured after plugin beans and there can only be one bean for each name. The plugin uses an extension of UserDetailsService, grails.plugin.springsecurity.userdetails.GrailsUserDetailsService, which adds the method UserDetails loadUserByUsername(String username, boolean loadRoles) to support use cases like in LDAP where you often infer all roles from LDAP but might keep application-specific user details in the database. Create the class in src/groovy and not in grails-app/services - although the interface name includes "Service", this is just a coincidence and the bean wouldn’t benefit from being a Grails service.
In the following example, the UserDetails and GrailsUserDetailsService implementation adds the full name of the user domain class in addition to the standard information. If you extract extra data from your domain class, you are less likely to need to reload the user from the database. Most of your common data can be kept along with your security credentials.
This example adds in a fullName property. Keeping the full name cached avoids hitting the database just for that lookup. GrailsUser already adds the id value from the domain class to so we can do a more efficient database load of the user. If all you have is the username, then you need to call User.findByUsername(principal.username), but if you have the id you can call User.get(principal.id). Even if you have a unique index on the username database column, loading by primary key is usually more efficient because it takes advantage of Hibernate’s first-level and second-level caches.
There is not much to implement other than your application-specific lookup code:
MyUserDetails.groovypackage com.mycompany.myapp
import grails.plugin.springsecurity.userdetails.GrailsUser
import org.springframework.security.core.GrantedAuthority
class MyUserDetails extends GrailsUser {
final String fullName
MyUserDetails(String username, String password, boolean enabled,
boolean accountNonExpired, boolean credentialsNonExpired,
boolean accountNonLocked,
Collection<GrantedAuthority> authorities,
long id, String fullName) {
super(username, password, enabled, accountNonExpired,
credentialsNonExpired, accountNonLocked, authorities, id)
this.fullName = fullName
}
}MyUserDetailsService.groovypackage com.mycompany.myapp
import grails.plugin.springsecurity.SpringSecurityUtils
import grails.plugin.springsecurity.userdetails.GrailsUserDetailsService
import grails.plugin.springsecurity.userdetails.NoStackUsernameNotFoundException
import grails.gorm.transactions.Transactional
import org.springframework.security.core.authority.SimpleGrantedAuthority
import org.springframework.security.core.userdetails.UserDetails
import org.springframework.security.core.userdetails.UsernameNotFoundException
class MyUserDetailsService implements GrailsUserDetailsService {
/**
* Some Spring Security classes (e.g. RoleHierarchyVoter) expect at least
* one role, so we give a user with no granted roles this one which gets
* past that restriction but doesn't grant anything.
*/
static final List NO_ROLES = [new SimpleGrantedAuthority(SpringSecurityUtils.NO_ROLE)]
UserDetails loadUserByUsername(String username, boolean loadRoles)
throws UsernameNotFoundException {
return loadUserByUsername(username)
}
@Transactional(readOnly=true, noRollbackFor=[IllegalArgumentException, UsernameNotFoundException])
UserDetails loadUserByUsername(String username) throws UsernameNotFoundException {
User user = User.findByUsername(username)
if (!user) throw new NoStackUsernameNotFoundException()
def roles = user.authorities
// or if you are using role groups:
// def roles = user.authorities.collect { it.authorities }.flatten().unique()
def authorities = roles.collect {
new SimpleGrantedAuthority(it.authority)
}
return new MyUserDetails(user.username, user.password, user.enabled,
!user.accountExpired, !user.passwordExpired,
!user.accountLocked, authorities ?: NO_ROLES, user.id,
user.firstName + " " + user.lastName)
}
}The loadUserByUsername method is transactional, but read-only, to avoid lazy loading exceptions when accessing the authorities collection. There are obviously no database updates here but this is a convenient way to keep the Hibernate Session open to enable accessing the roles.
To use your implementation, register it in grails-app/conf/spring/resources.groovy like this:
UserDetailsService in resources.groovyimport com.mycompany.myapp.MyUserDetailsService
beans = {
userDetailsService(MyUserDetailsService)
}Another option for loading users and roles from the database is to subclass grails.plugin.springsecurity.userdetails.GormUserDetailsService - the methods are all protected so you can override as needed.
This approach works with all beans defined in SpringSecurityCoreGrailsPlugin.doWithSpring() - you can replace or subclass any of the Spring beans to provide your own functionality when the standard extension mechanisms are insufficient.
4.10.1. Flushing the Cached Authentication
If you store mutable data in your custom UserDetails implementation (such as full name in the preceding example), be sure to rebuild the Authentication if it changes. springSecurityService has a reauthenticate method that does this for you:
reauthenticate() after making a change that affects the cached authenticationclass MyController {
def springSecurityService
def someAction() {
def user = ...
// update user data
user.save()
springSecurityService.reauthenticate user.username
...
}
}4.11. Password and Account Protection
The sections that follow discuss approaches to protecting passwords and user accounts.
4.11.1. Password Hashing
By default the plugin uses the bcrypt algorithm to hash passwords. You can customize this with the grails.plugin.springsecurity.password.algorithm attribute as described below. In addition you can increase the security of your passwords by adding a salt, which can be a property of the UserDetails instance, a global static value, or any custom value you want.
bcrypt is a much more secure alternative to the message digest approaches since it supports a customizable work level which when increased takes more computation time to hash the users' passwords, but also dramatically increases the cost of brute force attacks. Given how easy it is to use GPUs to crack passwords, you should definitely consider using bcrypt for new projects and switching to it for existing projects. Note that due to the approach used by bcrypt, you cannot add an additional salt like you can with the message digest algorithms.
Enable bcrypt by using the 'bcrypt' value for the algorithm config attribute:
grails.plugin.springsecurity.password.algorithm = 'bcrypt'and optionally changing the number of rekeying rounds (which will affect the time it takes to hash passwords), e.g.
grails.plugin.springsecurity.password.bcrypt.logrounds = 15Note that the number of rounds must be between 4 and 31.
PBKDF2 is also supported.
The table shows configurable password hashing attributes.
If you want to use a message digest hashing algorithm, see this Java page for the available algorithms.
| Property | Default | Description |
|---|---|---|
password.algorithm |
" |
passwordEncoder algorithm; " |
password.encodeHashAsBase64 |
|
If |
password.bcrypt.logrounds |
|
the number of rekeying rounds to use when using bcrypt |
password.hash.iterations |
|
the number of iterations which will be executed on the hashed password/salt when using a message digest algorithm |
The bcrypt logrounds and iterations are set to a lower number to improve speed while testing.
If you rely on them to be higher, set them manually when testing.
|
4.11.2. Salted Passwords
The Spring Security plugin uses hashed passwords and a digest algorithm that you specify. For enhanced protection against dictionary attacks, you should use a salt in addition to digest hashing.
|
Note that if you use bcrypt (the default setting) or pbkdf2, do not configure a salt (e.g. the |
There are two approaches to using salted passwords in the plugin - defining a property in the UserDetails class to access by reflection, or by directly implementing SaltSource yourself.
dao.reflectionSaltSourceProperty
Set the dao.reflectionSaltSourceProperty configuration property:
grails.plugin.springsecurity.dao.reflectionSaltSourceProperty = 'username'This property belongs to the UserDetails class. By default it is an instance of grails.plugin.springsecurity.userdetails.GrailsUser, which extends the standard Spring Security User class and not your "person" domain class. This limits the available properties unless you use a custom UserDetailsService (Custom UserDetailsService).
As long as the username does not change, this approach works well for the salt. If you choose a property that the user can change, the user cannot log in again after changing it unless you re-hash the password with the new value. So it’s best to use a property that doesn’t change.
Another option is to generate a random salt when creating users and store this in the database by adding a new property to the "person" class. This approach requires a custom UserDetailsService because you need a custom UserDetails implementation that also has a "salt" property, but this is more flexible and works in cases where users can change their username.
SystemWideSaltSource and Custom SaltSource
Spring Security supplies a simple SaltSource implementation, SystemWideSaltSource, which uses the same salt for each user. It’s less robust than using a different value for each user but still better than no salt at all.
An example override of the salt source bean using SystemWideSaltSource would look like this:
SystemWideSaltSource as the saltSource bean in application.groovyimport org.springframework.security.authentication.dao.SystemWideSaltSource
beans = {
saltSource(SystemWideSaltSource) {
systemWideSalt = 'the_salt_value'
}
}To have full control over the process, you can implement the SaltSource interface and replace the plugin’s implementation with your own by defining a bean in grails-app/conf/spring/resources.groovy with the name saltSource:
saltSource bean in application.groovyimport com.foo.bar.MySaltSource
beans = {
saltSource(MySaltSource) {
// set properties
}
}Hashing Passwords
Regardless of the implementation, you need to be aware of what value to use for a salt when creating or updating users, for example, in a save or update action in a UserController. When hashing the password, use the two-parameter version of springSecurityService.encodePassword():
class UserController {
def springSecurityService
def save(User user) {
user.password = springSecurityService.encodePassword(
params.password, user.username)
if (!user.save(flush: true)) {
render view: 'create', model: [userInstance: user]
return
}
flash.message = "The user was created"
redirect action: show, id: user.id
}
def update(User user) {
if (params.password) {
params.password = springSecurityService.encodePassword(
params.password, user.username)
}
if (!user.save(flush: true)) {
render view: 'edit', model: [userInstance: user]
return
}
if (springSecurityService.loggedIn &&
springSecurityService.principal.username == user.username) {
springSecurityService.reauthenticate user.username
}
flash.message = "The user was updated"
redirect action: show, id: user.id
}
}|
If you are encoding the password in the User domain class (using |
4.11.3. Account Locking and Forcing Password Change
Spring Security supports four ways of disabling a user account. When you attempt to log in, the UserDetailsService implementation creates an instance of UserDetails that uses these accessor methods:
-
isAccountNonExpired() -
isAccountNonLocked() -
isCredentialsNonExpired() -
isEnabled()
If you use the s2-quickstart script to create a user domain class, it creates a class with corresponding properties to manage this state.
When an accessor returns true for accountExpired, accountLocked, or passwordExpired or returns false for enabled, a corresponding exception is thrown:
| Accessor | Property | Exception |
|---|---|---|
|
|
|
|
|
|
|
|
|
|
|
You can configure exception mappings in application.groovy to associate a URL to any or all of these exceptions to determine where to redirect after a failure, for example:
grails.plugin.springsecurity.failureHandler.exceptionMappings configurationimport org.springframework.security.authentication.LockedException
import org.springframework.security.authentication.DisabledException
import org.springframework.security.authentication.AccountExpiredException
import org.springframework.security.authentication.CredentialsExpiredException
grails.plugin.springsecurity.failureHandler.exceptionMappings = [
[exception: LockedException.name, url: '/user/accountLocked'],
[exception: DisabledException.name, url: '/user/accountDisabled'],
[exception: AccountExpiredException.name, url: '/user/accountExpired'],
[exception: CredentialsExpiredException.name, url: '/user/passwordExpired']
]Without a mapping for a particular exception, the user is redirected to the standard login fail page (by default /login/authfail), which displays an error message from this table:
| Property | Default |
|---|---|
errors.login.disabled |
" |
errors.login.expired |
" |
errors.login.passwordExpired |
" |
errors.login.locked |
" |
errors.login.fail |
" |
You can customize these messages by setting the corresponding property in application.groovy, for example:
grails.plugin.springsecurity.errors.login.locked = "None shall pass."You can use this functionality to manually lock a user’s account or expire the password, but you can automate the process. For example, use the Quartz plugin to periodically expire everyone’s password and force them to go to a page where they update it. Keep track of the date when users change their passwords and use a Quartz job to expire their passwords once the password is older than a fixed max age.
Here’s an example for a password expired workflow. You’d need a simple action to display a password reset form (similar to the login form):
passwordExpired() controller actiondef passwordExpired() {
[username: session['SPRING_SECURITY_LAST_USERNAME']]
}and the form would look something like this:
<div id='login'>
<div class='inner'>
<g:if test='${flash.message}'>
<div class='login_message'>${flash.message}</div>
</g:if>
<div class='fheader'>Please update your password..</div>
<g:form action='updatePassword' id='passwordResetForm' class='cssform' autocomplete='off'>
<p>
<label for='username'>Username</label>
<span class='text_'>${username}</span>
</p>
<p>
<label for='password'>Current Password</label>
<g:passwordField name='password' class='text_' />
</p>
<p>
<label for='password'>New Password</label>
<g:passwordField name='password_new' class='text_' />
</p>
<p>
<label for='password'>New Password (again)</label>
<g:passwordField name='password_new_2' class='text_' />
</p>
<p>
<input type='submit' value='Reset' />
</p>
</g:form>
</div>
</div>It’s important that you not allow the user to specify the username (it’s available in the HTTP session) but that you require the current password, otherwise it would be simple to forge a password reset.
The GSP form would submit to an action like this one:
updatePassword() controller actiondef updatePassword(String password, String password_new, String password_new_2) {
String username = session['SPRING_SECURITY_LAST_USERNAME']
if (!username) {
flash.message = 'Sorry, an error has occurred'
redirect controller: 'login', action: 'auth'
return
}
if (!password || !password_new || !password_new_2 || password_new != password_new_2) {
flash.message = 'Please enter your current password and a valid new password'
render view: 'passwordExpired', model: [username: session['SPRING_SECURITY_LAST_USERNAME']]
return
}
User user = User.findByUsername(username)
if (!passwordEncoder.matches(password, user.password)) {
flash.message = 'Current password is incorrect'
render view: 'passwordExpired', model: [username: session['SPRING_SECURITY_LAST_USERNAME']]
return
}
if (passwordEncoder.matches(password_new, user.password)) {
flash.message = 'Please choose a different password from your current one'
render view: 'passwordExpired', model: [username: session['SPRING_SECURITY_LAST_USERNAME']]
return
}
user.password = password_new
user.passwordExpired = false
user.save() // if you have password constraints check them here
redirect controller: 'login', action: 'auth'
}User Cache
If the cacheUsers configuration property is set to true, Spring Security caches UserDetails instances to save trips to the database (the default is false). This optimization is minor, because typically only two small queries occur during login — one to load the user, and one to load the authorities.
If you enable this feature, you must remove any cached instances after making a change that affects login. If you do not remove cached instances, even though a user’s account is locked or disabled, logins succeed because the database is bypassed. By removing the cached data, you force at trip to the database to retrieve the latest updates.
Here is a sample Quartz job that demonstrates how to find and disable users with passwords that are too old:
ExpirePasswordsJob.groovypackage com.mycompany.myapp
class ExpirePasswordsJob {
static triggers = {
cron name: 'myTrigger', cronExpression: '0 0 0 * * ?' // midnight daily
}
def userCache
void execute() {
def users = User.executeQuery(
'from User u where u.passwordChangeDate <= :cutoffDate',
[cutoffDate: new Date() - 180])
for (user in users) {
// flush each separately so one failure doesn't rollback all of the others
try {
user.passwordExpired = true
user.save(flush: true)
userCache.removeUserFromCache user.username
}
catch (e) {
log.error "problem expiring password for user $user.username : $e.message", e
}
}
}
}|
If your application includes a dependency for |
4.12. URL Properties
The table shows configurable URL-related properties.
| Property | Default Value | Meaning |
|---|---|---|
apf.filterProcessesUrl |
" |
Login form post URL, intercepted by Spring Security filter |
apf.usernameParameter |
" |
Login form username parameter |
apf.passwordParameter |
" |
Login form password parameter |
apf.allowSessionCreation |
|
Whether to allow authentication to create an HTTP session |
apf.postOnly |
|
Whether to allow only POST login requests |
apf.continueChainBefore SuccessfulAuthentication |
|
whether to continue calling subsequent filters in the filter chain |
apf.storeLastUsername |
|
Whether to store the login username in the HTTP session |
failureHandler.defaultFailureUrl |
" |
Redirect URL for failed logins |
failureHandler.ajaxAuthFailUrl |
" |
Redirect URL for failed Ajax logins |
failureHandler.exceptionMappings |
none |
Map of exception class name (subclass of AuthenticationException) to which the URL will redirect for that exception type after authentication failure |
failureHandler.useForward |
|
Whether to render the error page ( |
failureHandler.allowSessionCreation |
|
Whether to enable session creation to store the authentication failure exception |
successHandler.defaultTargetUrl |
" |
Default post-login URL if there is no saved request that triggered the login |
successHandler.alwaysUseDefault |
|
If |
successHandler.targetUrlParameter |
" |
Name of optional login form parameter that specifies destination after successful login |
successHandler.useReferer |
|
Whether to use the HTTP |
successHandler.ajaxSuccessUrl |
" |
URL for redirect after successful Ajax login |
auth.loginFormUrl |
" |
URL of login page |
auth.forceHttps |
|
If |
auth.ajaxLoginFormUrl |
" |
URL of Ajax login page |
auth.useForward |
|
Whether to render the login page ( |
logout.afterLogoutUrl |
" |
URL for redirect after logout |
logout.filterProcessesUrl |
" |
Logout URL, intercepted by Spring Security filter |
logout.handlerNames |
|
Logout handler bean names. See Logout Handlers |
logout.clearAuthentication |
|
If |
logout.invalidateHttpSession |
|
Whether to invalidate the HTTP session when logging out |
logout.targetUrlParameter |
none |
the querystring parameter name for the post-logout URL |
logout.alwaysUseDefaultTargetUrl |
|
whether to always use the |
logout.redirectToReferer |
|
whether to use the |
logout.postOnly |
|
If |
adh.errorPage |
" |
Location of the 403 error page (or set to |
adh.ajaxErrorPage |
" |
Location of the 403 error page for Ajax requests |
adh.useForward |
|
If |
ajaxHeader |
" |
Header name sent by Ajax library, used to detect Ajax |
ajaxCheckClosure |
none |
An optional closure that can determine if a request is Ajax |
redirectStrategy.contextRelative |
|
If |
switchUser URLs |
See Switch User, under Customizing URLs |
|
fii.alwaysReauthenticate |
|
If |
fii.rejectPublicInvocations |
|
Disallow URL access when there is no request mapping |
fii.validateConfigAttributes |
|
Whether to check that all |
fii.publishAuthorizationSuccess |
|
Whether to publish an |
fii.observeOncePerRequest |
|
If |
4.13. Hierarchical Roles
Hierarchical roles are a convenient way to reduce clutter in your request mappings.
| Property | Default Value | Meaning |
|---|---|---|
roleHierarchy |
none |
Hierarchical role definition |
roleHierarchyEntryClassName |
none |
Domain class used to manage persistent role hierarchy entries |
For example, if you have several types of "admin" roles that can be used to access a URL pattern and you do not use hierarchical roles, you need to specify all the admin roles:
package com.mycompany.myapp
import grails.plugin.springsecurity.annotation.Secured
class SomeController {
@Secured(['ROLE_ADMIN', 'ROLE_FINANCE_ADMIN', 'ROLE_SUPERADMIN'])
def someAction() {
...
}
}However, if you have a business rule that says ROLE_FINANCE_ADMIN implies being granted ROLE_ADMIN, and that ROLE_SUPERADMIN implies being granted ROLE_FINANCE_ADMIN, you can express that hierarchy as:
grails.plugin.springsecurity.roleHierarchy = '''
ROLE_SUPERADMIN > ROLE_FINANCE_ADMIN
ROLE_FINANCE_ADMIN > ROLE_ADMIN
'''Then you can simplify your mappings by specifying only the roles that are required:
package com.mycompany.myapp
import grails.plugin.springsecurity.annotation.Secured
class SomeController {
@Secured('ROLE_ADMIN')
def someAction() {
...
}
}You can also reduce the number of granted roles in the database. Where previously you had to grant ROLE_SUPERADMIN, ROLE_FINANCE_ADMIN, and ROLE_ADMIN, now you only need to grant ROLE_SUPERADMIN.
4.13.1. Persistent role hierarchy
Specifying a static string in the roleHierarchy property will be sufficient for most applications, but you can also store the information in your database. This is particularly useful if you’re also storing requestmaps in the database. To use persistant storage, run the s2-create-role-hierarchy-entry script. This will create the domain class and enable persistent storage by registering its name as the roleHierarchyEntryClassName setting in grails-app/conf/application.groovy.
For example, running
./grailsw s2-create-role-hierarchy-entry com.yourapp.RoleHierarchyEntrywill generate this class in grails-app/domain/com/yourapp/RoleHierarchyEntry.groovy:
RoleHierarchyEntry.groovypackage com.yourapp
import groovy.transform.EqualsAndHashCode
import groovy.transform.ToString
@EqualsAndHashCode(includes='entry')
@ToString(includes='entry', includeNames=true, includePackage=false)
class RoleHierarchyEntry implements Serializable {
private static final long serialVersionUID = 1
String entry
static constraints = {
entry blank: false, unique: true
}
static mapping = {
cache true
}
}To store the equivalent entries for the ROLE_SUPERADMIN / ROLE_FINANCE_ADMIN / ROLE_ADMIN hierarchy, add code like this to a method in a transactional service:
RoleHierarchyEntry instancesif (!RoleHierarchyEntry.count()) {
new RoleHierarchyEntry(entry: 'ROLE_SUPERADMIN > ROLE_FINANCE_ADMIN').save()
new RoleHierarchyEntry(entry: 'ROLE_FINANCE_ADMIN > ROLE_ADMIN').save()
}Remember to update the roleHierarchy beans hierarchy definition by calling SpringSecurityService#reloadDBRoleHierarchy, or your model changes are not reflected in the running application.
4.14. Switch User
To enable a user to switch from the current Authentication to another user’s, set the useSwitchUserFilter attribute to true. This feature is similar to the "su" command in Unix. It enables, for example, an admin to act as a regular user to perform some actions, and then switch back.
|
This feature is very powerful; it allows full access to everything the switched-to user can access without requiring the user’s password. Limit who can use this feature by guarding the user switch URL with a role, for example, |
4.14.1. Switching to Another User
To switch to another user, typically you create a form that submits to /login/impersonate:
<sec:ifAllGranted roles='ROLE_SWITCH_USER'>
<form action='/login/impersonate' method='POST'>
Switch to user: <input type='text' name='username'/> <br/>
<input type='submit' value='Switch'/>
</form>
</sec:ifAllGranted>Here the form is guarded by a check that the logged-in user has ROLE_SWITCH_USER and is not shown otherwise. You also need to guard the user switch URL, and the approach depends on your mapping scheme. If you use annotations, add a rule to the controllerAnnotations.staticRules attribute:
controllerAnnotations.staticRulesgrails.plugin.springsecurity.controllerAnnotations.staticRules = [
...
[pattern: '/login/impersonate', access: ['ROLE_SWITCH_USER', 'IS_AUTHENTICATED_FULLY']]
]If you use ``Requestmap``s, create a rule like this (for example, in BootStrap):
new Requestmap(url: '/login/impersonate',
configAttribute: 'ROLE_SWITCH_USER,IS_AUTHENTICATED_FULLY').save(flush: true)If you use the static application.groovy map, add the rule there:
interceptUrlMapgrails.plugin.springsecurity.interceptUrlMap = [
...
[pattern: '/login/impersonate', access: ['ROLE_SWITCH_USER', 'IS_AUTHENTICATED_FULLY']]
]4.14.2. Switching Back to Original User
To resume as the original user, POST to /logout/impersonate.
<sec:ifSwitched>
<form action='${request.contextPath}/logout/impersonate' method='POST'>
<input type='submit' value="Resume as ${grails.plugin.springsecurity.SpringSecurityUtils.switchedUserOriginalUsername}"/>
</form>
</sec:ifSwitched>4.14.3. Customizing URLs
You can customize the URLs that are used for this feature, although it is rarely necessary:
grails.plugin.springsecurity.switchUser.switchUserUrl = ...
grails.plugin.springsecurity.switchUser.exitUserUrl = ...
grails.plugin.springsecurity.switchUser.targetUrl = ...
grails.plugin.springsecurity.switchUser.switchFailureUrl = ...| Property | Default | Meaning |
|---|---|---|
useSwitchUserFilter |
|
Whether to use the switch user filter |
switchUser.switchUserUrl |
" |
URL to access (via POST) to switch to another user |
switchUser.exitUserUrl |
" |
URL to access (via POST) to switch to another user |
switchUser.switchUserMatcher |
|
An alternative to |
switchUser.exitUserMatcher |
|
An alternative to |
switchUser.targetUrl |
Same as |
URL for redirect after switching |
switchUser.switchFailureUrl |
Same as |
URL for redirect after an error during an attempt to switch |
switchUser.usernameParameter |
|
The username request parameter name |
4.14.4. GSP Code
One approach to supporting the switch user feature is to add code to one or more of your GSP templates. In this example the current username is displayed, and if the user has switched from another (using the sec:ifSwitched tag) then a "resume" button is displayed. If not, and the user has the required role, a form is displayed to allow input of the username to switch to:
<sec:ifLoggedIn>
Logged in as <sec:username/>
</sec:ifLoggedIn>

<sec:ifSwitched>
    <form action='${request.contextPath}/logout/impersonate' method='POST'>
        <input type='submit' value="Resume as ${grails.plugin.springsecurity.SpringSecurityUtils.switchedUserOriginalUsername}"/>
    </form>
</sec:ifSwitched>

<sec:ifNotSwitched>

   <sec:ifAllGranted roles='ROLE_SWITCH_USER'>

   <form action='${request.contextPath}/login/impersonate'
         method='POST'>

      Switch to user: <input type='text' name='username'/><br/>

      <input type='submit' value='Switch'/> </form>

   </sec:ifAllGranted>

</sec:ifNotSwitched>4.15. Filters
There are a few different approaches to configuring filter chains.
4.15.1. Default Approach to Configuring Filter Chains
The default is to use configuration attributes to determine which extra filters to use (for example, Basic Auth, Switch User, etc.) and add these to the "core" filters. For example, setting grails.plugin.springsecurity.useSwitchUserFilter = true adds switchUserProcessingFilter to the filter chain (and in the correct order). The filter chain built here is applied to all URLs. If you need more flexibility, you can use filterChain.chainMap as discussed in chainMap below.
4.15.2. filterNames
To define custom filters, to remove a core filter from the Spring Security filter chain (not recommended), or to otherwise have control over the Spring Security filter chain, you can specify the filterNames property as a list of strings. As with the default approach, the Spring Security filter chain built here is applied to all URLs.
For example:
grails.plugin.springsecurity.filterChain.filterNames configurationgrails.plugin.springsecurity.filterChain.filterNames = [
'securityContextPersistenceFilter', 'logoutFilter',
'authenticationProcessingFilter', 'myCustomProcessingFilter',
'rememberMeAuthenticationFilter', 'anonymousAuthenticationFilter',
'exceptionTranslationFilter', 'filterInvocationInterceptor'
]This example creates a Spring Security filter chain corresponding to the Spring beans with the specified names.
4.15.3. chainMap
Use the filterChain.chainMap attribute to define which filters are applied to different URL patterns. You define a Map that specifies one or more lists of filter bean names, each with a corresponding URL pattern.
grails.plugin.springsecurity.filterChain.chainMap configurationgrails.plugin.springsecurity.filterChain.chainMap = [
[pattern: '/urlpattern1/**', filters: 'filter1,filter2,filter3,filter4'],
[pattern: '/urlpattern2/**', filters: 'filter1,filter3,filter5'],
[pattern: '/**', filters: 'JOINED_FILTERS']
]|
The format of |
In this example, four filters are applied to URLs matching /urlpattern1/** and three different filters are applied to URLs matching /urlpattern2/**. In addition the special token JOINED_FILTERS is applied to all URLs. This is a conventient way to specify that all defined filters (configured either with configuration rules like useSwitchUserFilter or explicitly using filterNames) should apply to this pattern.
The order of the mappings is important. Each URL will be tested in order from top to bottom to find the first matching one. So you need a /** catch-all rule at the end for URLs that do not match one of the earlier rules.
There’s also a filter negation syntax that can be very convenient. Rather than specifying all of the filter names (and risking forgetting one or putting them in the wrong order), you can use the JOINED_FILTERS keyword and one or more filter names prefixed with a - . This means to use all configured filters except for the excluded ones. For example, if you had a web service that uses Basic Auth for /webservice/** URLs, you would configure that using:
JOINED_FILTERS in a filterChain.chainMap configurationgrails.plugin.springsecurity.filterChain.chainMap = [
[pattern: '/webservice/**', filters: 'JOINED_FILTERS,-exceptionTranslationFilter'],
[pattern: '/**', filters: 'JOINED_FILTERS,-basicAuthenticationFilter,-basicExceptionTranslationFilter']
]For the /webservice/** URLs, we want all filters except for the standard ExceptionTranslationFilter since we want to use just the one configured for Basic Auth. And for the /** URLs (everything else) we want everything except for the Basic Auth filter and its configured ExceptionTranslationFilter.
Additionally, you can use a chainMap configuration to declare one or more URL patterns which should have no filters applied. Use the name 'none' for these patterns, e.g.
none in a filterChain.chainMap configurationgrails.plugin.springsecurity.filterChain.chainMap = [
[pattern: '/someurlpattern/**', filters: 'none'],
[pattern: '/**', filters: 'JOINED_FILTERS']
]4.15.4. clientRegisterFilter
An alternative to setting the filterNames property is grails.plugin.springsecurity.SpringSecurityUtils.clientRegisterFilter(). This property allows you to add a custom filter to the chain at a specified position. Each standard filter has a corresponding position in the chain (see grails.plugin.springsecurity.SecurityFilterPosition for details). So if you have created an application-specific filter, register it in grails-app/conf/spring/resources.groovy:
import com.mycompany.myapp.MyFilter
import org.springframework.boot.context.embedded.FilterRegistrationBean
beans = {
myFilter(MyFilter) {
// properties
}
myFilterDeregistrationBean(FilterRegistrationBean) {
filter = ref('myFilter')
enabled = false
}
}Note that in addition to the filter bean, there is also a disabled FilterRegistrationBean registered. This is needed because Spring Boot automatically registers filter beans in the ApplicationContext, so you must register your own FilterRegistrationBean and set its enabled property to false to prevent this.
Then register the filter in grails-app/init/BootStrap.groovy:
import grails.plugin.springsecurity.SecurityFilterPosition
import grails.plugin.springsecurity.SpringSecurityUtils
class BootStrap {
def init = {
SpringSecurityUtils.clientRegisterFilter(
'myFilter', SecurityFilterPosition.OPENID_FILTER.order + 10)
}
}This bootstrap code registers your filter just after the Open ID filter (if it’s configured). You cannot register a filter in the same position as another, so it’s a good idea to add a small delta to its position to put it after or before a filter that it should be next to in the chain. The Open ID filter position is just an example - add your filter in the position that makes sense.
4.16. Channel Security
Use channel security to configure which URLs require HTTP and which require HTTPS.
| Property | Default Value | Meaning |
|---|---|---|
portMapper.httpPort |
|
HTTP port your application uses |
portMapper.httpsPort |
|
HTTPS port your application uses |
secureChannel.definition |
none |
Map of URL pattern to channel rule |
secureChannel.secureHeaderName |
|
The name of the header to check for HTTPS |
secureChannel.secureHeaderValue |
|
The header value for |
secureChannel.secureConfigAttributeKeyword |
|
The config attribute token to use for marking a pattern as requiring HTTPS. |
secureChannel.insecureHeaderName |
|
The name of the header to check for HTTP |
secureChannel.insecureHeaderValue |
|
The header value for |
secureChannel.insecureConfigAttributeKeyword |
|
The config attribute token to use for marking a pattern as requiring HTTP. |
Build a List of single-entry ``Map``s under the secureChannel.definition key, where URL patterns are stored under the key "pattern", and the values are stored under the key "access" and are one of the access keywords REQUIRES_SECURE_CHANNEL, REQUIRES_INSECURE_CHANNEL, or ANY_CHANNEL:
grails.plugin.springsecurity.secureChannel.definitiongrails.plugin.springsecurity.secureChannel.definition = [
[pattern: '/login/**', access: 'REQUIRES_SECURE_CHANNEL'],
[pattern: '/maps/**', access: 'REQUIRES_INSECURE_CHANNEL'],
[pattern: '/images/login/**', access: 'REQUIRES_SECURE_CHANNEL'],
[pattern: '/images/**', access: 'ANY_CHANNEL']
]|
The format of |
URLs are checked in order, so be sure to put more specific rules before less specific. In the preceding example, /images/login/** is more specific than /images/**, so it appears first in the configuration.
4.16.1. Header checking
The default implementation of channel security is fairly simple; if you’re using HTTP but HTTPS is required, you get redirected to the corresponding SSL URL and vice versa. But when using a load balancer such as an F5 BIG-IP it’s not possible to just check secure/insecure. In that case you can configure the load balancer to set a request header indicating the current state. To use this approach, set the useHeaderCheckChannelSecurity configuration property to true and optionally change the header names or values:
grails.plugin.springsecurity.secureChannel.useHeaderCheckChannelSecurity = trueBy default the header name is "X-Forwarded-Proto" and the secure header value is "http" (i.e. if you’re not secure, redirect to secure) and the insecure header value is "https" (i.e. if you’re secure, redirect to insecure). You can change any or all of these default values though:
grails.plugin.springsecurity.secureChannel.secureHeaderName = '...'
grails.plugin.springsecurity.secureChannel.secureHeaderValue = '...'
grails.plugin.springsecurity.secureChannel.insecureHeaderName = '...'
grails.plugin.springsecurity.secureChannel.insecureHeaderValue = '...'4.17. IP Address Restrictions
Ordinarily you can guard URLs sufficiently with roles, but the plugin provides an extra layer of security with its ability to restrict by IP address.
| Property | Default Value | Meaning |
|---|---|---|
ipRestrictions |
none |
Map of URL patterns to IP address patterns. |
For example, make an admin-only part of your site accessible only from IP addresses of the local LAN or VPN, such as 192.168.1.xxx or 10.xxx.xxx.xxx. You can also set this up at your firewall and/or routers, but it is convenient to encapsulate it within your application.
To use this feature, specify an ipRestrictions configuration as a List of ``Map``s, one for each combination of URL pattern to IP address patterns that can access those URLs. The IP patterns can be single-value strings, or multi-value lists of strings. They can use CIDR masks, and can specify either IPv4 or IPv6 patterns. For example, given this configuration:
grails.plugin.springsecurity.ipRestrictions configurationgrails.plugin.springsecurity.ipRestrictions = [
[pattern: '/pattern1/**', access: '123.234.345.456'],
[pattern: '/pattern2/**', access: '10.0.0.0/8'],
[pattern: '/pattern3/**', access: ['10.10.200.42', '10.10.200.63']]
]pattern1 URLs can be accessed only from the external address 123.234.345.456, pattern2 URLs can be accessed only from a 10.xxx.xxx.xxx intranet address, and pattern3 URLs can be accessed only from 10.10.200.42 or 10.10.200.63. All other URL patterns are accessible from any IP address.
|
The format of |
All addresses can always be accessed from localhost regardless of IP pattern, primarily to support local development mode.
|
You cannot compare IPv4 and IPv6 addresses, so if your server supports both, you need to specify the IP patterns using the address format that is actually being used. Otherwise the filter throws exceptions. One option is to set the |
4.18. Session Fixation Prevention
To guard against session-fixation attacks set the useSessionFixationPrevention attribute to true:
grails.plugin.springsecurity.useSessionFixationPrevention = trueUpon successful authentication a new HTTP session is created and the previous session’s attributes are copied into it. If you start your session by clicking a link that was generated by someone trying to hack your account, which contained an active session id, you are no longer sharing the previous session after login. You have your own session.
Session fixation is less of a problem now that Grails by default does not include jsessionid in URLs (see this JIRA issue), but it’s still a good idea to use this feature.
Note that there is an issue when using the cookie-session plugin; see this issue for more details.
The table shows configuration options for session fixation.
| Property | Default Value | Meaning |
|---|---|---|
useSessionFixationPrevention |
|
Whether to use session fixation prevention |
sessionFixationPrevention.migrate |
|
Whether to copy the session attributes of the existing session to the new session after login |
sessionFixationPrevention.alwaysCreateSession |
|
Whether to always create a session even if one did not exist at the start of the request |
4.19. Logout Handlers
You register a list of logout handlers by implementing the LogoutHandler interface. The list is called when a user explicitly logs out.
By default, a securityContextLogoutHandler bean is registered to clear the SecurityContextHolder. Also, unless you are using Facebook or OpenID, rememberMeServices bean is registered to reset your cookie. (Facebook and OpenID authenticate externally so we don’t have access to the password to create a remember-me cookie.) If you are using Facebook, a facebookLogoutHandler is registered to reset its session cookies.
To customize this list, you define a logout.handlerNames attribute with a list of bean names.
| Property | Default Value | Meaning |
|---|---|---|
logout.handlerNames |
|
Logout handler bean names |
The beans must be declared either by the plugin or by you in resources.groovy. For example, suppose you have a custom MyLogoutHandler in resources.groovy:
resources.groovyimport com.foo.MyLogoutHandler
beans = {
myLogoutHandler(MyLogoutHandler) {
// attributes
}
}You register it in grails-app/conf/application.groovy as:
grails.plugin.springsecurity.logout.handlerNamesgrails.plugin.springsecurity.logout.handlerNames = [
'rememberMeServices', 'securityContextLogoutHandler', 'myLogoutHandler'
]4.20. Voters
Voters are classes that implement the Spring Security AccessDecisionVoter interface and are used to confirm whether a successful authentication is authorized for the current request.
You can register the voters to use with the voterNames setting; each element in the collection is the name of an existing Spring bean.
| Property | Default Value | Meaning |
|---|---|---|
voterNames |
|
Bean names of voters |
The default voters include a RoleHierarchyVoter to ensure users have the required roles for the request, an AuthenticatedVoter to support IS_AUTHENTICATED_FULLY, IS_AUTHENTICATED_REMEMBERED, and IS_AUTHENTICATED_ANONYMOUSLY tokens, a WebExpressionVoter to evaluate SpEL expressions, and a grails.plugin.springsecurity.access.vote.ClosureVoter to invoke annotation closures.
To customize this list, you define a voterNames attribute with a list of bean names. Any existing bean that implements the interface can be used, whether it is declared by this plugin, in your application’s resources.groovy, another plugin, or any other source.
Suppose you have registered a bean for a custom MyAccessDecisionVoter in resources.groovy:
import com.foo.MyAccessDecisionVoter
beans = {
myAccessDecisionVoter(MyAccessDecisionVoter) {
// attributes
}
}You register it in grails-app/conf/application.groovy as:
grails.plugin.springsecurity.voterNames = [
'authenticatedVoter', 'roleVoter', 'webExpressionVoter',
'closureVoter', 'myAccessDecisionVoter'
]4.21. Miscellaneous Properties
| Property | Default Value | Meaning |
|---|---|---|
active |
|
Whether the plugin is enabled |
printStatusMessages |
|
Whether to print status messages such as " |
rejectIfNoRule |
|
" |
anon.key |
" |
anonymousProcessingFilter key |
atr.anonymousClass |
|
Anonymous token class |
useHttpSession EventPublisher |
|
If |
cacheUsers |
|
If |
useSecurity EventListener |
|
If |
dao.reflectionSaltSourceProperty |
none |
Which property to use for the reflection-based salt source. See Salted Passwords |
dao.hideUserNotFoundExceptions |
|
if |
requestCache.createSession |
|
Whether caching |
roleHierarchy |
none |
Hierarchical role definition. See Hierarchical Roles |
voterNames |
|
Bean names of voters. See Voters |
providerNames |
|
Bean names of authentication providers. See Authentication Providers |
securityConfigType |
" |
Type of request mapping to use, one of " |
controllerAnnotations.lowercase |
|
Whether to do URL comparisons using lowercase |
controllerAnnotations.staticRules |
none |
Extra rules that cannot be mapped using annotations |
interceptUrlMap |
none |
Request mapping definition when using " |
registerLoggerListener |
|
If |
scr.allowSessionCreation |
|
Whether to allow creating a session in the |
scr.disableUrlRewriting |
|
Whether to disable URL rewriting (and the jsessionid attribute) |
scr.springSecurityContextKey |
|
The HTTP session key to store the |
scpf.forceEagerSessionCreation |
|
Whether to eagerly create a session in the |
sch.strategyName |
|
The strategy to use for storing the |
debug.useFilter |
|
Whether to use the |
providerManager.eraseCredentialsAfterAuthentication |
|
Whether to remove the password from the |
excludeSpringSecurityAutoConfiguration |
|
Whether to automatically exclude Spring Boot security auto-configuration classes that conflict with the plugin. Set to |
4.22. Configuration Properties
This page is generated from spring-configuration-metadata.json. For IDE auto-completion of these properties, ensure the plugin JAR is on your classpath.
4.22.1. General configuration properties.
| Property | Description | Default |
|---|---|---|
|
Whether the plugin is enabled. |
|
|
Whether to automatically exclude Spring Boot security auto-configuration classes that conflict with the plugin. |
|
|
Whether to print status messages such as "Configuring Spring Security Core …". |
|
|
Strict mode where a request mapping is required for all resources. |
|
|
Whether to enable HTTP Basic authentication. |
|
|
Whether to enable HTTP Digest authentication. |
|
|
If true, use external domain classes. |
|
|
If true, enable role groups. |
|
|
Whether to enable the switch user filter. |
|
|
Whether to enable X.509 authentication. |
|
4.22.2. Domain class configuration properties.
| Property | Description | Default |
|---|---|---|
|
Role class name. |
- |
|
Role class authority group name property. |
- |
|
Role class role name property. |
|
|
Requestmap class name. |
- |
|
Requestmap class role and token property. |
|
|
Requestmap class HTTP method property. |
|
|
Requestmap class URL pattern property. |
|
|
User class account expired property. |
|
|
User class account locked property. |
|
|
User class role collection property. |
|
|
User and role many-to-many join class name. |
- |
|
User class enabled property. |
|
|
User class password expired property. |
|
|
User class password property. |
|
|
User class name. |
- |
|
Ignore case when searching for usernamePropertyName. |
|
|
User class username property. |
|
4.22.3. Authentication and authorization configuration properties.
| Property | Description | Default |
|---|---|---|
|
AfterInvocationManager provider bean names. |
|
|
anonymousProcessingFilter key. |
|
|
Whether to continue calling subsequent filters in the filter chain. |
|
|
Anonymous token class. |
|
|
Remember-me token class. |
|
|
If true, throws BadCredentialsException for both bad username and bad password. |
|
|
If true, re-authenticates when there is an Authentication in the SecurityContext. |
|
|
If false, allow checks to happen multiple times. |
|
|
Whether to publish an AuthorizedEvent after successful access check. |
|
|
Disallow URL access when there is no request mapping. |
|
|
Whether to check that all ConfigAttribute instances are valid at startup. |
|
|
Whether to remove the password from the Authentication and its child objects after successful authentication. |
|
|
Bean names of authentication providers. |
|
|
Hierarchical role definition. |
|
|
Bean names of voters. |
|
4.22.4. Login and logout configuration properties.
| Property | Description | Default |
|---|---|---|
|
Location of the 403 error page for Ajax requests. |
|
|
Location of the 403 error page (or set to null to send a 403 error and not render a page). |
|
|
If true a forward will be used to render the error page, otherwise a redirect is used. |
|
|
Login form post URL, intercepted by Spring Security filter. |
|
|
Login form password parameter. |
|
|
Whether to allow only POST login requests. |
|
|
Login form username parameter. |
|
|
URL of Ajax login page. |
|
|
If true, redirects login page requests to HTTPS. |
|
|
URL of login page. |
|
|
Whether to render the login page (true) or redirect (false). |
|
|
Redirect URL for failed Ajax logins. |
|
|
Redirect URL for failed logins. |
|
|
Map of AuthenticationException subclasses to redirect URLs after authentication failure. |
|
|
Whether to render the error page (true) or redirect (false). |
|
|
URL for redirect after logout. |
|
|
Whether to always use afterLogoutUrl as the post-logout URL. |
|
|
If true removes the Authentication from the SecurityContext to prevent issues with concurrent requests. |
|
|
Logout URL, intercepted by Spring Security filter. |
|
|
Logout handler bean names. |
|
|
If true only POST requests will be allowed to logout. |
|
|
Whether to use the Referer header value as the post-logout URL. |
|
|
The querystring parameter name for the post-logout URL. |
- |
|
URL for redirect after successful Ajax login. |
|
|
Whether to always redirect to successHandler.defaultTargetUrl after successful authentication. |
|
|
Default post-login URL if there is no saved request that triggered the login. |
|
|
Name of optional login form parameter that specifies destination after successful login. |
|
|
Whether to use the HTTP Referer header to determine post-login destination. |
|
4.22.5. Password encoding configuration properties.
| Property | Description | Default |
|---|---|---|
|
Which property to use for the reflection-based salt source. |
- |
|
Password encoding algorithm. |
|
|
BCrypt log rounds. |
|
|
Whether to Base64 encode password hashes. |
|
|
Hashing iterations. |
|
4.22.6. Remember-me cookie configuration properties.
| Property | Description | Default |
|---|---|---|
|
Whether to always remember users. |
|
|
Remember-me cookie domain. |
- |
|
Remember-me cookie name. |
|
|
Whether to create a session after remember-me login. |
|
|
Key used to identify remember-me tokens. |
|
|
Remember-me parameter name. |
|
|
Whether to use persistent remember-me tokens. |
|
|
Persistent token domain class name. |
- |
|
Persistent token series length. |
|
|
Persistent token token length. |
|
|
Remember-me token validity in seconds. |
|
|
Whether to use a secure remember-me cookie. |
- |
4.22.7. Session and security context configuration properties.
| Property | Description | Default |
|---|---|---|
|
Whether to allow authentication to create an HTTP session. |
|
|
Whether to store the login username in the HTTP session. |
|
|
Whether to enable session creation to store the authentication failure exception. |
|
|
Whether to invalidate the HTTP session when logging out. |
|
|
Whether caching SavedRequest can trigger the creation of a session. |
|
|
The strategy to use for storing the SecurityContext. |
|
|
Whether to eagerly create a session in the securityContextRepository bean. |
|
|
Whether to allow creating a session in the securityContextRepository bean. |
|
|
Whether to disable URL rewriting (and the jsessionid attribute). |
|
|
The HTTP session key to store the SecurityContext under. |
|
|
Whether to always create a session for session fixation prevention. |
|
|
Whether to migrate the session on authentication. |
|
|
If true, an HttpSessionEventPublisher will be configured. |
|
|
Whether to use session fixation prevention. |
|
4.22.8. URL mapping configuration properties.
| Property | Description | Default |
|---|---|---|
|
Whether to do URL comparisons using lowercase. |
|
|
Extra rules that cannot be mapped using annotations. |
|
|
Request mapping definition when using InterceptUrlMap. |
|
|
If true, the redirect URL will be the value after the request context path. |
|
|
Type of request mapping to use, one of Annotation, Requestmap, or InterceptUrlMap. |
|
4.22.9. Basic and digest HTTP authentication properties.
| Property | Description | Default |
|---|---|---|
|
Credentials charset for HTTP Basic authentication. |
|
|
Realm name for HTTP Basic authentication. |
|
|
Whether to create authenticated tokens for digest auth. |
|
|
Key for HTTP Digest authentication. |
|
|
Digest nonce validity in seconds. |
|
|
Whether digest passwords are already encoded. |
|
|
Realm name for HTTP Digest authentication. |
|
|
Whether to use cleartext passwords for digest auth. |
|
4.22.10. Switch user (impersonation) configuration properties.
| Property | Description | Default |
|---|---|---|
|
URL used to exit switched user. |
|
|
Failure URL for switch user. |
- |
|
URL used to switch users. |
|
|
Target URL after switching user. |
- |
|
Username parameter for switch user. |
|
4.22.11. Port mapping and secure channel configuration properties.
| Property | Description | Default |
|---|---|---|
|
HTTP port for port mapping. |
|
|
HTTPS port for port mapping. |
|
|
Secure channel definition rules. |
|
|
Config attribute keyword for insecure channel. |
|
|
Header name indicating insecure channel. |
|
|
Header value indicating insecure channel. |
|
|
Config attribute keyword for secure channel. |
|
|
Header name indicating secure channel. |
|
|
Header value indicating secure channel. |
|
|
Whether to use header based channel security. |
|
4.22.12. X.509 client certificate authentication properties.
| Property | Description | Default |
|---|---|---|
|
Whether to check for principal changes. |
|
|
Whether to continue filter chain when X.509 authentication fails. |
|
|
Whether to invalidate the session when the principal changes. |
|
|
Closure to extract principal from subject DN. |
- |
|
Regex for extracting username from subject DN. |
`CN=(.*?)(?:, |
$)` |
|
Whether to throw an exception when the token is rejected. |
4.22.13. Miscellaneous configuration properties.
| Property | Description | Default |
|---|---|---|
|
An optional closure that can determine if a request is Ajax. |
- |
|
Header name sent by Ajax library, used to detect Ajax. |
|
|
Bean type resolver class name. |
|
|
If true, logins are cached using an EhCache. |
|
|
Whether to use the DebugFilter to log request debug information to the console. |
|
|
Layout name for auth views. |
|
|
Layout name for denied views. |
|
|
List of IP addresses allowed by the IP restriction filter. |
|
|
If true, registers a LoggerListener that logs interceptor-related application events. |
|
|
If true, configure SecurityEventListener. |
|
4.23. Tutorials
4.23.1. Using Controller Annotations to Secure URLs
1. Create your Grails application.
$ grails create-app bookstore $ cd bookstore
2. "Install" the plugin by adding it to build.gradle
dependencies {
...
implementation 'org.apache.grails:grails-spring-security:{project-version}'
...
}Run the compile command to resolve dependencies and ensure everything is correct:
$ grails compile
3. Create the User and Role domain classes.
./grailsw s2-quickstart com.mycompany.myapp User RoleYou can choose your names for your domain classes and package; these are just examples.
|
Depending on your database, some domain class names might not be valid, especially those relating to security. Before you create names like " |
If you are using Spring Core version 3.1.2 or later and GORM 6.0.10 or later, the script creates this User class:
grails-app/domain/com/mycompany/myapp/User.groovypackage com.mycompany.myapp
import groovy.transform.EqualsAndHashCode
import groovy.transform.ToString
import grails.compiler.GrailsCompileStatic
@GrailsCompileStatic
@EqualsAndHashCode(includes='username')
@ToString(includes='username', includeNames=true, includePackage=false)
class User implements Serializable {
private static final long serialVersionUID = 1
String username
String password
boolean enabled = true
boolean accountExpired
boolean accountLocked
boolean passwordExpired
Set<Role> getAuthorities() {
(UserRole.findAllByUser(this) as List<UserRole>)*.role as Set<Role>
}
static constraints = {
password blank: false, password: true
username blank: false, unique: true
}
static mapping = {
password column: '`password`'
}
}and a password encoder listener to manage password encoding:
grails-app/conf/spring/resources.groovyimport com.mycompany.myapp.UserPasswordEncoderListener
// Place your Spring DSL code here
beans = {
userPasswordEncoderListener(UserPasswordEncoderListener)
}src/main/groovy/com/mycompany/myapp/UserPasswordEncoderListener.groovypackage com.mycompany.myapp
import grails.plugin.springsecurity.SpringSecurityService
import org.grails.datastore.mapping.engine.event.AbstractPersistenceEvent
import org.grails.datastore.mapping.engine.event.PreInsertEvent
import org.grails.datastore.mapping.engine.event.PreUpdateEvent
import org.springframework.beans.factory.annotation.Autowired
import grails.events.annotation.gorm.Listener
import groovy.transform.CompileStatic
@CompileStatic
class UserPasswordEncoderListener {
@Autowired
SpringSecurityService springSecurityService
@Listener(User)
void onPreInsertEvent(PreInsertEvent event) {
encodePasswordForEvent(event)
}
@Listener(User)
void onPreUpdateEvent(PreUpdateEvent event) {
encodePasswordForEvent(event)
}
private void encodePasswordForEvent(AbstractPersistenceEvent event) {
if (event.entityObject instanceof User) {
User u = event.entityObject as User
if (u.password && ((event instanceof PreInsertEvent) || (event instanceof PreUpdateEvent && u.isDirty('password')))) {
event.getEntityAccess().setProperty('password', encodePassword(u.password))
}
}
}
private String encodePassword(String password) {
springSecurityService?.passwordEncoder ? springSecurityService.encodePassword(password) : password
}
}Previous versions of the plugin’s script manage the password encoding directly in domain class:
grails-app/domain/com/mycompany/myapp/User.groovypackage com.mycompany.myapp
import grails.plugin.springsecurity.SpringSecurityService
import groovy.transform.EqualsAndHashCode
import groovy.transform.ToString
import grails.compiler.GrailsCompileStatic
@GrailsCompileStatic
@EqualsAndHashCode(includes='username')
@ToString(includes='username', includeNames=true, includePackage=false)
class User implements Serializable {
private static final long serialVersionUID = 1
SpringSecurityService springSecurityService
String username
String password
boolean enabled = true
boolean accountExpired
boolean accountLocked
boolean passwordExpired
Set<Role> getAuthorities() {
(UserRole.findAllByUser(this) as List<UserRole>)*.role as Set<Role>
}
def beforeInsert() {
encodePassword()
}
def beforeUpdate() {
if (isDirty('password')) {
encodePassword()
}
}
protected void encodePassword() {
password = springSecurityService?.passwordEncoder ? springSecurityService.encodePassword(password) : password
}
static transients = ['springSecurityService']
static constraints = {
password blank: false, password: true
username blank: false, unique: true
}
static mapping = {
password column: '`password`'
}
}
If you use this older pattern, be aware that springSecurityService will be null when creating User instances in BootStrap.groovy. Domain class instances are plain Groovy objects, not Spring-managed beans, so their transient service references are not autowired at construction time. The beforeInsert() callback will silently skip password encoding because of the ?. safe-navigation operator, resulting in plaintext passwords stored in the database. See Password Encoding in BootStrap below for the recommended approach to seeding users in BootStrap.
|
| Service injection in GORM entities is disabled by default since Grails 3.2.8. Read documentation about Spring Autowiring of Domain Instances to learn how to turn autowire on. |
Even with autowiring enabled, transient service references (such as springSecurityService) are only injected into domain instances that are loaded by GORM from the database. Freshly constructed instances (e.g., new User(...)) are plain Groovy objects and will have null for all transient service fields. This is particularly important in BootStrap.groovy, where newly created domain instances will not have springSecurityService available during beforeInsert(). See Password Encoding in BootStrap for the recommended approach to password encoding when seeding data.
s2-quickstart script generates this Role too:
Role.groovypackage com.mycompany.myapp
import groovy.transform.EqualsAndHashCode
import groovy.transform.ToString
import grails.compiler.GrailsCompileStatic
@GrailsCompileStatic
@EqualsAndHashCode(includes='authority')
@ToString(includes='authority', includeNames=true, includePackage=false)
class Role implements Serializable {
private static final long serialVersionUID = 1
String authority
static constraints = {
authority blank: false, unique: true
}
static mapping = {
cache true
}
}and a domain class that maps the many-to-many join class, UserRole:
UserRole.groovypackage com.mycompany.myapp
import grails.gorm.DetachedCriteria
import groovy.transform.ToString
import org.codehaus.groovy.util.HashCodeHelper
import grails.compiler.GrailsCompileStatic
@GrailsCompileStatic
@ToString(cache=true, includeNames=true, includePackage=false)
class UserRole implements Serializable {
private static final long serialVersionUID = 1
User user
Role role
@Override
boolean equals(other) {
if (other instanceof UserRole) {
other.userId == user?.id && other.roleId == role?.id
}
}
@Override
int hashCode() {
int hashCode = HashCodeHelper.initHash()
if (user) {
hashCode = HashCodeHelper.updateHash(hashCode, user.id)
}
if (role) {
hashCode = HashCodeHelper.updateHash(hashCode, role.id)
}
hashCode
}
static UserRole get(long userId, long roleId) {
criteriaFor(userId, roleId).get()
}
static boolean exists(long userId, long roleId) {
criteriaFor(userId, roleId).count()
}
private static DetachedCriteria criteriaFor(long userId, long roleId) {
UserRole.where {
user == User.load(userId) &&
role == Role.load(roleId)
}
}
static UserRole create(User user, Role role, boolean flush = false) {
def instance = new UserRole(user: user, role: role)
instance.save(flush: flush)
instance
}
static boolean remove(User u, Role r) {
if (u != null && r != null) {
UserRole.where { user == u && role == r }.deleteAll()
}
}
static int removeAll(User u) {
u == null ? 0 : UserRole.where { user == u }.deleteAll() as int
}
static int removeAll(Role r) {
r == null ? 0 : UserRole.where { role == r }.deleteAll() as int
}
static constraints = {
role validator: { Role r, UserRole ur ->
if (ur.user?.id) {
UserRole.withNewSession {
if (UserRole.exists(ur.user.id, r.id)) {
return ['userRole.exists']
}
}
}
}
}
static mapping = {
id composite: ['user', 'role']
version false
}
}|
These generated files are not part of the plugin - these are your application files.
They are examples to get you started, so you can edit them as you please.
They contain the minimum needed for the plugin’s default implementation of the Spring Security |
The script has edited (or created) grails-app/conf/application.groovy and added the configuration for your domain classes. Make sure that the changes are correct.
While you’re looking at application.groovy, add this config override to make the sample app easier to work with:
grails.plugin.springsecurity.logout.postOnly = false|
By default only POST requests can be used to logout; this is a very sensible default and shouldn’t be changed in most cases. However to keep things simple for this tutorial we’ll change it (using the |
The plugin has no support for CRUD actions or GSPs for your domain classes; the spring-security-ui plugin supplies a UI for those. So for now you will create roles and users in grails-app/init/BootStrap.groovy. (See step 7.)
4. Create a controller that will be restricted by role.
$ grails create-controller com.mycompany.myapp.Secure
This command creates grails-app/controllers/com/mycompany/myapp/SecureController.groovy. Add some output so you can verify that things are working:
SecureController.groovypackage com.mycompany.myapp
class SecureController {
def index() {
render 'Secure access only'
}
}5. Edit grails-app/init/BootStrap.groovy to add a test user.
BootStrap.groovypackage com.mycompany.myapp
import grails.gorm.transactions.Transactional
class BootStrap {
def init = {
addTestUser()
}
@Transactional
void addTestUser() {
def adminRole = new Role(authority: 'ROLE_ADMIN').save()
def testUser = new User(username: 'me', password: 'password').save()
UserRole.create testUser, adminRole
UserRole.withSession {
it.flush()
it.clear()
}
assert User.count() == 1
assert Role.count() == 1
assert UserRole.count() == 1
}
}Some things to note about the preceding BootStrap.groovy:
-
The example does not use a traditional GORM many-to-many mapping for the User <==> Role relationship; instead you are mapping the join table with the
UserRoleclass. This performance optimization helps significantly when many users have one or more common roles. -
We explicitly flush (using
withSession) becauseBootStrapdoes not run in a transaction or OpenSessionInView. -
This example works correctly because the
UserPasswordEncoderListener(a Spring-managed bean) handles password encoding during the GORMPreInsertEvent. If you are using the older domain class pattern withbeforeInsert()instead, see the note below.
Password Encoding in BootStrap
If you are using the older User domain class pattern where springSecurityService is declared as a transient field and password encoding happens in beforeInsert(), passwords will not be encoded when creating users in BootStrap.groovy. This is because domain class instances are plain Groovy objects - their transient service references are not autowired by Spring at construction time. The springSecurityService field will be null, and the safe-navigation operator (?.) in encodePassword() will silently skip encoding.
To work around this, inject the passwordEncoder bean directly in BootStrap and pre-encode passwords before saving:
BootStrap.groovyimport grails.gorm.transactions.Transactional
import org.springframework.security.crypto.password.PasswordEncoder
class BootStrap {
PasswordEncoder passwordEncoder (1)
def init = {
addTestUser()
}
@Transactional
void addTestUser() {
def adminRole = new Role(authority: 'ROLE_ADMIN').save()
String encodedPassword = passwordEncoder.encode('password') (2)
def testUser = new User(username: 'me', password: encodedPassword).save()
UserRole.create testUser, adminRole
UserRole.withSession {
it.flush()
it.clear()
}
}
}| 1 | The PasswordEncoder bean is auto-configured by the plugin and can be injected into BootStrap by name. |
| 2 | Pre-encode the password before constructing the User instance so that password encoding is handled explicitly here, rather than relying on a beforeInsert() hook or an injected springSecurityService in the domain class. |
Be careful not to double-encode passwords if you also use a beforeInsert()-style encoding hook or a Spring-managed listener (for example, a User domain class with an injected springSecurityService, or a UserPasswordEncoderListener that encodes on insert/update). In those cases, the callback or listener would see the already-encoded value produced in BootStrap and attempt to encode it again. Ensure that only one mechanism is responsible for encoding - for example, rely solely on a listener such as UserPasswordEncoderListener, or disable automatic encoding for users created in BootStrap. The recommended approach is to use the UserPasswordEncoderListener pattern shown above, which avoids this issue entirely.
|
6. Start the server.
$ grails run-app
7. Verify that you cannot access the page yet.
Before you secure the page, navigate to http://localhost:8080/secure to verify that you cannot access the page yet. You will be redirected to the login page, but after a successful authentication (log in with the username and password you used for the test user in BootStrap.groovy) you will see an error page:
Sorry, you're not authorized to view this page.
This is because with the default configuration, all URLs are denied unless there is an access rule specified.
8. Apply the annotation.
Edit grails-app/controllers/com/mycompany/myapp/SecureController.groovy to import the annotation class and apply the annotation to restrict (and grant) access.
SecureController.groovypackage com.mycompany.myapp
import grails.plugin.springsecurity.annotation.Secured
class SecureController {
@Secured('ROLE_ADMIN')
def index() {
render 'Secure access only'
}
}or
SecureController.groovypackage com.mycompany.myapp
import grails.plugin.springsecurity.annotation.Secured
@Secured('ROLE_ADMIN')
class SecureController {
def index() {
render 'Secure access only'
}
}You can annotate the entire controller or individual actions. In this case you have only one action, so you can do either.
9. Restart.
Shut down the app and run grails run-app again, and navigate again to http://localhost:8080/secure.
This time you should again be able to see the secure page after successfully authenticating.
10. Test the Remember Me functionality.
Check the checkbox, and once you’ve tested the secure page, close your browser and reopen it. Navigate again the the secure page. Because a cookie is stored, you should not need to log in again. Logout at any time by navigating to http://localhost:8080/logout.
11. Create a CRUD UI.
Optionally, create a CRUD UI to work with users and roles.
Run grails generate-all for the domain classes:
$ grails generate-all com.mycompany.myapp.User
$ grails generate-all com.mycompany.myapp.Role
Since the User domain class handles password hashing, there are no changes required in the generated controllers.
Be sure to add an @Secured annotation to both of the generated controllers to make them accessible.
4.24. Example Applications
Sometimes the best way to learn is by example. We have an ever-expanding list of example apps created to do just that… help you learn how to utilize the grails-spring-security plugin in your current application.
4.24.1. The Repos
A comprehensive list of example spring security apps may be found at:
4.24.2. The Example Apps
spring-security-ui
A sample Grails App which uses the Grails Spring Security UI and Spring Security Core Plugins.
The Spring Security UI plugin provides CRUD screens and other user management workflows.
grails-spring-security-spring-boot-actuators
A sample Grails App which secures a Spring Boot Actuator endpoint using the Spring Security Core Plugin.
Spring Boot Actuators provide ways to monitor the health and performance of your application along with other metadata information.
grails-ssc-mongodb
A sample Grails App which uses the Spring Security Core Plugin and MongoDB.
MongoDB is an open source, document-oriented database.
grails-spring-security-params
A sample Grails App which uses the Spring Security Core Plugin to demonstrate how to use a closure with the @Secured annotation.
grails-spring-security-group
A sample Grails App which uses the Spring Security Core Plugin and Group Authentication as described in the documentation.
Rather than granting authorities directly to a “person”, you can create a “group”, map authorities to it, and then map a “person” to that “group”. For applications that have a one or more groups of users who need the same level of access, having one or more “group” instances makes managing changes to access levels easier.
grails-spring-security-hierarchical-roles
A sample Grails App which uses the Spring Security Core Plugin and Hierarchical Roles as described in the documentation.
Hierarchical roles are a convenient way to reduce clutter in your request mappings.
grails-spring-security-ajax
A sample Grails App which uses the Spring Security Core Plugin and Ajax Authentication as described in the documentation.
The Spring Security Core Plugin supports Ajax logins, but you need to create your own client-side code.
4.25. Controller Methods
The plugin registers some convenience methods into all controllers in your application. As of version 3.1.0 this is implemented by a trait that is applied to all controllers but was implemented in earlier versions by adding methods to each controller’s MetaClass. All are accessor methods, so they can be called as methods or properties. They include:
4.25.1. isLoggedIn
Returns true if there is an authenticated user.
isLoggedIn()class MyController {
def someAction() {
if (isLoggedIn()) {
...
}
...
if (!isLoggedIn()) {
...
}
// or
if (loggedIn) {
...
}
if (!loggedIn) {
...
}
}
}4.25.2. getPrincipal
Retrieves the current authenticated user’s Principal (a GrailsUser instance unless you’ve customized this) or null if not authenticated.
getPrincipal()class MyController {
def someAction() {
if (isLoggedIn()) {
String username = getPrincipal().username
...
}
// or
if (isLoggedIn()) {
String username = principal.username
...
}
}
}4.25.3. getAuthenticatedUser
Loads the user domain class instance from the database that corresponds to the currently authenticated user, or null if not authenticated. This is the equivalent of adding a dependency injection for springSecurityService and calling PersonDomainClassName.get(springSecurityService.principal.id) (the typical way that this is often done).
getAuthenticatedUser()class MyController {
def someAction() {
if (isLoggedIn()) {
String email = getAuthenticatedUser().email
...
}
// or
if (isLoggedIn()) {
String email = authenticatedUser.email
...
}
}
}4.26. Internationalization
The plugin includes i18n messages in several languages. To customize or translate these, add messages for the following keys to your i18n resource bundle(s) for each exception:
| Message | Default Value | Exception |
|---|---|---|
springSecurity.errors.login.expired |
" |
|
springSecurity.errors.login.passwordExpired |
" |
|
springSecurity.errors.login.disabled |
" |
|
springSecurity.errors.login.locked |
" |
|
springSecurity.errors.login.fail |
" |
Other exceptions |
You can customize all messages in auth.gsp and denied.gsp:
| Message | Default Value |
|---|---|
springSecurity.login.title |
" |
springSecurity.login.header |
" |
springSecurity.login.button |
" |
springSecurity.login.username.label |
" |
springSecurity.login.password.label |
" |
springSecurity.login.remember.me.label |
" |
springSecurity.denied.title |
" |
springSecurity.denied.message |
" |
4.27. Scripts
4.27.1. s2-quickstart
Creates a user and role class (and optionally a requestmap class) in the specified package. If you specify a role-group name with the groupClassName argument, role/group classes will also be generated. If you specify the uiOnly flag, no domain classes are created but the plugin settings are initialized (useful with LDAP, Mock, Shibboleth, etc.)
The general format is:
./grailsw s2-quickstart DOMAIN_CLASS_PACKAGE USER_CLASS_NAME ROLE_CLASS_NAME [REQUESTMAP_CLASS_NAME] [--groupClassName=GROUP_CLASS_NAME]./grailsw s2-quickstart com.yourapp User Role./grailsw s2-quickstart com.yourapp User Role --groupClassName=RoleGroup./grailsw s2-quickstart com.yourapp Person Authority Requestmap./grailsw s2-quickstart --uiOnly-
Updates
grails-app/conf/application.groovywith security configuration settings and creates domain classes ingrails-app/domainunless the uiOnly flag is specified
4.27.2. s2-create-persistent-token
Creates a persistent token domain class for storing remember-me cookie information in the database. The general format is:
./grailsw s2-create-persistent-token <classname>./grailsw s2-create-persistent-token com.yourapp.PersistentLoginThis creates the domain class in the specified package, and also registers the name in grails-app/conf/application.groovy, along with enabling persistent remember-me.
4.27.3. s2-create-role-hierarchy-entry
Creates a persistent role hierarchy entry domain class for storing role hierarchy information in the database. The general format is:
./grailsw s2-create-role-hierarchy-entry <classname>./grailsw s2-create-role-hierarchy-entry com.yourapp.RoleHierarchyEntryThis creates the domain class in the specified package, and also registers the name in grails-app/conf/application.groovy, along with enabling persistent role hierarchy storage and lookup.
4.28. Debugging
If you need debug information, you can specify the following entries in logback.groovy:
logger 'org.springframework.security', DEBUG, ['STDOUT'], false
logger 'grails.plugin.springsecurity', DEBUG, ['STDOUT'], false4.29. API Reference
The Core plugin Groovydoc API documentation is available at Core Plugin API Reference.
5. ACL Plugin
5.1. Introduction to the Spring Security ACL Plugin
The ACL plugin adds Domain Object Security support to a Grails application that uses Spring Security. It depends on the Spring Security Core plugin.
The core plugin and other extension plugins support restricting access to URLs via rules that include checking a user’s authentication status, roles, etc. and the ACL plugin extends this by adding support for restricting access to individual domain class instances. The access can be very fine-grained and can define which actions can be taken on an object - these typically include Read, Create, Write, Delete, and Administer but you’re free to define whatever actions you like.
To learn about using ACLs in Grails, you can follow the Tutorial and in addition you can download and run a complete Grails application that uses the plugin. Installing and running the application are described in Sample Application.
In addition to this document, you should read the Spring Security documentation.
5.2. Installing
Add an entry in the dependencies block of your `build.gradle file, changing the version as needed:
dependencies {
...
implementation 'org.apache.grails:grails-spring-security-acl:8.0.0-SNAPSHOT'
...Different Branches are built for different versions of Grails
-
5.0.x: Grails 7
-
4.0: Grails 4 through Grails 6
-
3.3.x: Grails 3.3
-
grails_32: Grails 3.2
-
2.x: Grails 2
Current version (5.0.x) is for Grails 7 only.
For Grails 3.3.x use:
dependencies {
...
implementation 'org.grails.plugins:spring-security-acl:3.2.1'
...For previous Grails 3 versions ( 3.0.x, 3.1.x and 3.2.x ) use:
dependencies {
...
implementation 'org.grails.plugins:spring-security-acl:3.1.1'
...5.2.1. Distribution
Grails Spring Security ACL plugin is distributed in repo.grails.org.
5.2.2. Snapshots
Snapshots are published automatically to repo.grails.org on every successful build.
You can use them by defining this Maven repository inside
the repositories block in your build.gradle:
maven { url "https://repo.grails.org/grails/core" }5.3. Usage
5.3.1. Securing Service Methods
There are two primary use cases for ACL security: determining whether a user is allowed to perform an action on an instance before the action is invoked, and restricting access to single or multiple instances after methods are invoked (this is typically implemented by collection filtering). You can call aclUtilService.hasPermission() explicitly, but this tends to clutter your code with security logic that often has little to do with business logic. Instead, Spring Security provides some convenient annotations that are used to wrap your method calls in access checks.
There are four annotations:
The annotations use security-specific Spring expression language (SpEL) expressions - see the documentation for the available standard and method expressions.
Here’s an example service that manages a Report domain class and uses these annotations and expressions:
import org.springframework.security.access.prepost.PostFilter
import org.springframework.security.access.prepost.PreAuthorize
import org.springframework.security.core.parameters.P
import grails.gorm.transactions.Transactional
import com.yourapp.Report
class ReportService {
@PreAuthorize("hasPermission(#id, 'com.yourapp.Report', read) or " +
"hasPermission(#id, 'com.yourapp.Report', admin)")
Report getReport(@P("id") long id) {
Report.get(id)
}
@Transactional
@PreAuthorize("hasRole('ROLE_USER')")
Report createReport(params) {
Report report = new Report(params)
report.save()
report
}
@PreAuthorize("hasRole('ROLE_USER')")
@PostFilter("hasPermission(filterObject, read) or " +
"hasPermission(filterObject, admin)")
List getAllReports(params = [:]) {
Report.list(params)
}
@Secured(['ROLE_USER', 'ROLE_ADMIN'])
String getReportName(long id) {
Report.get(id).name
}
@Transactional
@PreAuthorize("hasPermission(#report, write) or " +
"hasPermission(#report, admin)")
Report updateReport(@P("report") Report report, params) {
report.properties = params
report.save()
report
}
@Transactional
@PreAuthorize("hasPermission(#report, delete) or " +
"hasPermission(#report, admin)")
void deleteReport(@P("report") Report report) {
report.delete()
}
}The configuration specifies these rules:
-
getReportrequires that the authenticated user haveBasePermission.READorBasePermission.ADMINfor the instance -
createReportrequiresROLE_USER -
getAllReportsrequiresROLE_USERand will have elements removed from the returnedListthat the user doesn’t have an ACL grant for; the user must haveBasePermission.READorBasePermission.ADMINfor each element in the list; elements that don’t have access granted will be removed -
getReportNamerequires that the authenticated user have eitherROLE_USERorROLE_ADMIN(but no ACL rules) -
updateReporthas no role restrictions but must satisfy the requirements of theaclReportWriteVotervoter (which has theACL_REPORT_WRITEconfig attribute), i.e.BasePermission.ADMINISTRATIONorBasePermission.WRITE -
deleteReporthas no role restrictions but must satisfy the requirements of theaclReportDeleteVotervoter (which has theACL_REPORT_DELETEconfig attribute), i.e.BasePermission.ADMINISTRATIONorBasePermission.DELETE
5.3.2. Working with ACLs
Suggested application changes
To properly display access denied exceptions (e.g. when a user tries to perform an action but doesn’t have a grant authorizing it), you should create a mapping in grails-app/controllers/UrlMappings.groovy for error code 403. In addition, it’s possible to trigger a NotFoundException which will create an error 500, but should be treated like a 403 error, so you should add mappings for these conditions:
import org.springframework.security.access.AccessDeniedException
import org.springframework.security.acls.model.NotFoundException
class UrlMappings {
static mappings = {
...
"403"(controller: "errors", action: "error403")
"500"(controller: "errors", action: "error500")
"500"(controller: "errors", action: "error403",
exception: AccessDeniedException)
"500"(controller: "errors", action: "error403",
exception: NotFoundException)
}
}These depend on an ErrorsController:
package com.yourcompany.yourapp
import grails.plugin.springsecurity.annotation.Secured
@Secured('permitAll')
class ErrorsController {
def error403() {}
def error500() {
render view: '/error'
}
}and a grails-app/views/errors/error403.gsp similar to this:
<html>
<head>
<title>Access denied!</title>
<meta name='layout' content='main' />
</head>
<body>
<h1>Access Denied</h1>
<p>We're sorry, but you are not authorized to
perform the requested operation.</p>
</body>
</html>actionSubmit
Grails has a convenient feature where it supports multiple submit actions per form via the <g:actionSubmit> tag. This is done by posting to the index action but with a special parameter that indicates which action to invoke. This is a problem in general for security since any URL rules for edit, delete, save, etc. will be bypassed. It’s an even more significant issue with ACLs because of the way that the access denied exception interacts with the actionSubmit processing. If you don’t make any adjustments for this, your users will see a blank page when they attempt to submit a form and the action is disallowed. The solution is to remove actionSubmit buttons and replace them with regular submit buttons. This requires one form per button, and without adjusting the CSS the buttons will look differently than if they were in-line actionSubmit buttons, but that is fixable with the appropriate CSS changes.
|
Note that this is not an issue when using the generated GSPs in Grails 3 because they’ve been reworked to use the fields plugin, but if you have an older application that you’ve upgraded or if you have GSPs that don’t use the newer approach, you will need to avoid using |
It’s simple to adjust the actionSubmit buttons and you’ll need to change them in show.gsp and edit.gsp; list.gsp (or index.gsp) and show.gsp don’t need any changes. In show.gsp, replace the two actionSubmit buttons with these two forms (maintain the g:message tags; the strings are hard-coded here to reduce clutter):
<div class="buttons">
<g:form action='edit'>
<g:hiddenField name="id" value="${reportInstance?.id}" />
<span class="button">
<g:submitButton class="edit" name="Edit" />
</span>
</g:form>
<g:form action='delete'>
<g:hiddenField name="id" value="${reportInstance?.id}" />
<span class="button">
<g:submitButton class="delete" name="Delete"
onclick="return confirm('Are you sure?');" />
</span>
</g:form>
</div>In edit.gsp, change the <form> tag to
<g:form action='update'>and convert the update button to a regular submit button:
<div class="buttons">
<span class="button">
<g:submitButton class="save" name="Update" />
</span>
</div>and move the delete button out of the form into its own form just below the main form:
<g:form action='delete'>
<g:hiddenField name="id" value="${reportInstance?.id}" />
<div class="buttons">
<span class="button">
<g:submitButton class="delete" name="Delete"
onclick="return confirm('Are you sure?');" />
</span>
</div>
</g:form>5.3.3. Domain Classes
The plugin uses domain classes to manage database state. Ordinarily the database structure isn’t all that important, but to be compatible with the traditional JDBC-based Spring Security code, the domain classes are configured to generate the table and column names that are used there.
The plugin classes related to persistence use these classes, so they’re included in the plugin but can be overridden by running the s2-create-acl-domains script.
As you can see, the database structure is highly normalized.
AclClass
The AclClass domain class contains entries for the names of each application domain class that has associated permissions:
package grails.plugin.springsecurity.acl
class AclClass {
String className
@Override
String toString() {
"AclClass id $id, className $className"
}
static mapping = {
className column: 'class'
version false
}
static constraints = {
className unique: true, blank: false
}
}AclSid
The AclSid domain class contains entries for the names of grant recipients (a principal or authority - SID is an acronym for "security identity"). These are typically usernames (where principal is true) but can also be a GrantedAuthority (role name, where principal is false). When granting permissions to a role, any user with that role receives that permission:
package grails.plugin.springsecurity.acl
class AclSid {
String sid
boolean principal
@Override
String toString() {
"AclSid id $id, sid $sid, principal $principal"
}
static mapping = {
version false
}
static constraints = {
principal unique: 'sid'
sid blank: false, size: 1..255
}
}AclObjectIdentity
The AclObjectIdentity domain class contains entries representing individual domain class instances (OIDs). It has a field for the instance id (objectId) and domain class (aclClass) that uniquely identify the instance. In addition there are optional nullable fields for the parent OID (parent) and owner (owner). There’s also a flag (entriesInheriting) to indicate whether ACL entries can inherit from a parent ACL.
package grails.plugin.springsecurity.acl
class AclObjectIdentity extends AbstractAclObjectIdentity {
Long objectId
@Override
String toString() {
"AclObjectIdentity id $id, aclClass $aclClass.className, " +
"objectId $objectId, entriesInheriting $entriesInheriting"
}
static mapping = {
version false
aclClass column: 'object_id_class'
owner column: 'owner_sid'
parent column: 'parent_object'
objectId column: 'object_id_identity'
}
static constraints = {
objectId unique: 'aclClass'
}
}AclObjectIdentity actually extends a base class, AbstractAclObjectIdentity:
abstract class AbstractAclObjectIdentity {
AclClass aclClass
AclObjectIdentity parent
AclSid owner
boolean entriesInheriting
static constraints = {
parent nullable: true
owner nullable: true
}
}By default it’s assumed that domain classes have a numeric primary key, but that’s not required. So the default implementation has a Long objectId field, but if you want to support other types of ids you can change that field and retain the other standard functionality from the base class.
AclEntry
Finally, the AclEntry domain class contains entries representing grants (or denials) of a permission on an object instance to a recipient. The aclObjectIdentity field references the domain class instance (since an instance can have many granted permissions). The sid field references the recipient. The granting field determines whether the entry grants the permission (true) or denies it (false). The aceOrder field specifies the position of the entry, which is important because the entries are evaluated in order and the first matching entry determines whether access is allowed. auditSuccess and auditFailure determine whether to log success and/or failure events (these both default to false).
The mask field holds the permission. This can be a source of confusion because the name (and the Spring Security documentation) indicates that it’s a bit mask. A value of 1 indicates permission A, a value of 2 indicates permission B, a value of 4 indicates permission C, a value of 8 indicates permission D, etc. So you would think that a value of 5 would indicate a grant of both permission A and C. Unfortunately this is not the case. There is a CumulativePermission class that supports this, but the standard classes don’t support it (AclImpl.isGranted() checks for == rather than using | (bitwise or) so a combined entry would never match). So rather than grouping all permissions for one recipient on one instances into a bit mask, you must create individual records for each.
package grails.plugin.springsecurity.acl
class AclEntry {
AclObjectIdentity aclObjectIdentity
int aceOrder
AclSid sid
int mask
boolean granting
boolean auditSuccess
boolean auditFailure
@Override
String toString() {
"AclEntry id $id, aceOrder $aceOrder, mask $mask, granting $granting, " +
"aclObjectIdentity $aclObjectIdentity"
}
static mapping = {
version false
sid column: 'sid'
aclObjectIdentity column: 'acl_object_identity'
}
static constraints = {
aceOrder unique: 'aclObjectIdentity'
}
}5.3.4. Configuration
Creating, editing, or deleting permissions requires an authenticated user. In most cases if the authenticated user is the owner of the ACL then access is allowed, but granted roles also affect whether access is allowed. The default required role is ROLE_ADMIN for all actions, but this can be configured in grails-app/conf/application.groovy. This table summarizes the attribute names and the corresponding actions that are allowed for it:
| Attribute | Affected methods |
|---|---|
|
|
|
|
|
|
You can leave the attributes set to ROLE_ADMIN or change them to have separate values, e.g.
grails.plugin.springsecurity.acl.authority.
modifyAuditingDetails = 'ROLE_ACL_MODIFY_AUDITING'
grails.plugin.springsecurity.acl.authority.
changeOwnership = 'ROLE_ACL_CHANGE_OWNERSHIP'
grails.plugin.springsecurity.acl.authority.
changeAclDetails = 'ROLE_ACL_CHANGE_DETAILS'Run-As Authentication Replacement
There are also two options to configure Run-As Authentication Replacement:
| Attribute | Meaning |
|---|---|
|
change to |
|
a shared key between the two standard implementation classes, used to verify that a third party hasn’t created a token for the user; should be changed from its default value |
Example:
grails.plugin.springsecurity.useRunAs = true
grails.plugin.springsecurity.runAs.key = 'your run-as key'5.3.5. Run-As Authentication Replacement
Although not strictly related to ACLs, the plugin implements Run-As Authentication Replacement since it’s related to method security in general. This feature is similar to the Switch User feature of the Spring Security Core plugin, but instead of running as another user until you choose to revert to your original Authentication, the temporary authentication switch only lasts for one method invocation.
For example, in this service someMethod() requires that the authenticated user have ROLE_ADMIN and will also be granted ROLE_RUN_AS_SUPERUSER for the duration of the method only:
class SecureService {
@Secured(['ROLE_ADMIN', 'RUN_AS_SUPERUSER'])
def someMethod() {
...
}
}5.3.6. Custom Permissions
By default there are 5 permissions available from the org.springframework.security.acls.domain. BasePermission class: READ, WRITE, CREATE, DELETE, and ADMINISTRATION. You can also add your own permissions if these aren’t sufficient.
The easiest approach is to create a subclass of BasePermission and add your new permissions there. This way you retain the default permissions and can use them if you need. For example, here’s a subclass that adds a new APPROVE permission:
package com.mycompany.myapp;
import org.springframework.security.acls.domain.BasePermission;
import org.springframework.security.acls.model.Permission;
public class MyPermission extends BasePermission {
public static final Permission APPROVE = new MyPermission(1 << 5, 'V');
protected MyPermission(int mask) {
super(mask);
}
protected MyPermission(int mask, char code) {
super(mask, code);
}
}It sets the mask value to 32 (1 << 5) since the values up to 16 are defined in the base class.
To use your class instead of the default, specify it in with the grails.plugin.springsecurity.acl.permissionClass attribute either as a Class or a String, for example
import com.mycompany.myapp.MyPermissions
...
grails.plugin.springsecurity.acl. permissionClass = MyPermissionsor
grails.plugin.springsecurity.acl.permissionClass = 'com.mycompany.myapp.MyPermissions'You can also override the aclPermissionFactory bean in grails-app/conf/spring/resources.groovy, keeping the org.springframework.security.acls.domain. DefaultPermissionFactory class but passing your class as the constructor argument to keep it from defaulting to BasePermission, or do a more complex override to more fully reconfigure the behavior:
import org.springframework.security.acls.domain.DefaultPermissionFactory
import com.mycompany.myapp.MyPermission
beans = {
aclPermissionFactory(DefaultPermissionFactory, MyPermission)
}Once this is done you can use the permission like any other, specifying its quoted lowercase name in an expression, e.g.
@PreAuthorize("hasPermission(#id, 'com.testacl.Report', 'approve')")
Report get(@P("id") long id) {
Report.get id
}5.4. Tutorial
First create a test application:
$ grails create-app acltest $ cd acltest
Add a dependency for the plugin by adding it to the dependencies block in build.gradle:
dependencies {
...
implementation 'org.grails.plugins:spring-security-acl:{project-version}'
...
}and run the compile command to resolve the dependencies:
$ grails compile
This will transitively install the Spring Security Core plugin, so you’ll need to configure that by running the s2-quickstart script:
$ grails s2-quickstart com.testacl User Role
The ACL support uses domain classes and includes them in the JAR file, but to allow customizing them (e.g. to enable Hibernate 2nd-level caching) there’s a script that copies the domain classes into your application, s2-create-acl-domains. There’s no need to run this script if the default configuration is sufficient.
Note that you cannot change the domain class names or packages since the plugin references them by name. Grails allows you to override plugin artifacts by creating (or copying and modifying existing) classes with the same name and package in your application.
For portability, the domain class mappings are configured to generate the same DDL as is required by the standard Spring Security JDBC implementation.
We’ll need a domain class to test with, so create a Report domain class:
$ grails create-domain-class com.testacl.Report
and add a name property for testing:
package com.testacl
class Report {
String name
}Next we’ll create a service to test ACLs:
$ grails create-service com.testacl.Report
and add some methods that work with ``Report``s:
package com.testacl
import static org.springframework.security.acls.domain.BasePermission.ADMINISTRATION
import org.springframework.security.access.prepost.PostFilter
import org.springframework.security.access.prepost.PreAuthorize
import org.springframework.security.acls.domain.DefaultPermissionFactory
import org.springframework.security.acls.model.AccessControlEntry
import org.springframework.security.acls.model.MutableAcl
import org.springframework.security.acls.model.Permission
import org.springframework.security.acls.model.Sid
import org.springframework.security.core.parameters.P
import grails.compiler.GrailsCompileStatic
import grails.plugin.springsecurity.SpringSecurityService
import grails.plugin.springsecurity.acl.AclService
import grails.plugin.springsecurity.acl.AclUtilService
import grails.gorm.transactions.Transactional
@GrailsCompileStatic
class ReportService {
DefaultPermissionFactory aclPermissionFactory
AclService aclService
AclUtilService aclUtilService
SpringSecurityService springSecurityService
void addPermission(Report report, String username, int permission) {
addPermission report, username, aclPermissionFactory.buildFromMask(permission)
}
@PreAuthorize('hasPermission(#report, admin)')
@Transactional
void addPermission(@P("report") Report report, String username, Permission permission) {
aclUtilService.addPermission report, username, permission
}
@Transactional
@PreAuthorize('hasRole("ROLE_USER")')
Report create(String name) {
Report report = new Report(name: name).save(failOnError: true)
// Grant the current principal administrative permission
addPermission report, springSecurityService.authentication.name, ADMINISTRATION
report
}
@PreAuthorize('hasPermission(#id, "com.testacl.Report", read) or hasPermission(#id, "com.testacl.Report", admin)')
Report get(@P("id") long id) {
Report.get id
}
@PreAuthorize('hasRole("ROLE_USER")')
@PostFilter('hasPermission(filterObject, read) or hasPermission(filterObject, admin)')
List<Report> list(Map params) {
Report.list params
}
int count() {
Report.count()
}
@Transactional
@PreAuthorize('hasPermission(#report, write) or hasPermission(#report, admin)')
void update(@P("report") Report report, String name) {
report.name = name
}
@Transactional
@PreAuthorize('hasPermission(#report, delete) or hasPermission(#report, admin)')
void delete(@P("report") Report report) {
report.delete()
// Delete the ACL information as well
aclUtilService.deleteAcl report
}
@Transactional
@PreAuthorize('hasPermission(#report, admin)')
void deletePermission(@P("report") Report report, Sid recipient, Permission permission) {
MutableAcl acl = (MutableAcl)aclUtilService.readAcl(report)
// Remove all permissions associated with this particular
// recipient (string equality to KISS)
acl.entries.eachWithIndex { AccessControlEntry entry, int i ->
if (entry.sid == recipient && entry.permission == permission) {
acl.deleteAce i
}
}
aclService.updateAcl acl
}
}The configuration specifies these rules:
-
addPermissionrequires that the authenticated user have admin permission on the report instance to grant a permission to someone else -
createrequires that the authenticated user haveROLE_USER -
getrequires that the authenticated user have read or admin permission on the specified Report -
listrequires that the authenticated user have ROLE_USER and read or admin permission on each returned Report; instances that don’t have granted permissions will be removed from the returned List -
counthas no restrictions -
updaterequires that the authenticated user have write or admin permission on the report instance to edit it -
deleterequires that the authenticated user have delete or admin permission on the report instance to edit it -
deletePermissionrequires that the authenticated user have admin permission on the report instance to delete a grant
To test this out we’ll need some users; create a service to create users and their grants:
$ grails create-service com.testacl.SampleData
and add this code:
package com.testacl
import static org.springframework.security.acls.domain.BasePermission.ADMINISTRATION
import static org.springframework.security.acls.domain.BasePermission.READ
import static org.springframework.security.acls.domain.BasePermission.WRITE
import org.springframework.security.authentication.UsernamePasswordAuthenticationToken
import org.springframework.security.core.authority.AuthorityUtils
import org.springframework.security.core.context.SecurityContextHolder as SCH
import grails.gorm.transactions.Transactional
@Transactional
class SampleDataService {
def aclService
def aclUtilService
def objectIdentityRetrievalStrategy
void createSampleData() {
createUsers()
loginAsAdmin()
grantPermissions()
// logout
SCH.clearContext()
}
private void loginAsAdmin() {
// have to be authenticated as an admin to create ACLs
SCH.context.authentication = new UsernamePasswordAuthenticationToken(
'admin', 'admin123',
AuthorityUtils.createAuthorityList('ROLE_ADMIN'))
}
private void createUsers() {
def roleAdmin = new Role(authority: 'ROLE_ADMIN').save()
def roleUser = new Role(authority: 'ROLE_USER').save()
3.times {
long id = it + 1
def user = new User("user$id", "password$id").save()
UserRole.create user, roleUser
}
def admin = new User('admin', 'admin123').save()
UserRole.create admin, roleUser
UserRole.create admin, roleAdmin
}
private void grantPermissions() {
def reports = []
100.times {
long id = it + 1
def report = new Report(name: "report$id").save()
reports << report
aclService.createAcl(
objectIdentityRetrievalStrategy.getObjectIdentity(report))
}
// grant user 1 admin on 11,12 and read on 1-67
aclUtilService.addPermission reports[10], 'user1', ADMINISTRATION
aclUtilService.addPermission reports[11], 'user1', ADMINISTRATION
67.times {
aclUtilService.addPermission reports[it], 'user1', READ
}
// grant user 2 read on 1-5, write on 5
5.times {
aclUtilService.addPermission reports[it], 'user2', READ
}
aclUtilService.addPermission reports[4], 'user2', WRITE
// user 3 has no grants
// grant admin admin on all
for (report in reports) {
aclUtilService.addPermission report, 'admin', ADMINISTRATION
}
// grant user 1 ownership on 1,2 to allow the user to grant
aclUtilService.changeOwner reports[0], 'user1'
aclUtilService.changeOwner reports[1], 'user1'
}
}and configure BootStrap.groovy to call the service at startup:
class BootStrap {
def sampleDataService
def init = {
sampleDataService.createSampleData()
}
}To have a UI to test with, let’s create a Report controller and GSPs:
$ grails generate-all com.testacl.Report
But to use the controller, it will have to be reworked to use ReportService. It’s a good idea to put all create/edit/delete code in a transactional service, but in this case we need to move all database access to the service to ensure that appropriate access checks are made:
package com.testacl
import org.springframework.dao.DataIntegrityViolationException
import grails.plugin.springsecurity.annotation.Secured
@Secured('ROLE_USER')
class ReportController {
def reportService
def index() {
params.max = Math.min(params.max ? params.int('max') : 10, 100)
[reportList: reportService.list(params),
reportCount: reportService.count()]
}
def create() {
[report: new Report(params)]
}
def save() {
def report = reportService.create(params.name)
if (!renderWithErrors('create', report)) {
redirectShow "Report $report.id created", report.id
}
}
def show() {
def report = findInstance()
if (!report) return
[report: report]
}
def edit() {
def report = findInstance()
if (!report) return
[report: report]
}
def update() {
def report = findInstance()
if (!report) return
reportService.update report, params.name
if (!renderWithErrors('edit', report)) {
redirectShow "Report $report.id updated", report.id
}
}
def delete() {
def report = findInstance()
if (!report) return
try {
reportService.delete report
flash.message = "Report $params.id deleted"
redirect action: 'list'
}
catch (DataIntegrityViolationException e) {
redirectShow "Report $params.id could not be deleted", params.id
}
}
def grant() {
def report = findInstance()
if (!report) return
if (!request.post) {
return [report: report]
}
reportService.addPermission(report, params.recipient,
params.int('permission'))
redirectShow "Permission $params.permission granted on Report $report.id " +
"to $params.recipient", report.id
}
private Report findInstance() {
def report = reportService.get(params.long('id'))
if (!report) {
flash.message = "Report not found with id $params.id"
redirect action: 'list'
}
report
}
private void redirectShow(message, id) {
flash.message = message
redirect action: 'show', id: id
}
private boolean renderWithErrors(String view, Report report) {
if (report.hasErrors()) {
render view: view, model: [report: report]
return true
}
false
}
}Note that the controller is annotated to require either ROLE_USER or ROLE_ADMIN. Since services have nothing to do with HTTP, when access is blocked you cannot be redirected to the login page as when you try to access a URL that requires an authentication. So you need to configure URLs with similar role requirements to give the user a chance to attempt a login before calling secured service methods.
Finally, we’ll make a few adjustments so errors are handled gracefully.
First, edit grails-app/controllers/UrlMappings.groovy and add some error code mappings:
import org.springframework.security.access.AccessDeniedException
import org.springframework.security.acls.model.NotFoundException
class UrlMappings {
static mappings = {
...
"403"(controller: 'errors', action: 'error403')
"404"(controller: 'errors', action: 'error404')
"500"(controller: 'errors', action: 'error500')
"500"(controller: 'errors', action: 'error403',
exception: AccessDeniedException)
"500"(controller: 'errors', action: 'error403',
exception: NotFoundException)
}
}Then create the ErrorsController that these reference:
$ grails create-controller com.testacl.Errors
and add this code:
package com.testacl
import grails.plugin.springsecurity.annotation.Secured
@Secured('permitAll')
class ErrorsController {
def error403() {}
def error404() {
render view: '/notFound'
}
def error500() {
render view: '/error'
}
}and we’ll need to create the GSP for the error403 action in grails-app/views/errors/error403.gsp:
<html>
<head>
<title>Access denied!</title>
<meta name='layout' content='main' />
</head>
<body>
<h1>Access Denied</h1>
<p>We're sorry, but you are not authorized
to perform the requested operation.</p>
</body>
</html>5.4.1. actionSubmit issues
Grails has a convenient feature where it supports multiple submit actions per form via the <g:actionSubmit> tag. This is done by posting to the index action but with a special parameter that indicates which action to invoke. This is a problem in general for security since any URL rules for edit, delete, save, etc. will be bypassed. It’s an even more significant issue with ACLs because of the way that the access denied exception interacts with the actionSubmit processing. If you don’t make any adjustments for this, your users will see a blank page when they attempt to submit a form and the action is disallowed. The solution is to remove actionSubmit buttons and replace them with regular submit buttons. This requires one form per button, and without adjusting the CSS the buttons will look differently than if they were in-line actionSubmit buttons, but that is fixable with the appropriate CSS changes.
|
Note that this is not an issue when using the generated GSPs in Grails 3 because they’ve been reworked to use the fields plugin, but if you have an older application that you’ve upgraded or if you have GSPs that don’t use the newer approach, you will need to avoid using |
It’s simple to adjust the actionSubmit buttons and you’ll need to change them in show.gsp and edit.gsp; list.gsp (or index.gsp) and show.gsp don’t need any changes. In show.gsp, replace the two actionSubmit buttons with these two forms (maintain the g:message tags; the strings are hard-coded here to reduce clutter):
<div class="buttons">
<g:form action='edit'>
<g:hiddenField name="id" value="${reportInstance?.id}" />
<span class="button">
<g:submitButton class="edit" name="Edit" />
</span>
</g:form>
<g:form action='delete'>
<g:hiddenField name="id" value="${reportInstance?.id}" />
<span class="button">
<g:submitButton class="delete" name="Delete"
onclick="return confirm('Are you sure?');" />
</span>
</g:form>
</div>In grails-app/views/report/edit.gsp, change the <form> tag to
<g:form action='update'>and convert the update button to a regular submit button:
<div class="buttons">
<span class="button"><g:submitButton class="save" name="Update" /></span>
</div>and move the delete button out of the form into its own form just below the main form:
<g:form action='delete'>
<g:hiddenField name="id" value="${reportInstance?.id}" />
<div class="buttons">
<span class="button">
<g:submitButton class="delete" name="Delete"
onclick="return confirm('Are you sure?');" />
</span>
</div>
</g:form>list.gsp (or index.gsp) and show.gsp are fine as they are.
Finally, to make it easier to log out (by default POST is required, so typical link that uses GET won’t work), add this to grails-app/views/layouts/main.gsp before the <g:layoutBody/> tag:
<sec:ifLoggedIn>
<g:form controller='logout'>
Logged in as <sec:username/> - <g:submitButton name='logout' value='Logout'/>
</g:form>
</sec:ifLoggedIn>
<sec:ifNotLoggedIn>
<g:link controller='login' action='auth'>Login</g:link>
</sec:ifNotLoggedIn>and you’ll see a link to login if not authenticated, and a button to click to logout if you are.
5.4.2. Testing
Now start the app:
$ grails run-app
and open http://localhost:8080/report.
|
If you see the error |
Login as user1/password1 and you should see the first page of results. But if you click on page 7 or higher, you’ll see that you can only see a subset of the ``Report``s. This illustrates one issue with using ACLs to restrict view access to instances; you would have to add joins in your query to the ACL database tables to get an accurate count of the total number of visible instances.
Click on any of the report instance links (e.g. http://localhost:8080/report/show/63) to verify that you can view the instance. You can test that you have no view access to the filtered instances by navigating to http://localhost:8080/report/show/83.
Verify that user1 has admin permission on report #11 by editing it and deleting it.
Verify that user1 doesn’t have admin permission on report #13 by trying to editing or delete it and you should see the error page when you submit the form.
Logout (by navigating to http://localhost:8080/logout) and login as user2/password2. You should only see the first five reports. Verify that you can edit #5 but not any of the others, and that you can’t delete any.
Finally. logout and login as admin/admin123. You should be able to view, edit, and delete all instances.
5.5. Sample Application
Working with ACLs in Spring Security is complex but it will be easier to understand with a sample application. To help get you started, there’s a Grails application that uses the plugin to test with. It’s based on the Spring Security Contacts sample application. But where the Spring Security application uses SpringMVC, JDBC, etc., this application is 100% Grails. The application is available at GitHub.
Clone or fork the repo and start the app:
$ ./gradlew bootRun
Open http://localhost:8080/ in a browser to get started. The main functionality is at http://localhost:8080/secure. The login page lists the various configured users and their passwords; the "rod" user is an admin and has full access and the other users have various grants and ownership.
5.6. AclUtilService
5.6.1. addPermission
Grant a permission on a domain object instance to a recipient.
aclUtilService.addPermission Report, 1124, 'user123', BasePermission.WRITE
aclUtilService.addPermission reportInstance, 'user123', BasePermission.WRITEaddPermission has three signatures:
void addPermission(Class<?> domainClass, long id, recipient, Permission permission)
void addPermission(domainObject, recipient, Permission permission)
void addPermission(ObjectIdentity oid, recipient, Permission permission)-
domainClass- the domain class, used when specifying the class and id -
id- the instance id, used when specifying the class and id -
domainObject- the domain class instance, used when the instance is available -
recipient- the grantee; can be a String (username or role name), or aSid, or anAuthentication -
permission- the permission to grant
5.6.2. changeOwner
Change the ACL owner for a domain class instance.
aclUtilService.changeOwner reportInstance, 'user123'void changeOwner(domainObject, String newUsername)-
domainObject- the domain class instance -
newUsername- the username of the new owner
5.6.3. deleteAcl
Deletes the ACL for a domain class instance.
aclUtilService.deleteAcl reportInstancevoid deleteAcl(domainObject)-
domainObject- the domain class instance
5.6.4. deletePermission
Removes a granted permission.
aclUtilService.deletePermission Report, 42, 'user123', BasePermission.WRITE
aclUtilService.deletePermission reportInstance, 'user123', BasePermission.WRITEvoid deletePermission(domainObject, recipient, Permission permission)
void deletePermission(Class<?> domainClass, long id, recipient, Permission permission)-
domainClass- the domain class, used when specifying the class and id -
id- the instance id, used when specifying the class and id -
domainObject- the domain class instance, used when the instance is available -
recipient- the grantee; can be a String (username or role name), or aSid, or anAuthentication -
permission- the permission to remove
5.6.5. hasPermission
Check if the authentication has grants for the specified permission(s) on the domain class instance.
if (aclUtilService.hasPermission(auth, reportInstance, BasePermission.WRITE)) {
...
}boolean hasPermission(Authentication authentication, domainObject, Permission... permissions)
boolean hasPermission(Authentication authentication, domainObject, List<Permission> permissions)-
authentication- an authentication representing a user and associated roles -
domainObject- the domain class instance -
permissions- one or more permissions to check
5.6.6. readAcl
Retrieves the ACL for a domain class instance.
def acl = aclUtilService.readAcl(reportInstance)
def acl = aclUtilService.readAcl(Report, 42)Acl readAcl(domainObject)
Acl readAcl(Class<?> domainClass, id)-
domainClass- the domain class, used when specifying the class and id -
id- the instance id, used when specifying the class and id -
domainObject- the domain class instance, used when the instance is available
5.7. Scripts
5.7.1. s2-create-acl-domains
Creates the domain classes that manage ACL data.
grails s2-create-acl-domains
The plugin includes the required ACL domain classes, but if you want to customize them (for example to configure 2nd-level caching) you can use this script to generate the same domain classes in your application’s grails-app/domain folder to allow minor customization.
5.8. Tag Libraries
5.8.1. permitted
Renders the body if the user is granted the specified permission(s)
Single String:
<sec:permitted className='com.foo.Report' id='${reportId}' permission='read'>
the body content
</sec:permitted>Multiple String:
<sec:permitted className='com.foo.Report' id='${reportId}' permission='write,read'>
the body content
</sec:permitted>Single Permission:
<%@ page import="org.springframework.security.acls.domain.BasePermission" %>
<sec:permitted className='com.foo.Report' id='${reportId}' permission='${BasePermission.READ}'>
the body content
</sec:permitted>List of Permission:
<%@ page import="org.springframework.security.acls.domain.BasePermission" %>
<sec:permitted className='com.foo.Report' id='${reportId}' permission='${[BasePermission.WRITE,BasePermission.READ]}'>
the body content
</sec:permitted>Single mask int:
<sec:permitted className='com.foo.Report' id='${reportId}' permission='${1}'>
the body content
</sec:permitted>Multiple mask int:
<sec:permitted className='com.foo.Report' id='${reportId}' permission='2,1'>
the body content
</sec:permitted>Renders the body if the user has grants for the specified permissions. Permissions are specified in the "permission" attribute and can be a single Permission, an array of Permission, an int/Integer (which is assumed to be a mask), a String (which can be a single name, or a comma-delimited list of names, or a comma-delimited list of masks), or a List of any of these.
5.8.2. notPermitted
Renders the body if the user is not granted the specified permission(s)
Single String:
<sec:notPermitted className='com.foo.Report' id='${reportId}' permission='read'>
the body content
</sec:notPermitted>Multiple String:
<sec:notPermitted className='com.foo.Report' id='${reportId}' permission='read,write'>
the body content
</sec:notPermitted>Single Permission:
<%@ page import="org.springframework.security.acls.domain.BasePermission" %>
<sec:notPermitted className='com.foo.Report' id='${reportId}' permission='${BasePermission.READ}'>
the body content
</sec:notPermitted>List of Permission:
<%@ page import="org.springframework.security.acls.domain.BasePermission" %>
<sec:notPermitted className='com.foo.Report' id='${reportId}' permission='${[BasePermission.WRITE,BasePermission.READ]}'>
the body content
</sec:notPermitted>Single mask int:
<sec:notPermitted className='com.foo.Report' id='${reportId}' permission='${1}'>
the body content
</sec:notPermitted>Multiple mask int:
<sec:notPermitted className='com.foo.Report' id='${reportId}' permission='2,1'>
the body content
</sec:notPermitted>Renders the body if the user does not have grants for the specified permissions. Permissions are specified in the "permission" attribute and can be a single Permission, an array of Permission, an int/Integer (which is assumed to be a mask), a String (which can be a single name, or a comma-delimited list of names, or a comma-delimited list of masks), or a List of any of these.
5.9. History
-
Apr 18, 2019
-
4.0.0.M2 release
-
-
Apr 8, 2019
-
4.0.0.M1 release
-
-
Feb 15, 2018
-
3.2.1 release
-
-
Dec 4, 2017
-
3.2.0 release
-
-
May 4, 2017
-
3.1.1 release
-
-
December 20, 2015
-
3.0.1 release
-
-
December 8, 2015
-
3.0.0 release
-
-
August 25, 2015
-
3.0.0.M1 release
-
-
November 17, 2014
-
2.0-RC2 release
-
-
October 08, 2013
-
2.0-RC1 release
-
-
August 20, 2012
-
1.1.1 release
-
-
February 16, 2011
-
1.1 release
-
-
February 7, 2011
-
1.0.2 release
-
-
August 1, 2010
-
1.0.1 release
-
-
July 27, 2010
-
1.0 release
-
-
May 22, 2010
-
initial 0.1 release
-
5.9.1. Authors
Burt Beckwith
5.9.2. Previous work
Stephan February did the first work adding ACL support to the Acegi plugin. At the time the plugin was based on Acegi 1.0.x and around the same time the plugin was converted to use Spring Security 2.0 and the ACL support wasn’t converted to use the new package layout and approach.
Work was done in 2009 to create a GORM-based implementation (the standard Spring Security implementation uses JDBC). Around the same time, Phillip Merensky mentioned on the Grails mailing list that he was working on an implementation. He wrote about his approach here and this was merged in with the other approach but never formally released.
This plugin builds on that work but is based on Spring Security 4 and Spring 4.
5.10. API Reference
The ACL plugin Groovydoc API documentation is available at ACL Plugin API Reference.
6. CAS Plugin
6.1. Introduction to the Spring Security CAS Plugin
The CAS plugin adds CAS single sign-on support to a Grails application that uses Spring Security. It depends on the Spring Security Core plugin.
Once you have configured a CAS server and have configured your Grails application(s) as clients, you can authenticate to any application that is a client of the CAS server and be automatically authenticated to all other clients.
6.2. Usage
|
Configuring your CAS server is beyond the scope of this document. There are many different approaches and this will most likely be done by IT staff. It’s assumed here that you already have a running CAS server. |
CAS is a popular single sign-on implementation. It’s open source and has an Apache-like license, and is easy to get started with but is also highly configurable. In addition it has clients written in Java, .Net, PHP, Perl, and other languages.
6.2.1. Installation
There isn’t much that you need to do in your application to be a CAS client. Add a dependency in build.gradle for this plugin:
dependencies {
...
implementation 'org.apache.grails:grails-spring-security-cas:8.0.0-SNAPSHOT'
...then configure any required parameters and whatever optional parameters you want in application.yml or application.groovy. These are described in detail in the Configuration section but typically you only need to set these properties:
grails:
plugin:
springsecurity:
cas:
loginUri: /login
serviceUrl: http://localhost:8080/login/cas
serverUrlPrefix: https://your-cas-server/cas
proxyCallbackUrl: http://localhost:8080/secure/receptor
proxyReceptorUrl: /secure/receptor6.2.2. Single Signout
Single signout is enabled by default and enables signing out for all CAS-managed applications with one logout. This works best in the plugin when combined with the afterLogoutUrl parameter, for example:
grails:
plugin:
springsecurity:
logout:
afterLogoutUrl: https://your-cas-server/cas/logout?url=http://localhost:8080/With this configuration, when a user logs out locally by navigating to /logout/ they’ll then be redirected to the CAS server’s logout URL. This request includes a local URL to redirect back afterwards. When the whole process is finished they’ll be logged out locally and at the CAS server, so subsequent secure URLs at the local server or other CAS-managed servers will require a new login.
If you don’t want the single signout filter registered, you can disable the feature:
grails:
plugin:
springsecurity:
cas:
useSingleSignout: false6.3. Configuration
There are a few configuration options for the CAS plugin.
|
All of these property overrides must be specified in |
| Name | Default | Meaning |
|---|---|---|
cas.active |
|
whether the plugin is enabled (e.g. to disable per-environment) |
cas.serverUrlPrefix |
|
the root of all CAS server URLs, e.g. |
cas.serverUrlEncoding |
UTF-8 |
encoding for the server URL |
cas.loginUri |
|
the login URI, relative to |
cas.sendRenew |
|
if true, ticket validation will only succeed if it was issued from a login form, but will fail if it was issued from a single sign-on session. Analogous to |
cas.serviceUrl |
|
the local application login URL, e.g. |
cas.key |
grails-spring-security-cas, should be changed |
used by |
cas.artifactParameter |
|
the ticket login url parameter |
cas.serviceParameter |
|
the service login url parameter |
cas.filterProcessesUrl |
/login/cas |
the URL that the filter intercepts for login |
cas.proxyCallbackUrl |
|
proxy callback url, e.g. http://localhost:8080/secure/receptor |
cas.proxyReceptorUrl |
|
proxy receptor url, e.g. /secure/receptor |
cas.useSingleSignout |
|
if |
6.4. Release History
Please check release notes at https://github.com/apache/grails-spring-security/releases for release history of future releases.
-
Version 3.1.0
-
released Oct 3, 2017
-
-
Version 2.0.1
-
released Oct 3, 2017
-
-
Version 3.0.1
-
released May 2, 2017
-
-
Version 3.0.0
-
released December 8, 2015
-
-
Version 2.0.0
-
released December 7, 2015
-
-
Version 3.0.0.M1
-
released September 23, 2015
-
-
Version 2.0-RC1
-
released November 11, 2013
-
-
Version 1.0.4
-
released July 11, 2012
-
-
Version 1.0.3
-
released July 4, 2012
-
-
Version 1.0.2
-
released February 12, 2011
-
-
Version 1.0.1
-
released September 1, 2010
-
-
Version 1.0
-
released July 27, 2010
-
-
Version 0.1
-
released June 18, 2010
-
6.5. API Reference
The CAS plugin Groovydoc API documentation is available at CAS Plugin API Reference.
7. LDAP Plugin
7.1. Introduction to the Spring Security LDAP Plugin
The LDAP plugin adds support for LDAP and Active Directory authentication to a Grails application that uses Spring Security. It depends on the Spring Security Core plugin.
Once you have configured your Grails application as an LDAP client you can delegate authentication to LDAP and not have to manage users' authentication information in your application. By default, roles are inferred from LDAP group membership and you can store additional application-specific roles in your database.
Please refer to the Spring Security LDAP documentation for details of the underlying implementation.
7.2. Usage
|
Configuring your LDAP server is beyond the scope of this document. There are many different approaches and this will most likely be done by IT staff. It’s assumed here that you already have a running LDAP or Active Directory server. |
7.2.1. Installation
Declare dependency
There isn’t much that you need to do in your application to use LDAP. Add a dependency in build.gradle for this plugin:
dependencies {
...
implementation 'org.apache.grails:grails-spring-security-ldap:8.0.0-SNAPSHOT'
}Grails Spring Security LDAP plugin has a transitive dependency to Grails Spring Security Core. If you want to control which version is being used for Grails Spring Security Core you can do:
dependencies {
...
implementation "org.apache.grails:grails-spring-security:8.0.0-SNAPSHOT"
implementation "org.apache.grails:grails-spring-security-ldap:8.0.0-SNAPSHOT"
}Configure parameters
Configure any required parameters and any optional parameters you want in application.yml or application.groovy. These are described in detail in the Configuration section, but typically you only need to set these properties:
grails:
plugin:
springsecurity:
ldap:
context:
managerDn: 'uid=admin,ou=system'
managerPassword: secret
server: 'ldap://localhost:10389'
authorities:
groupSearchBase: 'ou=groups,dc=yourcompany,dc=com'
search:
base: 'dc=yourcompany,dc=com'Often all role information will be stored in LDAP, but if you want to also assign application-specific roles to users in the database, then add this
grails:
plugin:
springsecurity:
ldap:
authorities:
retrieveDatabaseRoles: trueto do an extra database lookup after the LDAP lookup.
Depending on how passwords are hashed in LDAP you may also need to configure the hash algorithm, e.g.
grails:
plugin:
springsecurity:
password:
algorithm: 'SHA-256'7.2.2. Sample config settings for Active Directory
Active directory is somewhat different although still relatively painless if you know what you are doing. Use these example configuration options to get started (tested in Windows Server 2008):
|
Replace the placeholders inside [] brackets with appropriate values and remove the [] chars |
grails:
plugin:
springsecurity:
# LDAP config
providerNames: ['ldapAuthProvider', 'anonymousAuthenticationProvider'] # specify this when you want to skip attempting to load from db and only use LDAP
ldap:
context:
managerDn: '[distinguishedName]'
managerPassword: '[password]'
server: 'ldap://[ip]:[port]/'
search:
base: '[the base directory to start the search. usually something like dc=mycompany,dc=com]'
filter: 'sAMAccountName={0}' # for Active Directory you need this
searchSubtree: true
attributesToReturn: ['mail', 'displayName'] # extra attributes you want returned; see below for custom classes that access this data
auth:
hideUserNotFoundExceptions: false
# role-specific LDAP config
useRememberMe: false
authorities:
ignorePartialResultException: true # typically needed for Active Directory
retrieveGroupRoles: true
groupSearchBase: '[the base directory to start the search. usually something like dc=mycompany,dc=com]'
# If you don't want to support group membership recursion (groups in groups),
# then use the following setting
# grails.plugin.springsecurity.ldap.authorities.groupSearchFilter = 'member={0}'
# If you wish to support groups with group as members (recursive groups), use
# the following:
# groupSearchFilter: '(member:1.2.840.113556.1.4.1941:={0})'7.2.3. Custom UserDetailsContextMapper
There are three options for mapping LDAP attributes to UserDetails data (as specified by the grails.plugin.springsecurity.ldap.mapper.userDetailsClass config attribute) and hopefully one of those will be sufficient for your needs. If not, it’s easy to implement UserDetailsContextMapper yourself.
Create a Groovy or Java class in src/main/groovy that implements UserDetailsContextMapper and register it in grails-app/conf/spring/resources.groovy:
/*
* Licensed to the Apache Software Foundation (ASF) under one
* or more contributor license agreements. See the NOTICE file
* distributed with this work for additional information
* regarding copyright ownership. The ASF licenses this file
* to you under the Apache License, Version 2.0 (the
* "License"); you may not use this file except in compliance
* with the License. You may obtain a copy of the License at
*
* https://www.apache.org/licenses/LICENSE-2.0
*
* Unless required by applicable law or agreed to in writing,
* software distributed under the License is distributed on an
* "AS IS" BASIS, WITHOUT WARRANTIES OR CONDITIONS OF ANY
* KIND, either express or implied. See the License for the
* specific language governing permissions and limitations
* under the License.
*/
package spring
import com.mycompany.myapp.MyUserDetailsContextMapper
beans = {
ldapUserDetailsMapper(MyUserDetailsContextMapper) {
// bean attributes
}
}For example, here’s a custom UserDetailsContextMapper that extracts three additional fields from LDAP (fullname, email, and title)
/*
* Licensed to the Apache Software Foundation (ASF) under one
* or more contributor license agreements. See the NOTICE file
* distributed with this work for additional information
* regarding copyright ownership. The ASF licenses this file
* to you under the Apache License, Version 2.0 (the
* "License"); you may not use this file except in compliance
* with the License. You may obtain a copy of the License at
*
* https://www.apache.org/licenses/LICENSE-2.0
*
* Unless required by applicable law or agreed to in writing,
* software distributed under the License is distributed on an
* "AS IS" BASIS, WITHOUT WARRANTIES OR CONDITIONS OF ANY
* KIND, either express or implied. See the License for the
* specific language governing permissions and limitations
* under the License.
*/
package com.mycompany.myapp
import groovy.transform.CompileStatic
import org.springframework.ldap.core.DirContextAdapter
import org.springframework.ldap.core.DirContextOperations
import org.springframework.security.core.GrantedAuthority
import org.springframework.security.core.userdetails.UserDetails
import org.springframework.security.ldap.userdetails.UserDetailsContextMapper
@CompileStatic
class MyUserDetailsContextMapper implements UserDetailsContextMapper {
@Override
UserDetails mapUserFromContext(DirContextOperations ctx, String username, Collection<? extends GrantedAuthority> authorities) {
String email = ctx.attributes.get('mail')?.get() as String
String phone = ctx.attributes.get('telephoneNumber')?.get() as String
new MyUserDetails(username,
'',
true,
true,
true,
true,
authorities,
email,
phone)
}
@Override
void mapUserToContext(UserDetails user, DirContextAdapter ctx) {
throw new IllegalStateException("Only retrieving data from AD is currently supported")
}
}and a custom UserDetails class to hold the extra fields:
/*
* Licensed to the Apache Software Foundation (ASF) under one
* or more contributor license agreements. See the NOTICE file
* distributed with this work for additional information
* regarding copyright ownership. The ASF licenses this file
* to you under the Apache License, Version 2.0 (the
* "License"); you may not use this file except in compliance
* with the License. You may obtain a copy of the License at
*
* https://www.apache.org/licenses/LICENSE-2.0
*
* Unless required by applicable law or agreed to in writing,
* software distributed under the License is distributed on an
* "AS IS" BASIS, WITHOUT WARRANTIES OR CONDITIONS OF ANY
* KIND, either express or implied. See the License for the
* specific language governing permissions and limitations
* under the License.
*/
package com.mycompany.myapp
import groovy.transform.CompileStatic
import org.springframework.security.core.GrantedAuthority
import org.springframework.security.core.userdetails.User
@CompileStatic
class MyUserDetails extends User {
// extra instance variables
final String email
final String telephone
MyUserDetails(String username, String password, boolean enabled, boolean accountNonExpired,
boolean credentialsNonExpired, boolean accountNonLocked,
Collection<GrantedAuthority> authorities, String email, String telephone) {
super(username, password, enabled, accountNonExpired, credentialsNonExpired,
accountNonLocked, authorities)
this.email = email
this.telephone = telephone
}
}Here we extend the standard Spring Security User class for convenience, but you could also directly implement the interface or use a different base class.
7.3. Configuration
|
Any property overrides must be specified in |
There are several configuration options for the LDAP plugin. In practice the defaults are fine and only a few will need to be overridden.
| Name | Default | Meaning |
|---|---|---|
ldap.search.searchSubtree |
|
If |
ldap.search.base |
'' |
Context name to search in, relative to the base of the configured ContextSource, e.g. dc=example,dc=com, ou=users,dc=example,dc=com |
ldap.search.filter |
|
The filter expression used in the user search |
ldap.search.derefLink |
|
Enables/disables link dereferencing during the search |
ldap.search.timeLimit |
|
The time to wait before the search fails |
ldap.search. attributesToReturn |
|
The attributes to return as part of the search |
ldap.authenticator.useBind |
|
if |
ldap.authenticator. attributesToReturn |
|
names of attribute ids to return; use |
ldap.authenticator. dnPatterns |
|
optional pattern(s) used to create DN search patterns, e.g. \["cn={0},ou=people"\] |
ldap.authenticator. passwordAttributeName |
|
the name of the password attribute to use when |
ldap.mapper. convertToUpperCase |
|
whether to uppercase retrieved role names (will also be prefixed with "ROLE_" or the overridden role prefix) |
ldap.mapper. passwordAttributeName |
|
password attribute name to use when building the |
ldap.mapper. userDetailsClass |
|
use |
ldap.mapper.roleAttributes |
|
optional names of role attributes |
ldap.auth. hideUserNotFound Exceptions |
|
if |
ldap.auth.useAuthPassword |
|
If |
ldap.context.managerDn |
|
DN to authenticate with |
ldap.context. managerPassword |
|
username to authenticate with |
ldap.context.server |
|
address of the LDAP server |
ldap.context. contextFactoryClassName |
|
class name of the |
ldap.context. dirObjectFactoryClassName |
class name of the |
|
ldap.context. baseEnvironmentProperties |
none |
extra context properties |
ldap.context. cacheEnvironmentProperties |
|
whether environment properties should be cached between requsts |
ldap.context. anonymousReadOnly |
|
whether an anonymous environment should be used for read-only operations |
ldap.context.referral |
|
the method to handle referrals. Can be |
ldap.authorities. retrieveGroupRoles |
|
whether to infer roles based on group membership |
ldap.authorities. retrieveDatabaseRoles |
|
whether to retrieve additional roles from the database using GORM |
ldap.authorities. groupRoleAttribute |
|
The ID of the attribute which contains the role name for a group |
ldap.authorities. groupSearchFilter |
|
The pattern to be used for the user search. {0} is the user’s DN |
ldap.authorities. searchSubtree |
|
If |
ldap.authorities. groupSearchBase |
|
The base DN from which the search for group membership should be performed |
ldap.authorities. ignorePartialResult Exception |
|
Whether `PartialResultException`s should be ignored in searches, typically used with Active Directory since AD servers often have a problem with referrals. |
ldap.authorities.defaultRole |
none |
An optional default role to be assigned to all users |
ldap.authorities.prefix |
|
The prefix prepended to group names in order to make them Spring Security Roles. |
ldap.authorities.clean.prefix |
none |
An optional string prefix to strip from the beginning of LDAP group names. For example, |
ldap.authorities.clean.suffix |
none |
An optional string suffix to strip from the end of LDAP group names. For example, |
ldap.authorities.clean.dashes |
|
Set this to true to replace all dashes with underscores in LDAP group names. For example, |
ldap.authorities.clean.uppercase |
|
Set this to true to uppercase all LDAP group names. For example, |
7.3.1. Persistent Logins
To use cookies for persistent logins, configure these properties:
|
Just like with non-LDAP persistent tokens, you need to run the |
| Name | Default | Meaning |
|---|---|---|
ldap.useRememberMe |
|
Whether to use persistent logins |
ldap.rememberMe.detailsManager. attributesToRetrieve |
|
The attributes to return as part of the search |
ldap.rememberMe.detailsManager. groupMemberAttributeName |
uniquemember |
The attribute which contains members of a group |
ldap.rememberMe.detailsManager. groupRoleAttributeName |
cn |
The attribute which corresponds to the role name of a group |
ldap.rememberMe.detailsManager. groupSearchBase |
ou=groups,dc=example,dc=com |
The DN under which groups are stored |
ldap.rememberMe.detailsManager. passwordAttributeName |
userPassword |
Password attribute name |
ldap.rememberMe.usernameMapper. userDnBase |
none, must be set, e.g. dc=example,dc=com, ou=users,dc=example,dc=com |
The base name of the DN |
ldap.rememberMe.usernameMapper. usernameAttribute |
none, must be set, e.g. cn |
the attribute to append for the username component |
7.4. API Reference
The LDAP plugin Groovydoc API documentation is available at LDAP Plugin API Reference.
8. OAuth2 Plugin
8.1. Introduction to the Spring Security OAuth2 Plugin
The OAuth2 Plugin adds oAuth v2 sign-on support to Grails applications that use Spring Security. It depends on the Spring Security Core plugin.
It comes with a number of preconfigured OAuth2 providers, but you can implement any provider you like, that is extending the Scribejava DefaultApi20
8.1.1. Release History
Please read release notes at https://github.com/apache/grails-spring-security/releases for checking release information in the future.
-
Version 3.0.0
-
Upgraded to Spring Security Core 6.1.0
-
Upgraded to Grails Gradle Plugin 6.1.0
-
Upgrade Script
init-oauth2toApplicationCommandto support Grails 6.
-
-
Version 2.0.1
-
Update plugin com.gradle.common-custom-user-data-gradle-plugin to v1.12
-
-
Version 2.0.0
-
Upgraded to Grails 5.3 with Groovy 3..0.11
-
Fixed conflict with logback-config library.
-
-
Version 2.0.0-RC1
-
Upgraded to Grails 5.1
-
-
Version 1.0.0
-
released
-
8.2. Installation
Add the following dependencies in build.gradle:
build.gradle
dependencies {
implementation "org.apache.grails:grails-spring-security-oauth2:8.0.0-SNAPSHOT"
}You will also need at least one provider extension, i.e the grails-spring-security-oauth2-google plugin.
8.3. Configuration
You can configure the following parameters in your application.yml.
| Key | Default | Optional | Description |
|---|---|---|---|
grails.plugin.springsecurity.oauth2.active |
true |
true |
Whether the plugin is active or not |
grails.plugin.springsecurity.oauth2.registration.askToLinkOrCreateAccountUri |
/oauth2/ask |
true |
The URI is called to ask the user to either create a new account or link an existing |
grails.plugin.springsecurity.oauth2.registration.roleNames |
[ROLE_USER] |
true |
A list of role names that should be automatically granted to OAuth User. There roles will be created if they do not exists |
Here is an example configuration file:
grails:
plugin:
springsecurity:
oauth2:
active: true
registration:
askToLinkOrCreateAccountUri: /oauth2/ask
roleNames: ['ROLE_USER']8.3.1. Initializing
Once you have a User domain class, initialize this plugin by using the init script
./gradlew runCommand "-Pargs=init-oauth2 [DOMAIN-CLASS-PACKAGE] [USER-CLASS-NAME] [OAUTH-ID-CLASS-NAME]"The above command will create the domain class with the provided name and package. For example, the command ./gradlew runCommand "-Pargs=init-oauth2 com.yourapp User OAuthID will create a domain class OAuthID.groovy.
Finally, you also need to add the following domain class relationship mapping to
the User.groovy domain class:
package com.yourapp
class User {
// ...
static hasMany = [oAuthIDs: OAuthID]
}8.4. Extensions
List of known extensions
8.4.1. How to create a new provider plugin?
-
Create a new plugin with command
grails create-plugin spring-security-oauth2-myProvider. -
Add the following plugins as dependency in the build:
dependencies {
// ...
api 'org.apache.grails:grails-spring-security:{version}'
api 'org.apache.grails:grails-spring-security-oauth2:{version}'
}-
Create a Groovy class that extends
OAuth2SpringTokenand implement the abstract methods.
getProviderName // gets the provider name getSocialId // is usually used for the username getScreenName // is usually used for the email address
-
You may want to check if the scribe library has a default API built-in for your provider or create a Groovy class that extends
DefaultApi20and implement the abstract methods.
getAccessTokenEndpoint // I would get this from config which is <providers domain>/oauth2/token getAuthorizationBaseUrl // I would get this from get this from config which is <providers domain>/oauth2/authorize getAccessTokenExtractor // In some implementations the `OpenIdJsonTokenExtractor` is used.
-
Create a service in your plugin that extends
OAuth2AbstractProviderServiceand implement the abstract methods. You can override the other methods for fine-tuning if needed.
getProviderID // whatever you want to call your provider.
getApiClass // points to your API implementation
getProfileScope // comes from config <domain>/oauth2/userInfo
getScopeSeparator // from the implementation that I've see usually: " " is used.
createSpringAuthToken // parses the OAuth2AccessToken to get the email and id that could be used
// to look up the user and puts them in a OAuth2SpringToken.
// This is also a good place to validate the token either inline or calling a separate method *
-
There maybe some variability between providers based on what is in the claims, but should be similar to this:
@Value('${grails.plugin.springsecurity.oauth2.providers.your_provider.api_key}')
String appId
def rawResponse = new JsonSlurper().parseText(accessToken.rawResponse)
String encodedIdToken = rawResponse.id_token
List<String> encodedIdTokenSegments = encodedIdToken.split('\\.')
String payloadClaimsStr = new String(Base64Utils.decodeFromUrlSafeString(encodedIdTokenSegments[1]))
Map payloadClaims = new JsonSlurper().parseText(payloadClaimsStr) as Map
if (payloadClaims.aud != appId) {
throw new IllegalStateException("ID Token rejected: token specified incorrect recipient ID ${payloadClaims.aud}")
}
Integer now = new Date().time / 1000 as Integer // UNIX timestamp
if (now < payloadClaims.nbf) {
throw new IllegalStateException("ID Token rejected: token cannot be processed before ${payloadClaims.nbf}; current time is $now")
}
if (now >= payloadClaims.exp) {
throw new IllegalStateException("ID Token rejected: token has expired")
}
if (now < payloadClaims.iat) {
throw new IllegalStateException("ID Token rejected: token cannot be from the future!")
}
Validating the token is important to security to make sure that the application client id is the same as what you sent to, because it prevents people from using tokens from other providers to try to grain access to your system.
-
You can register your implementation of
OAuth2AbstractProviderServicein the plugin groovy file or if you can inline in the registration in BootStrap.groovy
try {
springSecurityOauth2BaseService.registerProvider(yourAuth2Service)
} catch (OAuth2Exception exception) {
log.error("There was an oAuth2Exception Your provider has not been loaded", exception)
}
-
In the app that uses any of the extensions you’ll want to set up a URL mapping like:
"/oauth2/$provider/success"(controller: 'login', action: 'oauth2Success')
Then at that endpoint you can handle the user lookup, setting the authentication and redirecting, something like:
def oauth2Success(String provider) {
log.info "In oauth2Success with $provider"
if (!provider) {
log.warn "The Spring Security OAuth callback URL must include the 'provider' URL parameter"
throw new OAuth2Exception("The Spring Security OAuth callback URL must include the 'provider' URL parameter")
}
def sessionKey = springSecurityOauth2BaseService.sessionKeyForAccessToken(provider)
if (!session[sessionKey]) {
log.warn "No OAuth token in the session for provider '${provider}' your provider might require MFA before logging in to this server."
throw new OAuth2Exception("Authentication error for provider '${provider}' your provider might require MFA before logging in to this server.")
}
// Create the relevant authentication token and attempt to log in.
OAuth2SpringToken oAuthToken = createAuthToken(provider, session[sessionKey])
if (oAuthToken.principal instanceof GrailsUser) {
//provide you're own getDefaultTargetUrl method to replace with a string.
authenticateAndRedirect(oAuthToken, getDefaultTargetUrl())
} else {
// This OAuth account hasn't been registered against an internal
// account yet. Give the oAuthID the opportunity to create a new
// internal account or link to an existing one.
session[SpringSecurityOAuth2Controller.SPRING_SECURITY_OAUTH_TOKEN] = oAuthToken
def redirectUrl = springSecurityOauth2BaseService.getAskToLinkOrCreateAccountUri()
if (!redirectUrl) {
log.warn "grails.plugin.springsecurity.oauth.registration.askToLinkOrCreateAccountUri configuration option must be set"
throw new OAuth2Exception('Internal error')
}
log.debug "Redirecting to askToLinkOrCreateAccountUri: ${redirectUrl}"
redirect(redirectUrl instanceof Map ? redirectUrl : [uri: redirectUrl])
}
}
private OAuth2SpringToken createAuthToken(String providerName, OAuth2AccessToken scribeToken) {
def providerService = springSecurityOauth2BaseService.getProviderService(providerName)
OAuth2SpringToken oAuthToken = providerService.createSpringAuthToken(scribeToken)
def user
if(loadByUserName){
//provide your own security service or do a lookup manually.
user = securityService.loadUserByUsername(oAuthToken.getSocialId())
}
if(loadByEmail) {
//provide your own security service or do a lookup manually.
user = securityService.loadUserByEmailAddress(oAuthToken.getScreenName())
}
if (user) {
updateOAuthToken(oAuthToken, user)
}
return oAuthToken
}
private OAuth2SpringToken updateOAuthToken(OAuth2SpringToken oAuthToken, user) {
oAuthToken.principal = user
oAuthToken.authorities = user.authorities
oAuthToken.authenticated = true
return oAuthToken
}
protected void authenticateAndRedirect(OAuth2SpringToken oAuthToken, redirectUrl) {
session.removeAttribute SpringSecurityOAuth2Controller.SPRING_SECURITY_OAUTH_TOKEN
SecurityContextHolder.context.authentication = oAuthToken
redirect(redirectUrl instanceof Map ? redirectUrl : [uri: redirectUrl])
}8.5. API Reference
The OAuth2 plugin Groovydoc API documentation is available at OAuth2 Plugin API Reference.
9. REST Plugin
The Spring Security REST Grails plugin allows you to use Spring Security for a stateless, token-based, RESTful authentication.
Versions 1.x. of the plugin are compatible with Grails 2, whereas versions 2.x are to be used with Grails 3.
9.1. Motivation
The default behaviour of Spring Security is to store the authenticated principal in the HTTP session. However, in a RESTful scenario, we need to make sure our server is stateless.
The typical flow could be the following:
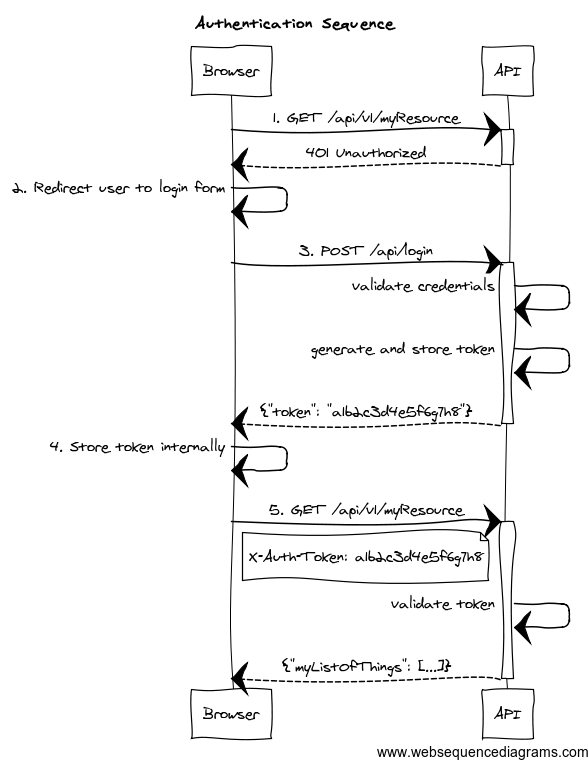
-
The client application requests and endpoint that requires authentication, so the server responds with a 401 response.
-
The client redirects the user to the login form.
-
The user enter credentials, and the client sends a request to the authentication endpoint. The server validates credentials, and if valid, generates, stores and sends back a token to the client.
-
The client then stores the token internally. It will be sent on every API method request.
-
The client sends again a request to the protected resource, passing the token as an HTTP header.
-
The server validates the token, and if valid, executes the actual operation requested.
As per the REST definition, the client is transferring its state on every request so the server is truly stateless.
This plugin helps you to wire your existing Spring Security authentication mechanism, provides you with ready-to-use token generation strategies and comes prepackaged with JWT, Memcached, GORM, Redis and Grails Cache support for token storage.
9.2. Release History
You can view all releases at https://github.com/apache/grails-spring-security/releases.
-
29 August 2016
-
1.5.4
-
-
7 January 2016
-
2.0.0.M2
-
-
11 December 2015
-
2.0.0.M1
-
-
20 November 2015
-
1.5.3
-
-
19 August 2015
-
1.5.2
-
-
6 May 2015
-
1.5.1
-
-
6 May 2015
-
1.5.0
-
-
21 April 2015
-
1.5.0.RC4
-
-
13 April 2015
-
1.5.0.RC3
-
-
9 April 2015
-
1.5.0.RC2
-
-
2 April 2015
-
1.5.0.RC1
-
-
1 April 2015
-
1.5.0.M3
-
-
24 February 2015
-
1.5.0.M2
-
-
3 February 2015
-
1.5.0.M1
-
-
28 January 2015
-
1.4.1
-
-
12 November 2014
-
1.4.1.RC2
-
-
20 October 2014
-
1.4.1.RC1
-
-
12 August 2014
-
1.4.0
-
-
14 July 2014
-
1.4.0.RC5
-
-
4 July 2014
-
1.4.0.RC4
-
-
24 June 2014
-
1.4.0.RC3
-
-
24 June 2014
-
1.4.0.RC2
-
-
20 June 2014
-
1.4.0.RC1
-
-
11 June 2014
-
1.4.0.M3
-
-
1 June 2014
-
1.4.0.M2
-
-
29 May 2014
-
1.4.0.M1
-
-
23 April 2014
-
1.3.4
-
-
16 April 2014
-
1.3.3
-
-
3 April 2014
-
1.3.2
-
-
18 March 2014
-
1.3.1
-
-
4 March 2014
-
1.3.0
-
-
17 February 2014
-
1.2.5
-
-
10 February 2014
-
1.2.4
-
-
4 February 2014
-
1.2.3
-
-
31 January 2014
-
1.2.2
-
-
15 January 2014
-
1.2.0
-
-
14 January 2014
-
1.1.0
-
-
13 January 2014
-
1.0.1
-
-
12 January 2014
-
1.0.0
-
-
10 January 2014
-
1.0.0.RC2
-
-
31 December 2013
-
Initial 1.0.0.RC1 release.
-
9.3. Grails 7 support
This major release is working with Grails 7. It’s based on the newer versions of Spring Security Core plugin, which in turn uses newer Spring Security versions, so make sure you read carefully what the new versions have changed:
| Grails Version | spring-security-rest version |
Spring Security Core docs |
|---|---|---|
6.x |
|
https://apache.github.io/grails-spring-security/7.0.x/index.html#whatsNew |
9.4. Only allow refresh tokens to be used on refresh token endpoint
See issue #515
9.5. Minimum Java Version
The minimum java version is now 17.
9.6. Dependency updates
Dependencies are updated as of Grails 7.0.0 release date.
9.7. Grails 6 support
This major release is working with Grails 6. It’s based on the newer versions of Spring Security Core plugin, which in turn uses newer Spring Security versions, so make sure you read carefully what the new versions have changed:
| Grails Version | spring-security-rest version |
Spring Security Core docs |
|---|---|---|
6.x |
|
https://apache.github.io/grails-spring-security/6.0.x/index.html#whatsNew |
9.8. Provide AccessToken object to storeToken and removeToken Methods
See issue #437
9.9. Minimum Java Version
The minimum java version is now 11.
9.10. Dependency updates
Dependencies are updated as of Grails 6.1.1 release date.
9.11. Grails 3 and 4 support
This major release is working with Grails 3 and 4. It’s based on the newer versions of Spring Security Core plugin, which in turn uses newer Spring Security versions, so make sure you read carefully what the new versions have changed:
| Grails Version | spring-security-rest version |
Spring Security Core docs |
|---|---|---|
3.x |
|
https://apache.github.io/grails-spring-security/3.2.x/index.html#newInV3 |
4.x |
|
https://apache.github.io/grails-spring-security/4.0.x/index.html#newInV3 |
Special thanks to James Kleeh and Ryan Vanderwerf for their help in the upgrade steps.
9.12. Plugin broken down into multiple modules
Starting from this version, org.grails.plugins:spring-security-rest just contains support for JWT. Artifact size has
been reduced from 429 KB in version 1.5.3 to 194K in 2.0.x!
For those using a different token storage system, the following artifacts are also published:
-
org.grails.plugins:spring-security-rest-gorm. -
org.grails.plugins:spring-security-rest-grailscache. -
org.grails.plugins:spring-security-rest-memcached. -
org.grails.plugins:spring-security-rest-redis.
The version is the same in all modules. For more details, check the Configuration section.
As a consequence, configuration properties like grails.plugin.springsecurity.rest.token.storage.useMemcached are no
longer used.
9.13. CORS is now supported in Grails core
As of Grails 3.2.1, Grails natively supports CORS. Refer to the Grails documentation for more information about how to configure it.
9.14. JWT improvements
As of this version, there is no longer a default value for the configuration property
grails.plugin.springsecurity.rest.token.storage.jwt.secret. Furthermore, if you are using JWT and no value has
been provided for that configuration property, an exception will be thrown during application startup.
It is also possible to influence the JWT generation by providing additional claims. Finally, the signing / encryption algorithms used are configurable. Check the JWT section for more information.
9.15. Other minor updates
-
Classes have been annotated with
@CompileStatic, for performance reasons. -
Documentation has been migrated to Asciidoctor.
-
All libraries used have been upgraded to their latest versions.
-
Snapshots are now published automatically to Artifactory OSS on every successful build. You can use them by defining this Maven repository inside the
repositoriesblock in yourbuild.gradle:maven { url "https://oss.jfrog.org/artifactory/oss-snapshot-local" }
9.16. JWT support
JWT is fully supported and is now the default token "storage" mechanism. If you still want to use your previous storage
(such as Memcached or GORM), make sure you explicitly set to true one of the following properties:
| Config key | Default value |
|---|---|
|
|
|
|
|
|
If switching over JWT, the logout behavior is not available anymore. Read the documentation on how to implement your own logout strategy if you want to.
9.17. Redis support
Redis can now be used as token storage service. Thanks to Philipp Eschenbach for his initial contribution.
9.18. New package base
Packages com.odobo.grails.plugin.springsecurity.rest.* have been refactored to simply grails.plugin.springsecurity.rest.*.
Make sure to double-check your imports when upgrading to 1.5.
9.19. Other minor changes
-
The plugin now uses Grails 2.4.4, and the build and tests are executed with Java 8.
-
Documentation for older versions is now published at http://alvarosanchez.github.io/grails-spring-security-rest
9.20. Full compatibility with Spring Security core.
Up to previous releases, this plugin was overriding "stateful" Spring Security core beans, to ensure a stateless behaviour. After some users reported issues integrating this plugin with existing installations, version 1.4 now follows a more friendly approach.
A new chapter has been created explaining how to configure the filter chains appropriately.
9.21. RFC 6750 Bearer Token support by default
Now, the token validation and rendering aligns with the RFC 6750 Bearer Token spec.
If you want to keep the old behaviour, simply disable it by setting
grails.plugin.springsecurity.rest.token.validation.useBearerToken = false
9.22. Credentials are extracted from JSON by default
It makes more sense in a REST application. The old behaviour can still be used by using the corresponding configuration property.
9.23. Anonymous access is allowed
In case you want to enable anonymous access (read: not authenticated) to certain URL patterns, you can do so. Take a look at the [new chapter in the documentation|guide:tokenValidation].
9.24. Other minor changes
-
Upgraded dependencies:
-
spring-security-core:2.0-RC3. -
cors:1.1.6.
-
9.25. Installing the plugin
Just proceed as with any other Grails 3 plugin:
build.gradledependencies {
//Other dependencies
implementation "org.apache.grails:grails-spring-security-rest:8.0.0-SNAPSHOT"
}Note that the default token storage system is JWT. If you want a different one, you need to install an additional artifact. For instance, for Memcached:
build.gradleext.springSecurityRestVersion = '8.0.0-SNAPSHOT'
dependencies {
//Other dependencies
implementation "org.apache.grails:grails-spring-security-rest:${springSecurityRestVersion}"
implementation "org.apache.grails:grails-spring-security-rest-memcached:${springSecurityRestVersion}"
}The Maven coordinates are the following:
-
Grails Cache:
org.apache.grails:grails-spring-security-rest-grailscache. -
Memcached:
org.apache.grails:grails-spring-security-rest-memcached. -
GORM:
org.apache.grails:grails-spring-security-rest-gorm. -
Redis:
org.apache.grails:grails-spring-security-rest-redis.
Note that configuration properties such as grails.plugin.springsecurity.rest.token.storage.useMemcached are no longer
used. Every submodule of the above list will automatically configure the token store appropriately
If you want your own token storage system, you need to implement
role=include
and register it in resources.groovy as tokenStorageService.
9.26. Plugin configuration
This plugin is compatible by default with Spring Security core traditional, form-based authentication. The important thing to remember is: you have to separate the filter chains, so different filters are applied on each case.
The stateless, token-based approach of this plugin is incompatible with the HTTP session-based approach of Spring Security, core, so the trick is to identify what URL patterns have to be stateless, and what others have to be stateful (if any).
To configure the chains properly, you can use the grails.plugin.springsecurity.filterChain.chainMap property:
grails.plugin.springsecurity.filterChain.chainMapgrails.plugin.springsecurity.filterChain.chainMap = [
//Stateless chain
[
pattern: '/**',
filters: 'JOINED_FILTERS,-anonymousAuthenticationFilter,-exceptionTranslationFilter,-authenticationProcessingFilter,-securityContextPersistenceFilter,-rememberMeAuthenticationFilter'
],
//Traditional, stateful chain
[
pattern: '/stateful/**',
filters: 'JOINED_FILTERS,-restTokenValidationFilter,-restExceptionTranslationFilter'
]
]To understand this syntax, please read the
Spring Security Core documentation.
Long story short: JOINED_FILTERS refers to all the configured filters. The minus (-) notation means all the previous values
but the neglected one.
So the first chain applies all the filters except the stateful ones. The second one applies all the filters but the stateless ones.
|
Make sure that the stateless chain applies not only to your REST controllers, but also to the URL’s where this plugin
filters are listening: by default, |
The difference is that, in a traditional form-based authentication, Spring Security will respond with an HTTP 302 redirect to the login controller. That doesn’t work for an API, so in the stateless approach, an HTTP 401 response will be sent back.
The Spring Security Rest plugin fires events exactly like Spring Security Core does.
9.27. Event Notification
You can set up event notifications in two ways. The sections that follow describe each approach in more detail.
-
Register an event listener, ignoring events that do not interest you. Spring allows only partial event subscription; you use generics to register the class of events that interest you, and you are notified of that class and all subclasses.
-
Register one or more callback closures in
grails-app/conf/application.groovythat take advantage of the plugin’sgrails.plugin.springsecurity.rest.RestSecurityEventListener. The listener does the filtering for you.
9.27.1. AuthenticationEventPublisher
Spring Security REST publishes events using an
AuthenticationEventPublisher
which in turn fire events using the
ApplicationEventPublisher.
By default no events are fired since the AuthenticationEventPublisher instance registered is a
grails.plugin.springsecurity.rest.authentication.NullRestAuthenticationEventPublisher. But you can enable event
publishing by setting grails.plugin.springsecurity.useSecurityEventListener = true in grails-app/conf/application.[groovy|yml].
You can use the useSecurityEventListener setting to temporarily disable and enable the callbacks, or enable them
per-environment.
9.27.2. Token Creation
Currently the Spring Security REST plugin supports a single event in addition to the default spring security events.
The event is fired whenever a new token is created. See grails.plugin.springsecurity.rest.RestTokenCreationEvent
|
Every time a token is successfully submitted, an |
9.28. Registering an Event Listener
Enable events with grails.plugin.springsecurity.useSecurityEventListener = true and create one or more Groovy or Java
classes, for example:
package com.foo.bar
import org.springframework.context.ApplicationListener
import grails.plugin.springsecurity.rest.RestTokenCreationEvent
class MySecurityEventListener
implements ApplicationListener<RestTokenCreationEvent> {
void onApplicationEvent(RestTokenCreationEvent event) {
// The access token is a delegate of the event, so you have access to an instance of `grails.plugin.springsecurity.rest.token.AccessToken`
}
}Register the class in grails-app/conf/spring/resources.groovy:
import com.foo.bar.MySecurityEventListener

beans = {
   mySecurityEventListener(MySecurityEventListener)
}9.29. Registering Callback Closures
Alternatively, enable events with grails.plugin.springsecurity.useSecurityEventListener = true and register one or
more callback closure(s) in grails-app/conf/Config.groovy and let SecurityEventListener do the filtering.
Implement the event handlers that you need, for example:
grails.plugin.springsecurity.useSecurityEventListener = true
grails.plugin.springsecurity.onRestTokenCreationEvent = { e, appCtx ->
// handle RestTokenCreationEvent
}None of these closures are required; if none are configured, nothing will be called. Just implement the event handlers that you need.
The authentication filter
uses the default authenticationManager bean, which in turn uses all the registered authentication
providers. See the Spring Security Core guide
for more information about how to define your own providers. Note that you can easily plug any Spring Security sub-plugin
(like the LDAP one) to use a different authentication strategy.
If the authentication is successful, a token generator is used to generate a token, and a
token storage implementation is used to store the token. Finally, the JSON response sent back to the
client is rendered by a restAuthenticationTokenJsonRenderer bean. See the token rendering documentation for more details.
|
This authentication filter will only be applied to the above configured URL and can also be disabled, in case a different approach for token creation is followed. In the rest of the cases, the request will continue through the filter chain, reaching Spring Security Core filters. Bear in mind that, by default, Spring Security Core 2.x locks down all URL’s unless a explicit securiy rule has been specified for each of them. See Spring Security Core documentation for more information. |
The following are the configuration properties available:
| Config key | Default value |
|---|---|
|
|
|
|
|
|
9.30. Extracting credentials from the request
The plugin supports 2 ways of extracting the username and password: using request parameters, and using a JSON payload. To align with the RESTful principles, JSON payload is the default behaviour.
9.30.1. From a JSON request
| Config key | Default value |
|---|---|
|
|
|
|
|
|
The default implementation expects a request like this:
{
"username": "john.doe",
"password": "dontTellAnybody"
}If you use usernamePropertyName and passwordPropertyName properties mentioned above, your JSON request can look like:
{
"login": "john.doe",
"pwd": "dontTellAnybody"
}With the following config:
grails.plugin.springsecurity.rest.login.usernamePropertyName = 'login'
grails.plugin.springsecurity.rest.login.passwordPropertyName = 'pwd'If your JSON request format is different, you can plug your own implementation by defining a class which extends AbstractJsonPayloadCredentialsExtractor. The default implementation looks like this:
DefaultJsonPayloadCredentialsExtractor/**
* Extracts credentials from a JSON request like: <code>{"username": "foo", "password": "bar"}</code>
*/
@Slf4j
class DefaultJsonPayloadCredentialsExtractor extends AbstractJsonPayloadCredentialsExtractor {
String usernamePropertyName
String passwordPropertyName
UsernamePasswordAuthenticationToken extractCredentials(HttpServletRequest httpServletRequest) {
def jsonBody = getJsonBody(httpServletRequest)
if (jsonBody) {
String username = jsonBody."${usernamePropertyName}"
String password = jsonBody."${passwordPropertyName}"
log.debug "Extracted credentials from JSON payload. Username: ${username}, password: ${password?.size()?'[PROTECTED]':'[MISSING]'}"
new UsernamePasswordAuthenticationToken(username, password)
} else {
log.debug "No JSON body sent in the request"
return null
}
}
}Once you are done, register it in resources.groovy with the name credentialsExtractor.
9.30.2. From request parameters
Note that the name of the parameters can also be customised:
| Config key | Default value |
|---|---|
|
|
|
|
|
|
9.31. Logout
|
Logout is not possible when using JWT tokens (the default strategy), as no state is kept in the server. If
you still want to have logout, you can provide your own implementation by creating a subclass of
role=include
and overriding the methods Then, register your implementation in However, a more rational approach would be just to remove the token from the client (eg, browser’s local storage) and let the tokens expire (they will expire anyway, unlike with other storages like Memcached or Redis where they get refreshed on every access). |
The logout filter exposes an endpoint for deleting tokens. It will read the token from an HTTP header. If found, will delete it from the storage, sending a 200 response. Otherwise, it will send a 404 response.
You can configure it using this properties:
| Config key | Default value |
|---|---|
|
|
|
|
By default, the plugin generates JWT tokens. Note that when using JWT, you can’t plug any other token generator. For more information about how this plugin uses JWT’s, check the JSON Web Token section.
9.32. JWT
9.32.1. Claims
It is possible, to include additional claims in the JWT generated. To do so, you can plug one or more implementations of the interface CustomClaimProvider, and register them in Spring.
The plugin comes prepackaged with a
IssuerClaimProvider,
that sets the iss field of the JWT claim set, and which value is configurable using the following configuration property:
grails.plugin.springsecurity.rest.token.generation.jwt.issuer.
Customising the JWT to include additional claims is a piece of cake. First, create the claim provider:
class BookListClaimProvider implements CustomClaimProvider {
@Override
void provideCustomClaims(JWTClaimsSet.Builder builder, UserDetails details, String principal, Integer expiration) {
builder.claim('books', Book.findAllByAuthor(details.username).collect { it.name })
}
}Then, register it in Spring via resources.groovy, or using the @Bean annotation in a method of the Application class
(or any @Configuration class):
@Bean
CustomClaimProvider bookListClaimProvider() {
new BookListClaimProvider()
}9.32.2. Algorithms
This plugin uses Nimbus JOSE+JWT library to generate and parse JWT’s, and the signing / encryption algorithms are configurable, as long as they are supported in Nimbus.
If using signed JWT’s, the relevant configuration is the following:
| Config key | Possible values | Default value |
|---|---|---|
|
Any |
|
|
At least 256 bits (32 characters) |
|
When using encrypted JWT’s, those are the possible configuration options:
| Config key | Possible values | Default value |
|---|---|---|
|
Any |
|
|
Any |
|
9.33. Memcached, GORM, Redis, Grails Cache
If you are not using JWT, but any stateful strategy like Memcached or GORM, the following strategies are available:
The strategy used is configurable:
| Config key | Default value |
|---|---|
|
|
|
|
Both of them generate tokens of 32 alphanumeric characters.
That should be enough for most of the human beings. But if you still want to provide your own implementation,
simply write a class implementing
role=include
and wire it up in resources.groovy as tokenGenerator.
The tokens are stored on the server using a tokenStorageService bean. The plugin comes with out-of-the-box support
for JWT, Memcached, GORM and Grails Cache, but you can use your own strategy implementing the
role=include
interface.
|
The default implementation, JWT, is stateless. Nothing is really stored. However, the plugin still gives a chance to the other implementations to store the principal if they need to. |
9.34. JSON Web Token
JSON Web Token (JWT) is an IETF standard which defines a secure way to encapsulate arbitrary data that can be sent over unsecure URL’s.
Generally speaking, JWT’s can be useful in the following use cases:
-
When generating "one click" action emails, like "delete this comment" or "add this to favorites". Instead of giving the users URL’s like
/comment/delete/123, you can give them something like/comment/delete/<JWT_TOKEN>, where theJWT_TOKENcontains encapsulated information about the user and the comment, in a safe way, so authentication is not required. -
To achieve single sign-on, by sharing a JWT across applications.
In the context of authentication and authorization, JWT will help you implement a stateless implementation, as the principal information is stored directly in the JWT.
9.34.1. How does a JWT looks like?
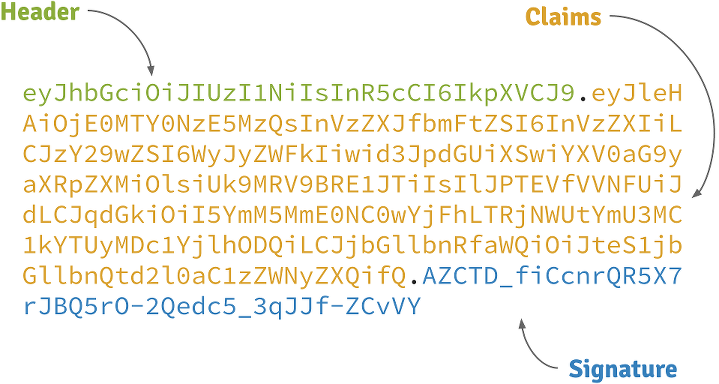
Header
A base64-encoded JSON like:
{
"alg": "HS256",
"typ": "JWT"
}Claims
A base64-encoded JSON like:
{
"exp": 1422990129,
"sub": "jimi",
"roles": [
"ROLE_ADMIN",
"ROLE_USER"
],
"iat": 1422986529
}Signature
Depends on the algorithm specified on the header, it can be a digital signature of the base64-encoded header and claims, or an encryption of them using RSA.
9.34.2. Signed JWT’s
By default, this plugin uses signed JWT’s as specified by the JSON Web Signature specification. More specifically, the algorithm used is HMAC SHA-256 with a specified shared secret. The relevant configuration properties are:
| Config key | Default value |
|---|---|
|
|
|
|
|
|
|
|
9.34.3. Encrypted JWT’s
|
Grails’s Listing 103. Excluding BouncyCastle’s libraries
|
In the previous strategy, the claims are just signed, so it prevents an attacker to tamper its contents to introduce malicious data or try a privilege escalation by adding more roles. However, the claims can be decoded just by using Base 64.
If the claims contains sensitive information, you can use a JSON Web Encryption algorithm to prevent them to be decoded. Particularly, this plugin uses RSAES OAEP for key encryption and AES GCM (Galois/Counter Mode) algorithm with a 256 bit key for content encryption.
By default, RSA public/private keys are generated every time the application runs. This means that generated tokens won’t be decrypted across executions of the application. So better create your own key pair using OpenSSL:
openssl genrsa -out private_key.pem 2048
openssl pkcs8 -topk8 -inform PEM -outform DER -in private_key.pem -out private_key.der -nocrypt
openssl rsa -in private_key.pem -pubout -outform DER -out public_key.derThen, configure the keys properly, along with the rest of the configuration:
| Config key | Default value |
|---|---|
|
|
|
|
|
|
Example configuration:
grails.plugin.springsecurity.rest.token.storage.jwt.useEncryptedJwt = true
grails.plugin.springsecurity.rest.token.storage.jwt.privateKeyPath = '/path/to/private_key.der'
grails.plugin.springsecurity.rest.token.storage.jwt.publicKeyPath = '/path/to/public_key.der'|
The performance of encryption algorithms is much slower compared with signing ones. If you are considering encrypting you JWT’s, think if you really need it. |
9.34.4. Token expiration and refresh tokens
When using JWT, issued access tokens expire after a period of time, and they are paired with refresh tokens, eg:
{
"username": "jimi",
"roles": [
"ROLE_ADMIN",
"ROLE_USER"
],
"expires_in": 3600,
"token_type": "Bearer",
"refresh_token": "eyJhbGciOiJSU0EtT0FFUCIsImVuYyI6IkEyNTZHQ00ifQ.fUaSWIdZakFX7CyimRIPhuw0sfevgmwL2xzm5H0TuaqwKx24EafCO0TruGKG-lN-wGCITssnF2LQTqRzQGp0PoLXHfUJ0kkz5rBl6LtnRu7cdD1ZUNYXLJtFjQ3IATzoo15tPafRPyStG1Qm7-1L0VxquhrLxkkpti0F1_VTytZAq8ltFrnxM4ahJUwS7eriivvdLqmHtnwuXw0kBXEseIyCkiyKklWDJAcD_P_gHoQJvSCoXedlr7Pp0n6LEUrRWJ2Hb-Zyt9dWqWDxm9nyDeEVtEZGcQtpgCGgbXxaUpULIy5nvrbRzXSNyT6iXhK1CLqiFVkfh-Y-DHXdB6Q4sg.uYdpxl835KnlkqC5.gBgSnPWZOo6FINovJNG7Xx2RuS09QJbU4-_J4EgZQkygt8xE-HfdYaOmtmJLjGJR1XKoaRsuX1gNjFoCZgqWAon6.Zsrk52dkjskSVQLXZBQooQ",
"access_token": "eyJhbGciOiJSU0EtT0FFUCIsImVuYyI6IkEyNTZHQ00ifQ.n-gGe65x0SlSXS3fTG8ZLdXvv6b5_1pDvkcGyCjFy-vm1VhaBEQL5p3hc6iUcCAcuyrqzGk95lV9dHCv46cNfCiUFHWfbEcd4nqScIxBbc28xO9L1mNLnZ0G1rx1Mx1L0Y_ZPoSxDXpJaHCT28cdZffHLxx2B9ioIClgdlYBAJ5Oz8VT39-D0QSomS6QhFqmcpbDsXrsKxs545Pn-TIlu-fSQ4wpIvAxusOKB6CV2EYKqBplMBrh-3btE8WksVcX2N3LsrcMhrKxSKi93c06MZh6JzSLWe5bl9hvUvBdEuwDrk-fQgD3ZlmjjoevRWYhv_kslW1PlqUHYmKOQ7csUw.3mvvsFWikEjZzExA.YixjnnzzcPRy_uUpgPv5zqOfshv3pUwfrME0AijpsB7u9CmJe94g6f2y_3vqUps-5weKKGZyk3ZtnwEbPVAk9-HZt-Y27SbZl4JNCFEOLVsMsK8.h4j9BdFXuWKKez6xxRAwJA"
}Refresh tokens never expire, by default, and can be used to obtain a new access token by sending a POST request to the
/oauth/access_token endpoint.
If you prefer to configure your refresh tokens to expire automatically, you can set
grails.plugin.springsecurity.rest.token.storage.jwt.refreshExpiration to the number of seconds before the token
is invalid. After this period, a client would be forced to present login credentials in order to obtain a new access token.
POST /myApp/oauth/access_token HTTP/1.1
Host: server.example.com
Content-Type: application/x-www-form-urlencoded
grant_type=refresh_token&refresh_token=eyJhbGciOiJSU0EtT0FFUCIsImVuYyI6IkEyNTZHQ00ifQ....As you can see, is a form request with 2 parameters:
-
grant_type: must berefresh_tokenalways. -
refresh_token: the refresh token provided earlier.
|
By default, refresh tokens never expire and must be securely stored in your client application. See section 10.4 of the OAuth 2.0 spec for more information. |
9.35. Memcached
To use Memcached, simply define the following configuration properties to match your environments accordingly:
| Config key | Default value |
|---|---|
|
|
|
|
|
|
|
|
For development, if you have Memcached installed locally with the default settings, it should just work with the defaults.
In Memcached tokens will expire automatically after the configured timeout (1h by default). They get refreshed on every access
9.36. GORM
To use GORM, these are the relevant configuration properties:
| Config key | Default value |
|---|---|
|
|
|
|
|
|
The relevant domain class should look something like this:
package org.example.product
class AuthenticationToken {
String tokenValue
String username
static mapping = {
version false
}
}|
For the |
A few things to take into consideration when using GORM for token storage:
-
Instead of storing the whole
UserDetailsobject, probably only the username is needed. This is because applications using this strategy will probably have the standard User and Role domain classes. When the token is verified the username is passed to the defaultuserDetailsServicebean, which in the case of the default Spring Security Core GORM implementation will fetch the information from the mentioned domain classes. -
GORM’s optimistic locking feature is likely unnecessary and may cause performance issues.
-
You’ll have to handle token expiration by yourself via Quartz jobs or a similar mechanism. There are various ways you might go about this.
9.36.1. GORM Token Expiration Examples
Adding a GORM autoTimestamp property like lastUpdated or dateCreated and sorting out stale or old tokens with Quartz jobs
are the most obvious routes. Each has its drawbacks though.
dateCreated is useful if you want tokens to expire a set time after they are issued. However, API users who didn’t pay
attention to when their token was issued may find themselves needing a new token unexpectedly.
Date dateCreatedlastUpdated requires a change to the token domain instance in order to be triggered. Something as simple as an access
counter may work as a strategy to keepTokens fresh, but doing a write to a disk based database on each token access may
be something you would prefer to avoid for the sake of performance.
Date lastUpdated
Integer accessCount = 0
def afterLoad() {
accessCount++
}Simply using your own date or timestamp is also a valid option.
Date refreshed = new Date()
def afterLoad() {
// if being accessed and it is more than a day since last marked as refreshed
// and it hasn't been wiped out by Quartz job (it exists, duh)
// then refresh it
if (refreshed < new Date() -1) {
refreshed = new Date()
it.save()
}
}Here is an example quartz job to go with the custom refresh timestamp above:
class RemoveStaleTokensJob {
static triggers = {
cron name: 'every4hours', cronExpression: '0 0 */4 * * *'
}
void execute() {
AuthenticationToken.executeUpdate('delete AuthenticationToken a where a.refreshed < ?' [new Date()-1])
}
}9.37. Redis
To use Redis as a token store simply you just have to enable it in you configuration by setting useRedis to true
(see table below).
You have to have the redis plugin installed in order to be able to use Redis as your token store. Refer to the
Redis plugin documentation for more details about how to configure it.
Configuration options for Redis:
| Config key | Default value |
|---|---|
|
|
9.38. Grails Cache
To use Grails Cache, simply define a cache name:
| Config key | Default value |
|---|---|
|
|
The cache name should correspond to a name specified in the [cache DSL|http://grails-plugins.github.io/grails-cache/docs/manual/guide/usage.html#dsl].
|
Token expiration / eviction / TTL
By default, Spring Cache abstraction does not support expiration. It depends on the specific support of the actual providers. Grails has several plugins for this: |
|
There is a bug in |
By default, this plugin renders the token in RFC 6750 Bearer Token format:
HTTP/1.1 200 OK
Content-Type: application/json;charset=UTF-8
Cache-Control: no-store
Pragma: no-cache
{
"access_token":"eyJhbGciOiJIUzI1NiJ9...",
"token_type":"Bearer",
"username": "john.doe",
"roles": [
"ROLE_ADMIN",
"ROLE_USER"
]
}|
As per the RFC, |
The JSON structure can be customised with the following configuration keys:
| Config key | Default value |
|---|---|
|
|
|
|
E.g., with the following configuration:
grails.plugin.springsecurity.rest.token.rendering.usernamePropertyName = 'login'
grails.plugin.springsecurity.rest.token.rendering.authoritiesPropertyName = 'permissions'The output will look like:
{
"access_token":"eyJhbGciOiJIUzI1NiJ9...",
"token_type":"Bearer",
"login": "john.doe",
"permissions": [
"ROLE_ADMIN",
"ROLE_USER"
]
}9.39. Disabling bearer tokens support for full response customisation
In order to fully customise the response, you need first to disable bearer tokens support by setting
grails.plugin.springsecurity.rest.token.validation.useBearerToken = false. That will enable you to use this additional
property:
| Config key | Default value |
|---|---|
|
|
|
Disabling bearer token support impacts the way tokens are extracted from the HTTP request. Please, read carefully the chapter about token validation first. |
If you want your own implementation, simply create a class implementing
role=include
and wire it up in resources.groovy with name accessTokenJsonRenderer.
|
The principal object stored in the security context, and passed to the JSON renderer, is coming from the configured
authentication providers. In most cases, this will be a If you want to render additional information in your JSON response, you have to:
|
The token validation filter looks for the token in the request and then tries to validate it using the configured token storage implementation.
If the validation is successful, the principal object is stored in the security context. This allows you to use in
your application @Secured, springSecurityService.principal and so on.
|
|
This plugin supports RFC 6750 Bearer Token specification out-of-the-box.
9.40. Sending tokens in the request
The token can be sent in the Authorization request header:
Authorization request headerGET /protectedResource HTTP/1.1
Host: server.example.com
Authorization: Bearer eyJhbGciOiJIUzI1NiJ9.eyJleHAiOjE0MjI5OTU5MjIsInN1YiI6ImppbWkiLCJyb2xlcyI6WyJST0xFX0FETUlOIiwiUk9MRV9VU0VSIl0sImlhdCI6MTQyMjk5MjMyMn0.rA7A2Gwt14LaYMpxNRtrCdO24RGrfHtZXY9fIjV8x8oOr using form-encoded body parameters:
POST /protectedResource HTTP/1.1
Host: server.example.com
Content-Type: application/x-www-form-urlencoded
access_token=eyJhbGciOiJIUzI1NiJ9.eyJleHAiOjE0MjI5OTU5MjIsInN1YiI6ImppbWkiLCJyb2xlcyI6WyJST0xFX0FETUlOIiwiUk9MRV9VU0VSIl0sImlhdCI6MTQyMjk5MjMyMn0.rA7A2Gwt14LaYMpxNRtrCdO24RGrfHtZXY9fIjV8x8oIf you need to use the GET HTTP method (to render images in an img tag, for example), you can also send the access token
in a query string parameter named access_token:
If you disable the bearer token support, you can customise it further:
grails.plugin.springsecurity.rest.token.validation.useBearerToken = false
grails.plugin.springsecurity.rest.token.validation.headerName = 'X-Auth-Token'If you still want to have full access and read the token from a different part of the request, you can implement a
role=include
and register it in your resources.groovy as tokenReader.
|
You must disable bearer token support to register your own |
9.41. Anonymous access
If you want to enable anonymous access to URL’s where this plugin’s filters are applied, you need to:
-
Configure
enableAnonymousAccess = true(see table below). -
Make sure that the
anonymousAuthenticationFilteris applied beforerestTokenValidationFilter. See how to configure filters for more details.
For example, with this configuration:
grails {
plugin {
springsecurity {
filterChain {
chainMap = [
[pattern: '/api/guest/**', filters: 'anonymousAuthenticationFilter,restTokenValidationFilter,restExceptionTranslationFilter,filterInvocationInterceptor'],
[pattern: '/api/**', filters: 'JOINED_FILTERS,-anonymousAuthenticationFilter,-exceptionTranslationFilter,-authenticationProcessingFilter,-securityContextPersistenceFilter,-rememberMeAuthenticationFilter'],
[pattern: '/**', filters: 'JOINED_FILTERS,-restTokenValidationFilter,-restExceptionTranslationFilter']
]
}
//Other Spring Security settings
//...
rest {
token {
validation {
enableAnonymousAccess = true
}
}
}
}
}
}The following chains are configured:
-
/api/guest/**is a stateless chain that allows anonymous access when no token is sent. If however a token is on the request, it will be validated. -
/api/**is a stateless chain that doesn’t allow anonymous access. Thus, the token will always be required, and if missing, a Bad Request reponse will be sent back to the client. -
/**(read: everything else) is a traditional stateful chain.
9.42. Validation Endpoint
There is also an endpoint available that you can call in case you want to know if a given token is valid. It looks for
the token in a HTTP header as well, and if the token is still valid, it renders guide:authentication[its JSON representation].
If the token does not exist, it will render a grails.plugin.springsecurity.rest.login.failureStatusCode response
(401 by default).
The relevant configuration properties for the validation endpoint are:
| Config key | Default value |
|---|---|
|
|
|
|
|
|
Note that headerName is only considered if grails.plugin.springsecurity.rest.token.validation.useBearerToken is set
to false. Otherwise (the default approach), as per RFC 6750, the header name will be Authorization and the value
will be Bearer TOKEN_VALUE.
Since Grails 3.2.1, CORS support is built-in into the framework. Check the documentation on the Grails guide for more information.
If you are using any Grails 3 version prior to 3.2.1, you can define your own filter, as described in https://github.com/davidtinker/grails-cors#grails-3.
Alternatively, you can also use this plugin.
This plugin is meant to be used in applications serving a REST API’s to pure Javascript clients. The main authentication flow of this plugin is to allow you to authenticate your users against any Spring Security-compatible user directory (like a DB or an LDAP server).
However, there might be situations where you want to delegate the authentication against a third-party provider, like Google or Facebook. Unfortunately, your pure Javascript front-end application cannot request the providers directly using OAuth, because then the access keys will be made public.
So is this plugin’s responsibility to provide endpoints so your Grails backend acts as a proxy for your front-end client.
The flow is something like the following:
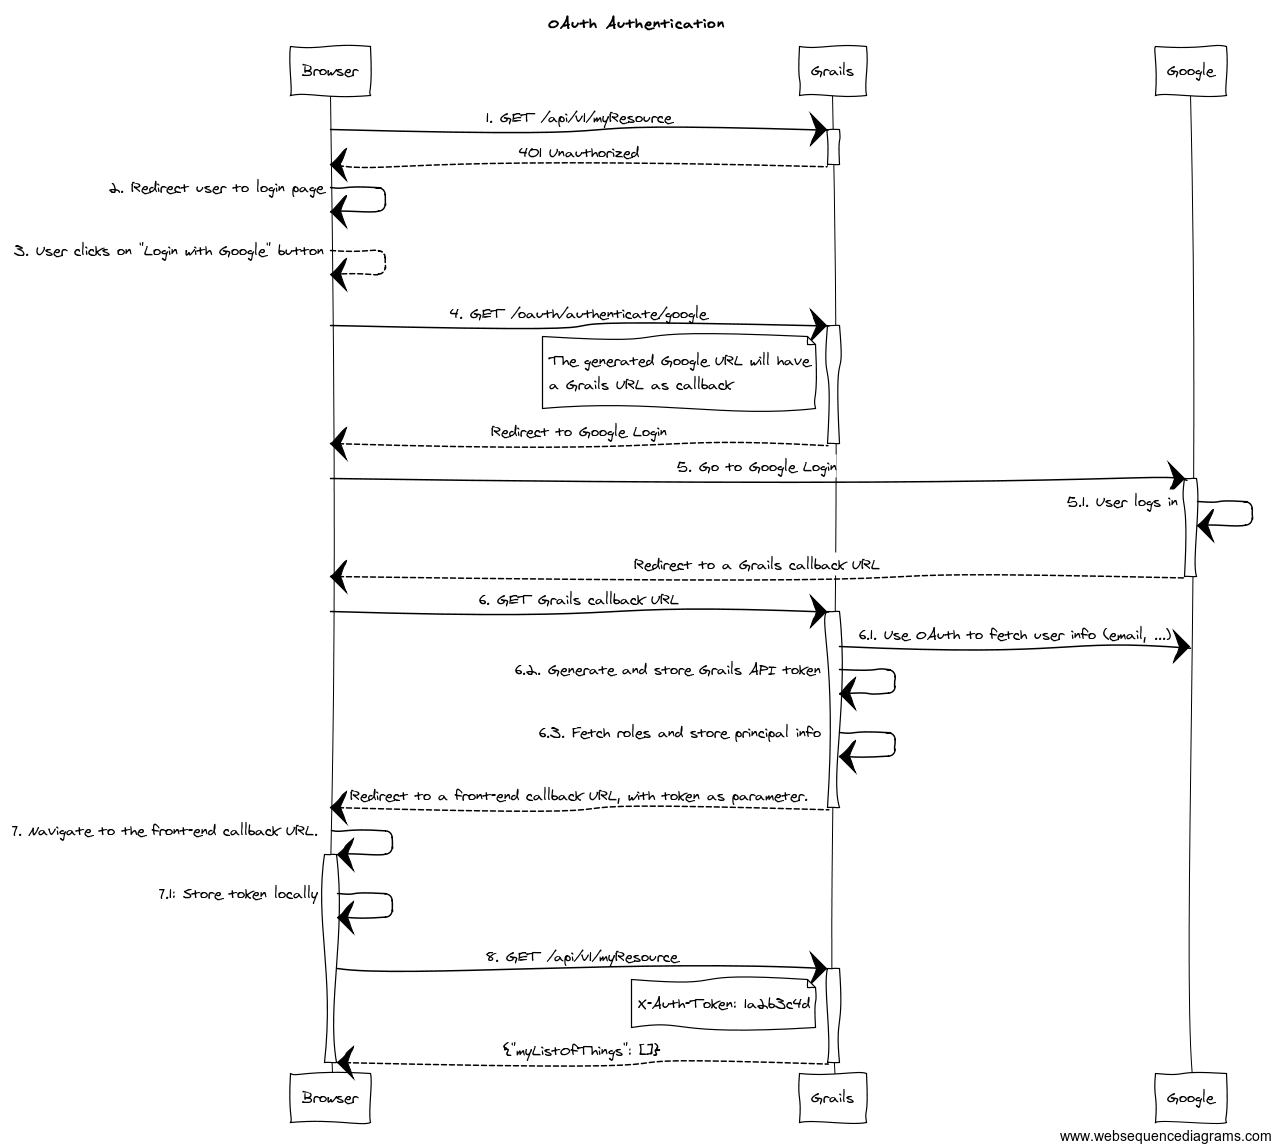
-
The client application requests and endpoint that requires authentication, so the server responds with a 401 response (*).
-
The client redirects the user to the login form (*).
-
This time, instead of using username and password, the user clicks on "Login with Google" button.
-
Browser navigates to a Grails URL. Grails will generate a Google Login URL, giving Google a Grails callback URL.
-
Browser navigates to Google Login. User logs in, and Google redirects the browser to the Grails callback URL.
-
Browser navigates to that Grails callback URL. Then, Grails will use OAuth to fetch user information (like email) from Google. Based on that, will generate a REST API token and fetch and store principal information. The response from Grails will be a front-end URL where the token is a parameter.
-
The browser will navigate to that URL, and the Javascript logic will read the token from the URL and store it locally.
-
The client sends again a request to the protected resource, passing the token as an HTTP header (*).
The steps flagged with (*) remain unchanged from the normal flow.
The Grails callback URL mentioned above has this general format: ${grails.serverURL}/oauth/callback/${providerName}.
You will need to configure such URL in your OAuth 2.0 provider.
To support OAuth, this plugin uses Profile & Authentication Client for Java. So you can use any OAuth 2.0 provider they support. This includes at the time of writing:
-
Dropbox.
-
Facebook.
-
GitHub.
-
Google.
-
LinkedIn.
-
Windows Live.
-
Wordpress.
-
Yahoo.
-
Paypal.
Note that OAuth 1.0a providers also work, like Twitter.
If your provider is not supported by pac4j, you can write your own. Please refer to the pac4j documentation for that.
The plugin also supports CAS (Central Authentication Service) using the OAuth authentication flow. See CAS Authentication for details.
To start the OAuth authentication flow, from your frontend application, generate a link to
<YOUR_GRAILS_APP>/oauth/authenticate/<provider>. The user clicking on that link represents step 4 in the previous
diagram.
Note that you can define the frontend callback URL in application.groovy under
grails.plugin.springsecurity.rest.oauth.frontendCallbackUrl. You need to define a closure that will be called with
the token value as parameter:
grails.plugin.springsecurity.rest.oauth.frontendCallbackUrl = { String tokenValue -> "http://my.frontend-app.com/welcome.token=${tokenValue}" }You can also define the URL as a callback parameter in the original link, eg:
http://your-grails-api.com/oauth/authenticate/google?callback=http://your-frontend-app.com/auth-success.html?token=
In this case, the token will be concatenated to the end of the URL.
Upon successful OAuth authorisation (after step 6.1 in the above diagram), an
role=include
will be stored in the security context. This is done by a bean named oauthUserDetailsService. The
role=include
delegates to the configured userDetailsService bean, passing the profile ID as the username:
/**
* Builds an {@link OauthUser}. Delegates to the default {@link UserDetailsService#loadUserByUsername(java.lang.String)}
* where the username passed is {@link UserProfile#getId()}.
*
* If the user is not found, it will create a new one with the the default roles.
*/
@Slf4j
@CompileStatic
class DefaultOauthUserDetailsService implements OauthUserDetailsService {
@Delegate
UserDetailsService userDetailsService
UserDetailsChecker preAuthenticationChecks
OauthUser loadUserByUserProfile(UserProfile userProfile, Collection<GrantedAuthority> defaultRoles)
throws UsernameNotFoundException {
String userDomainClass = userDomainClassName()
if ( !userDomainClass ) {
return instantiateOauthUser(userProfile, defaultRoles)
}
loadUserByUserProfileWhenUserDomainClassIsSet(userProfile, defaultRoles)
}
OauthUser loadUserByUserProfileWhenUserDomainClassIsSet(UserProfile userProfile, Collection<GrantedAuthority> defaultRoles) {
OauthUser oauthUser
try {
log.debug "Trying to fetch user details for user profile: ${userProfile}"
UserDetails userDetails = userDetailsService.loadUserByUsername userProfile.id
log.debug "Checking user details with ${preAuthenticationChecks.class.name}"
preAuthenticationChecks?.check(userDetails)
Collection<GrantedAuthority> allRoles = []
allRoles.addAll(userDetails.authorities)
allRoles.addAll(defaultRoles)
oauthUser = new OauthUser(userDetails.username, userDetails.password, allRoles, userProfile)
} catch (UsernameNotFoundException ignored) {
log.debug "User not found. Creating a new one with default roles: ${defaultRoles}"
oauthUser = instantiateOauthUser(userProfile, defaultRoles)
}
oauthUser
}
OauthUser instantiateOauthUser(UserProfile userProfile, Collection<GrantedAuthority> defaultRoles) {
new OauthUser(userProfile.id, 'N/A', defaultRoles, userProfile)
}
@CompileDynamic
String userDomainClassName() {
SpringSecurityUtils.getSecurityConfig()?.get('userLookup')?.get('userDomainClassName')
}
}If you want to provide your own implementation, define it in resources.groovy with bean name oauthUserDetailsService.
Make sure you implements the interface OauthUserDetailsService
If you want to do any additional post-OAuth authorisation check, you should do it on your loadUserByUserProfile
implementation. This is useful if you want to allow your corporate users to log into your application using their Gmail
account. In this case, you should decide based on OAuth20Profile.getEmail(), for instance:
OauthUser loadUserByUserProfile(OAuth20Profile userProfile, Collection<GrantedAuthority> defaultRoles) throws UsernameNotFoundException {
if (userProfile.email.endsWith('example.org')) {
return new OauthUser(userProfile.id, 'N/A', defaultRoles, userProfile)
} else {
throw new UsernameNotFoundException("User with email ${userProfile.email} is not allowed. Only `example.org` accounts are allowed.")
}
}In case of any OAuth authentication failure, the plugin will redirect back to the frontend application anyway, so it
has a chance to render a proper error message and/or offer the user the option to try again. In that case, the token
parameter will be empty, and both error and message params will be appended:
http://your-frontend-app.com/auth-success.html?token=&error=403&message=User+with+email+jimmy%40gmail.com+now+allowed.+Only+%40example.com+accounts+are+allowed
Below are some examples on how to configure it for Google, Facebook and Twitter.
9.43. Google
Define the following block in your application.groovy:
grails {
plugin {
springsecurity {
rest {
oauth {
frontendCallbackUrl = { String tokenValue -> "http://my.frontend-app.com/welcome#token=${tokenValue}" }
google {
client = org.pac4j.oauth.client.Google2Client
key = 'xxxx.apps.googleusercontent.com'
secret = 'xxx'
scope = org.pac4j.oauth.client.Google2Client.Google2Scope.EMAIL_AND_PROFILE
defaultRoles = ['ROLE_USER', 'ROLE_GOOGLE']
}
}
}
}
}
}|
The |
9.43.1. Facebook
Define the following block in your application.groovy:
grails {
plugin {
springsecurity {
rest {
oauth {
frontendCallbackUrl = { String tokenValue -> "http://my.frontend-app.com/welcome#token=${tokenValue}" }
facebook {
client = org.pac4j.oauth.client.FacebookClient
key = 'xxx'
secret = 'yyy'
scope = 'email,user_location'
fields = 'id,name,first_name,middle_name,last_name,username'
defaultRoles = ['ROLE_USER', 'ROLE_FACEBOOK']
}
}
}
}
}
}The scope is a comma-separated list, without blanks, of Facebook permissions. See the
Facebook documentation for more details.
fields may contain a comma-separated list, without blanks, of
user fields.
Both scope and fields are optional, but it’s highly recommendable to fine tune those lists so you don’t ask for
information you don’t need.
9.43.2. Twitter
Define the following block in your application.groovy:
grails {
plugin {
springsecurity {
rest {
oauth {
frontendCallbackUrl = { String tokenValue -> "http://my.frontend-app.com/welcome#token=${tokenValue}" }
twitter {
client = org.pac4j.oauth.client.TwitterClient
key = 'xxx'
secret = 'yyy'
defaultRoles = ['ROLE_USER', 'ROLE_TWITTER']
}
}
}
}
}
}There is no additional configuration for Twitter.
9.43.3. CAS (Central Authentication Service)
Define the following block in your application.groovy:
grails {
plugin {
springsecurity {
rest {
oauth {
frontendCallbackUrl = { String tokenValue -> "http://my.frontend-app.com/welcome#token=${tokenValue}" }
cas {
client = org.pac4j.cas.client.CasClient
configuration = new org.pac4j.cas.config.CasConfiguration("https://my.cas-server.com/cas/login")
}
}
}
}
}
}Set configuration to an instance of org.pac4j.cas.config.CasConfiguration passing the login URL of your CAS server as the argument of the constructor.
If you need debug information, you can specify the following entries in logback.groovy:
logger("org.springframework.security", DEBUG, ['STDOUT'], false)
logger("grails.plugin.springsecurity", DEBUG, ['STDOUT'], false)
logger("org.pac4j", DEBUG, ['STDOUT'], false)9.44. Why this token-based implementation? Can’t I use HTTP basic authentication?
In theory you can. The only restriction to be truly stateless is to not use HTTP sessions at all. So if you go with basic authentication, you need to transfer the credentials back and forth every time.
Let’s think about that. Keep in mind that your frontend is a pure HTML/Javascript application, consuming a REST API
from the Grails side. So the first time, the Javascript application will make an API query and will receive a 401 response
indicating that authentication is required. Then you present the user a form to enter credentials, you grab them, encode
them with Base64 and in the next request, you send an HTTP header like Authorization: Basic QWxhZGRpbjpvcGVuIHNlc2FtZQ==.
Now remember you are doing RESTful application, so the session state is maintained in the client. That means that you would need to store that Base64 encoded string somewhere: cookies? HTML5 local storage? In any case, they are accessible using browser tools. And that’s the point: there is a huge security risk because Base64 it’s not encryption, just encoding. And it can be easily decoded.
You could argue that someone can access the token in the browser. Yes, but having the token will not allow him to obtain user’s credentials. The tokens are just not decodable. And they can be revoked if necessary.
Fortunately for you, a token-based solution is not a magic idea that I only got; it’s actually a specification: RFC 6750 - The OAuth 2.0 Authorization Framework: Bearer Token Usage.
Moreover, if you use tokens, you have the chance to implement expiration policies.
A couple of link with further explanations on the token-based flow:
9.45. Why can’t the API be secured with OAuth?
RFC 6749 - OAuth 2.0 specification does cover this scenario in what they call "public clients":
Clients incapable of maintaining the confidentiality of their credentials (e.g., clients executing on the device used by the resource owner, such as an installed native application or a web browser-based application), and incapable of secure client authentication via any other means.
The OAuth 2.0 specification supports public clients with the implicit grant. This plugin supports that by default when you delegate the authentication to another OAuth provider. If it’s you who are authenticating the users (via DB, LDAP, etc), the token-based flow of this plugin is OAuth-ish.
9.46. Why you didn’t use any of the existing OAuth plugins? Why pac4j?
I’m aware of plugins like OAuth and Spring Security OAuth, but all of them rely on Spring Security Core’s way of using HTTP sessions. So not acceptable.
I chose pac4j because:
-
They support major OAuth 2.0 providers out-of-the-box, whereas Scribe does not.
-
It’s deadly simple and works just fine.
I’m also aware of a pac4j-spring-security module. See my previous response on HTTP sessions.
9.47. Project History
Originally this plugin was written by Alvaro Sanchez-Mariscal (Twitter). It is currently maintained by the Grails Stewards.
9.48. API Reference
The REST plugin Groovydoc API documentation is available at REST Plugin API Reference.
10. UI Plugin
10.1. Introduction to the Spring Security UI Plugin
The Spring Security UI plugin provides CRUD screens and other user management workflows.
The CRUD screens are protected from cross-site request forgery (CSRF) attacks through the use of the useToken attribute
in forms. For more details, refer to the
Handling Duplicate Form Submissions section in the
Grails Core documentation.
Non-default functionality is available only if the feature is available. This includes:
-
ACL Controllers and Views, which are enabled if the ACL Plugin is installed.
-
Requestmaps support, which is available if
grails.plugin.springsecurity.securityConfigTypeis set to"Requestmap"orSecurityConfigType.Requestmapinapplication.groovy. -
Persistent cookies support, which is enabled if it has been configured with the
s2-create-persistent-tokenscript.
10.1.1. Installation
Add an entry in the dependencies block of your build.gradle file, changing the version as needed:
build.gradleimplementation 'org.apache.grails:grails-spring-security-ui:8.0.0-SNAPSHOT'Also be sure to update the version when new releases are available.
10.1.2. Release History
For later releases - see the GitHub release page.
-
Apr 9, 2019
-
4.0.0.M1 release
-
-
Feb 14, 2018
-
3.1.2 release
-
-
Sep 27, 2017
-
3.1.1 release
-
-
Sep 26, 2017
-
3.1.0 release
-
-
Jul 28, 2017
-
3.0.2 release
-
-
Jul 27, 2017
-
3.0.1 release
-
-
April 15, 2016
-
3.0.0.M2 release
-
-
December 21, 2015
-
3.0.0.M1 release
-
-
December 21, 2015
-
1.0-RC3 release
-
-
May 20, 2014
-
1.0-RC2 release
-
-
November 11, 2013
-
1.0-RC1 release
-
-
February 12, 2012
-
0.2 release
-
-
September 14, 2010
-
0.1.2 release
-
-
July 27, 2010
-
0.1.1 release
-
-
July 26, 2010
-
initial 0.1 release
-
10.2. User Management
10.2.1. User search
The default action for the User controller is search. By default only the standard fields (username, enabled, accountExpired, accountLocked, and passwordExpired) are available but this is customizable with the s2ui-override script - see the Customization section for details.
You can search by any combination of fields, and the username field has an Ajax autocomplete to assist in finding instances. In this screenshot you can see that an email field has been added to the domain class and UI. Leave all fields empty and all checkboxes set at "Either" to return all instances.

This example shows a search for usernames containing adm (the search is case-insensitive and the search string can appear anywhere in the username). Results are shown paginated in groups of 10. All of the column headers are clickable and will sort the results by that field.
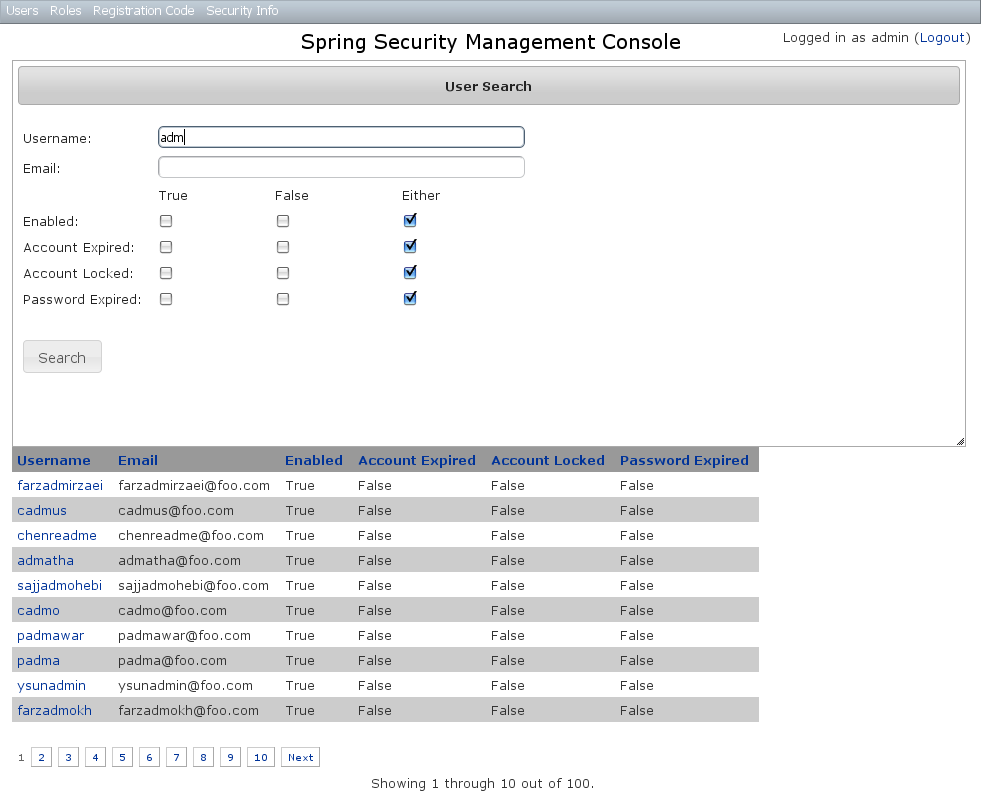
10.2.2. User edit
After clicking through to the admin User you get to the edit page (there are no view pages):
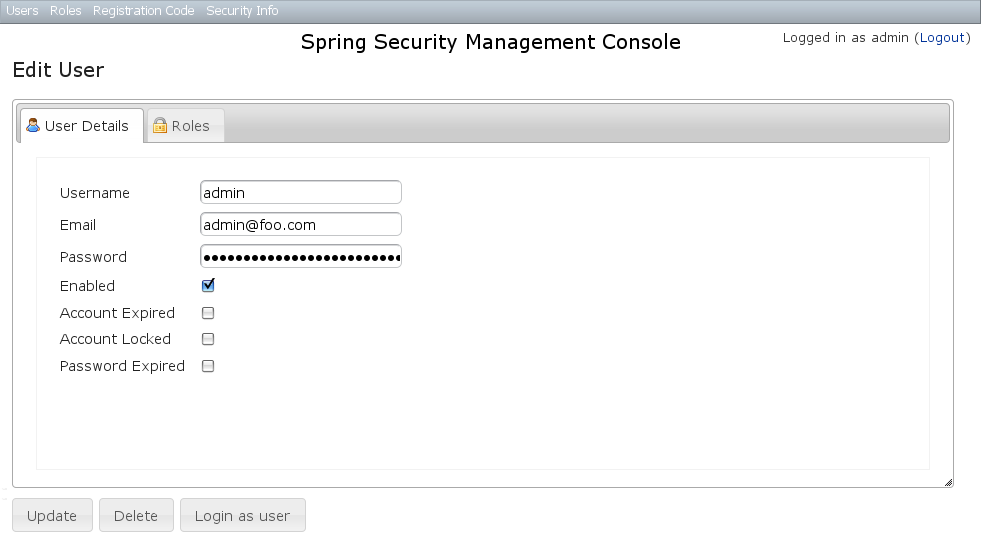
You can update any of the attributes or delete the User. You can see that there’s a "Login as user" button here - that is only shown if you’re authenticated with a User who is granted ROLE_SWITCH_USER (this role name can be configured in application.groovy):
This allows you to temporarily assume the identity of another User (see the Grails Spring Security Core Plugin documentation for more information about switch-user). The "Logged in as …" information in the top right of the screen will change to show that you’re running as another User and provide a link to switch back. The role name ROLE_SWITCH_USER is the default but you can change the value with the grails.plugin.springsecurity.ui.switchUserRoleName setting in application.groovy.
If you click the Roles tab you can see the roles granted to this User and can click through to its edit page:
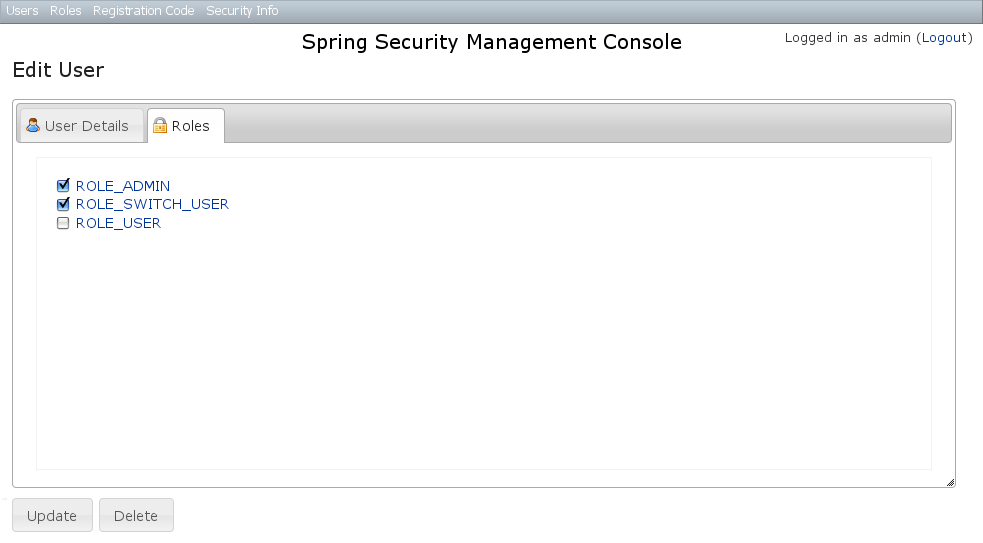
10.2.3. User creation
You can create new Users by going to /user/create or by clicking the Create action in the Users menu.
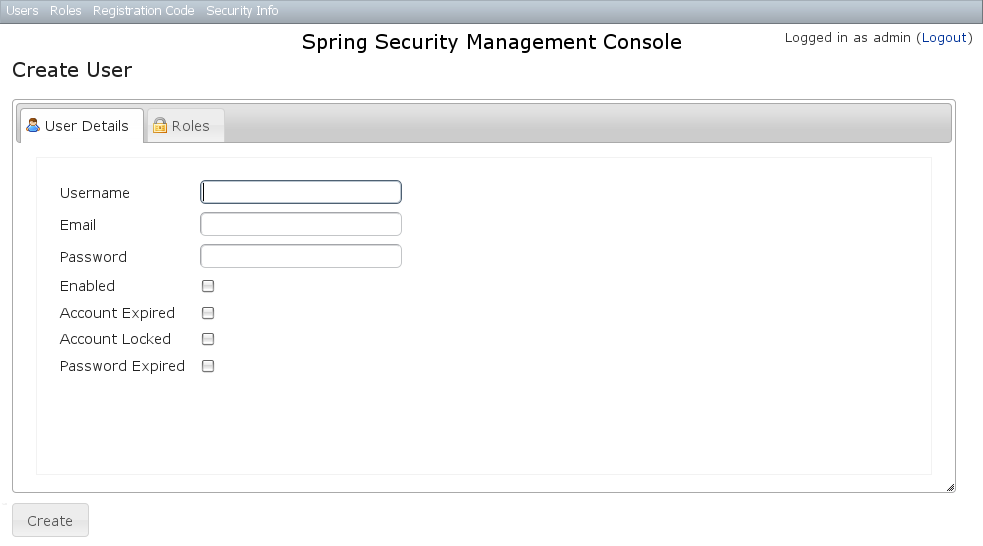
10.3. Role Management
10.3.1. Role search
The default action for the Role controller is search. By default only the authority field is available but this is customizable with the s2ui-override script - see the Customization section for details.
The authority field has an Ajax autocomplete to assist in finding instances. Leave the field empty to return all instances.
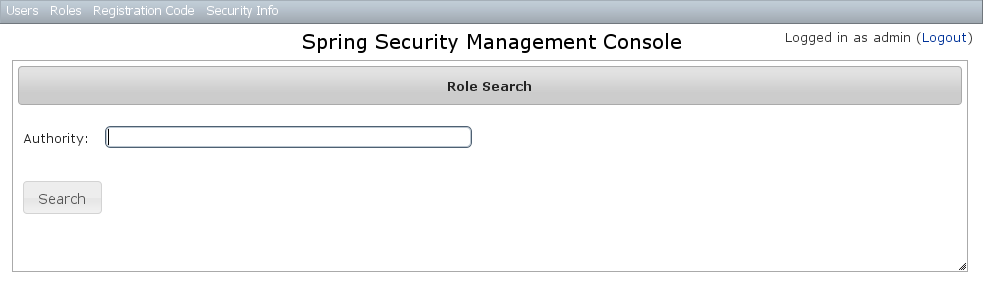
Search is case-insensitive and the search string can appear anywhere in the name (and you can omit the ROLE_ prefix). Results are shown paginated in groups of 10 but if there’s only one result you’ll be forwarded to the edit page for that Role. The authority column header is clickable and will sort the results by that field.
10.3.2. Role edit
After clicking through to a Role you get to the edit page (there are no view pages):
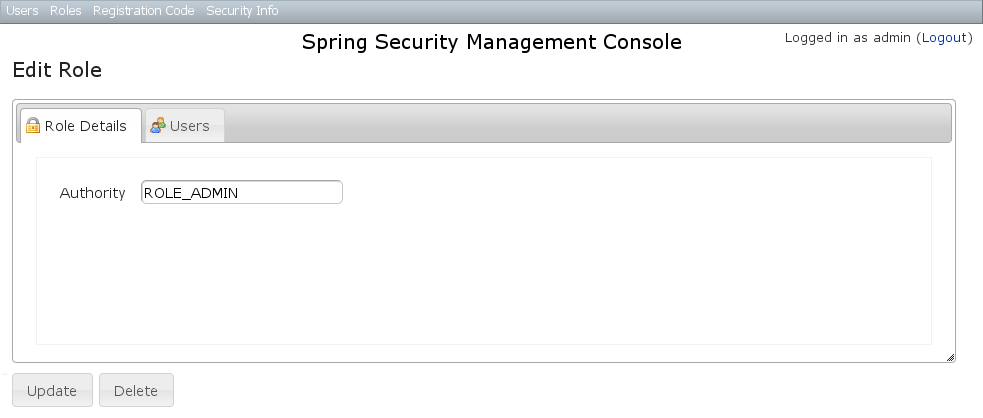
You can update any of the attributes or delete the Role. Any user that had been granted the Role will lose the grant but otherwise be unaffected.
If you click the Users tab you can see which users have a grant for this Role and can click through to their edit page:
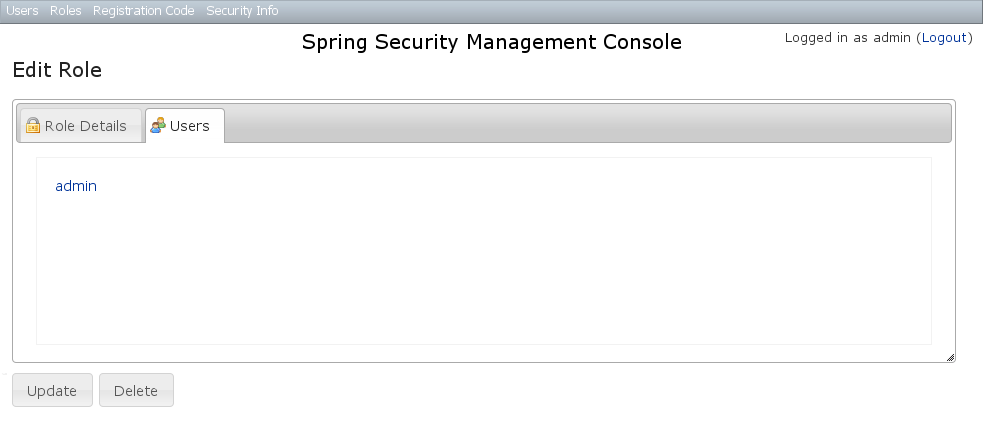
10.3.3. Role creation
You can create new Roles by going to /role/create or by clicking the Create action in the Roles menu.
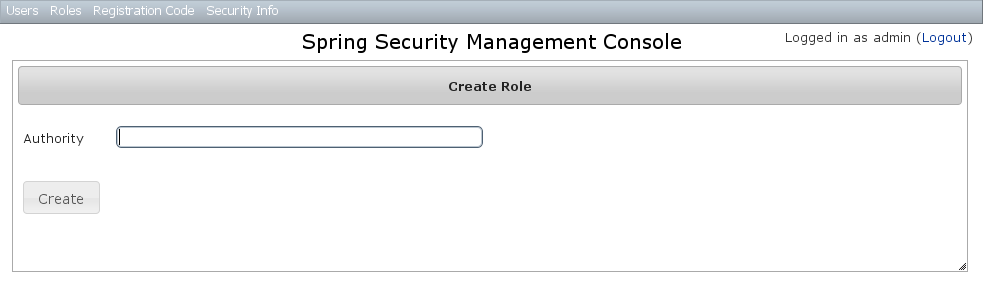
10.4. Requestmap Management
The default approach to securing URLs is with annotations, so the Requestmaps menu is only shown if grails.plugin.springsecurity.securityConfigType has the value "Requestmap" or SecurityConfigType.Requestmap in application.groovy.
10.4.1. Requestmap search
The default action for the Requestmap controller is search. By default only the standard fields (url and configAttribute) are available but this is customizable with the s2ui-override script - see the Customization section for details.
You can search by any combination of fields, and the url and configAttribute fields have an Ajax autocomplete to assist in finding instances. Leave both fields empty to return all instances.
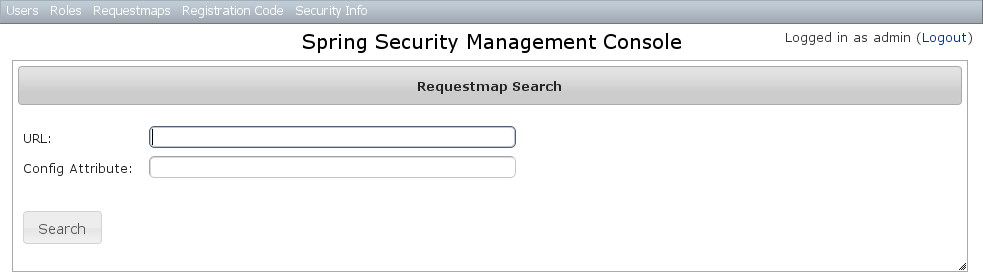
Searching is case-insensitive and the search string can appear anywhere in the field. Results are shown paginated in groups of 10 and you can click on either header to sort by that field:
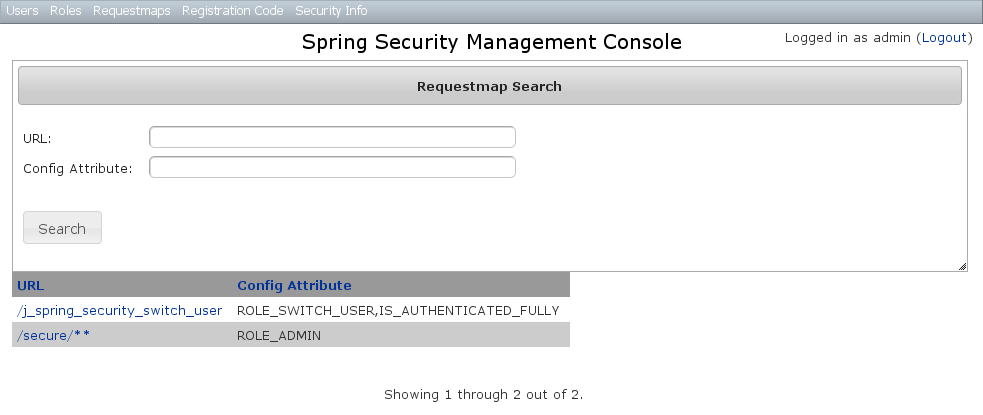
10.4.2. Requestmap edit
After clicking through to a Requestmap you get to the edit page (there are no view pages):
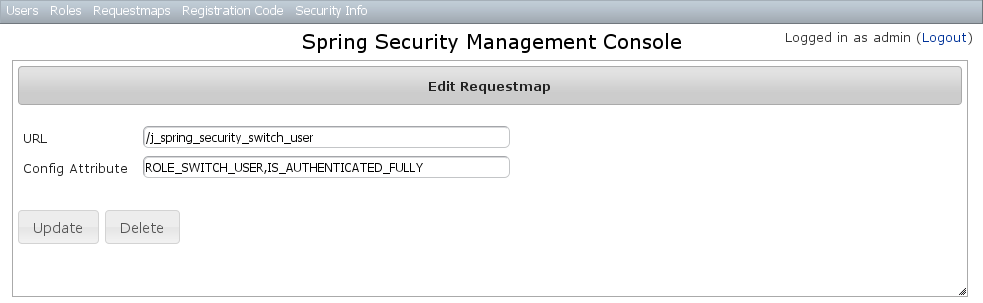
You can update any of the attributes or delete the Requestmap. Editing or deleting a Requestmap resets the cache of loaded instances, so your changes will take effect immediately.
10.4.3. Requestmap creation
You can create new Requestmaps by going to /requestmap/create or by clicking the Create action in the Requestmaps menu.
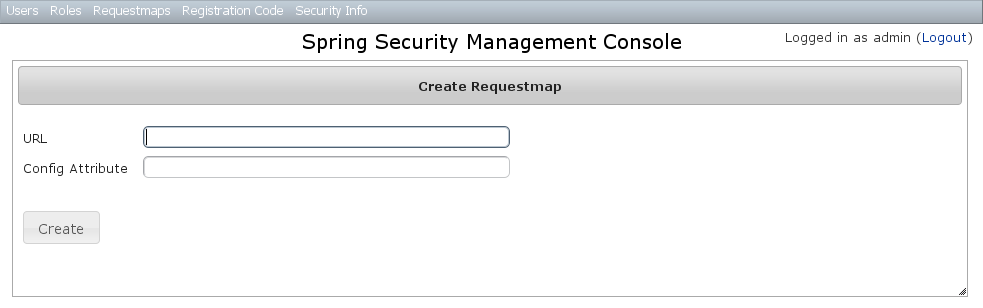
Creating a Requestmap resets the cache of loaded instances, so your changes will take effect immediately.
10.5. User Registration
Most of the plugin’s controllers are intended to be part of a backend admin application, but the Registration and Forgot Password workflows are expected to be user-facing. So they’re not available in the admin menu like the User, Role, and other backend functionality - you’ll need to expose them to your users.
One way to do this is to replace the default login.gsp that’s provided by the Spring Security Core plugin with this plugin’s version. You can do this by running grails s2ui-override auth - s2ui-override script - see the Customization section for details. If you do this your users will have links to both workflows from the login screen:
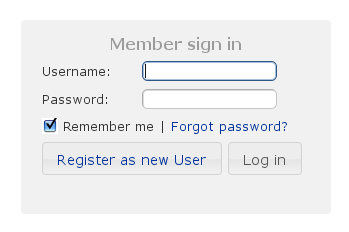
10.5.1. Registration
Navigate to /register/:
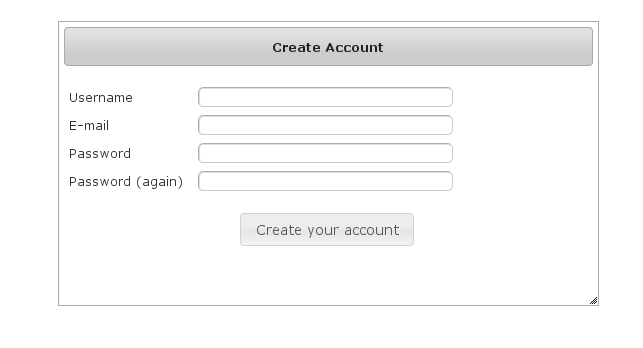
By default e-mail validation for user creation is turned on. If you wish to turn it off see the E-Mail Validation Parameter section below. If this is turned off then no e-mail is sent to the user and they are automatically redirected to the link that would have been sent in the e-mail.
After filling out valid values an email will be sent and you’ll see a success screen:
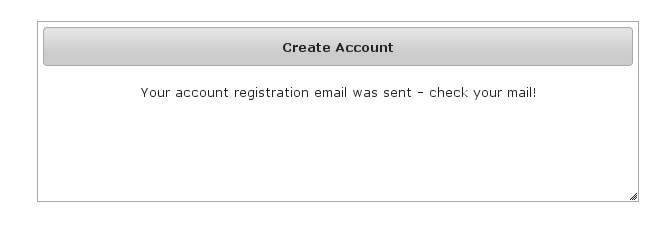
Click on the link in the email:
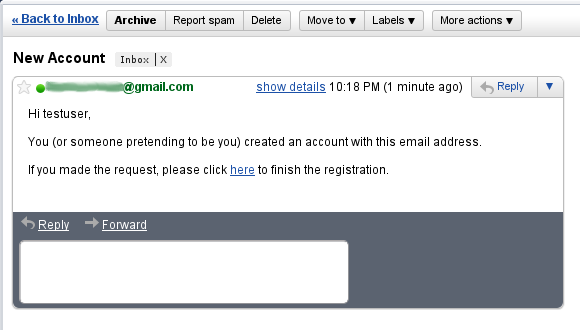
and you’ll finalize the process, which involves enabling the locked user and pre-authenticating, then redirecting to the configured destination:
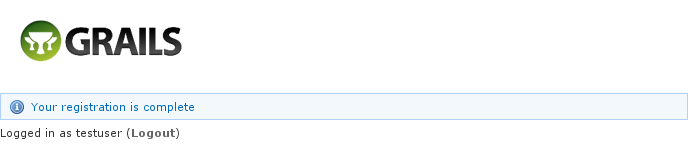
10.5.2. Configuration
The post-registration destination url is configurable in grails-app/conf/application.groovy using the postRegisterUrl attribute:
If you don’t specify a value then the grails.plugin.springsecurity.successHandler.defaultTargetUrl value will be used, which is '/' by default.
In addition, each new user will be granted ROLE_USER after finalizing the registration. If you want to change the default role, add more, or grant no roles at all (for example if you want an admin to approve new users and explicitly enable new users) then you can customize that with the defaultRoleNames attribute (which is a List of Strings):
grails.plugin.springsecurity.ui.register.postRegisterUrl = '/welcome'10.6. E-Mail Validation Parameter
You can customize if the user should get e-mail for validation before they can log in for the first time. To turn off
e-mail validation set the parameter requireEmailValidation to false, if not set it will default to true. This
can be set in grails-app/conf/application.groovy or grails-app/conf/application.yml under
grails.plugin.springsecurity.ui.register.requireEmailValidation = falsePlease Note if you turn off e-mail validation in production it is strongly recommended to have additional user creation validation
10.6.1. Mail configuration
By default the plugin uses the Mail plugin to send emails, but only if it is installed. This is configurable by registering your own MailStrategy implementation - see the section on Customization for more information. The plugin assumes that the Mail plugin and an SMTP server are already configured.
You can customize the subject, body, and from address of the registration email by overriding the default values in grails-app/conf/application.groovy, for example:
grails.plugin.springsecurity.ui.register.emailBody = '...'
grails.plugin.springsecurity.ui.register.emailFrom = '...'
grails.plugin.springsecurity.ui.register.emailSubject = '...'The emailBody property should be a GString and will have the User domain class instance in scope in the user variable, and the generated url to click to finalize the signup in the url variable.
grails.plugin.springsecurity.ui.register.defaultRoleNames = [] // no rolesor
grails.plugin.springsecurity.ui.register.defaultRoleNames = ['ROLE_CUSTOMER']10.6.2. Notes
You should consider the registration code as starter code - every signup workflow will be different, and this should help you get going but is unlikely to be sufficient. You may wish to collect more information than just username and email - first and last name for example. Run grails s2ui-override register to copy the registration controller and GSPs into your application to be customized.
If there are unexpected validation errors during registration (which can happen when there is a disconnect between the domain classes and the code in RegisterController they will be logged at the warn or error level, so enable logging to ensure that you see the messages, e.g.
...
logger 'grails.plugin.springsecurity.ui.SpringSecurityUiService', WARN
...|
|
10.6.3. RegistrationCode search
The plugin uses its grails.plugin.springsecurity.ui.RegistrationCode domain class to store a token associated with the new users' username for use when finishing the registration process after the user clicks the link in the generated email (and also as part of the forgot-password workflow). The plugin includes a controller and GSPs to manage these instances.
The default action for the RegistrationCode controller is search. By default only the standard fields (username and token) are available but this is customizable with the s2ui-override script - see the Customization section for details.
You can search by any combination of fields, and both fields have an Ajax autocomplete to assist in finding instances. Leave both fields empty to return all instances.
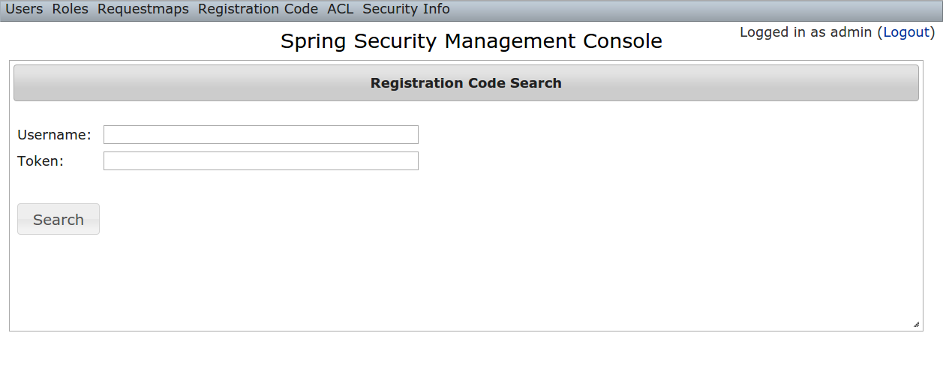
Searching is case-insensitive and the search string can appear anywhere in the field. Results are shown paginated in groups of 10 and you can click on any header to sort by that field:
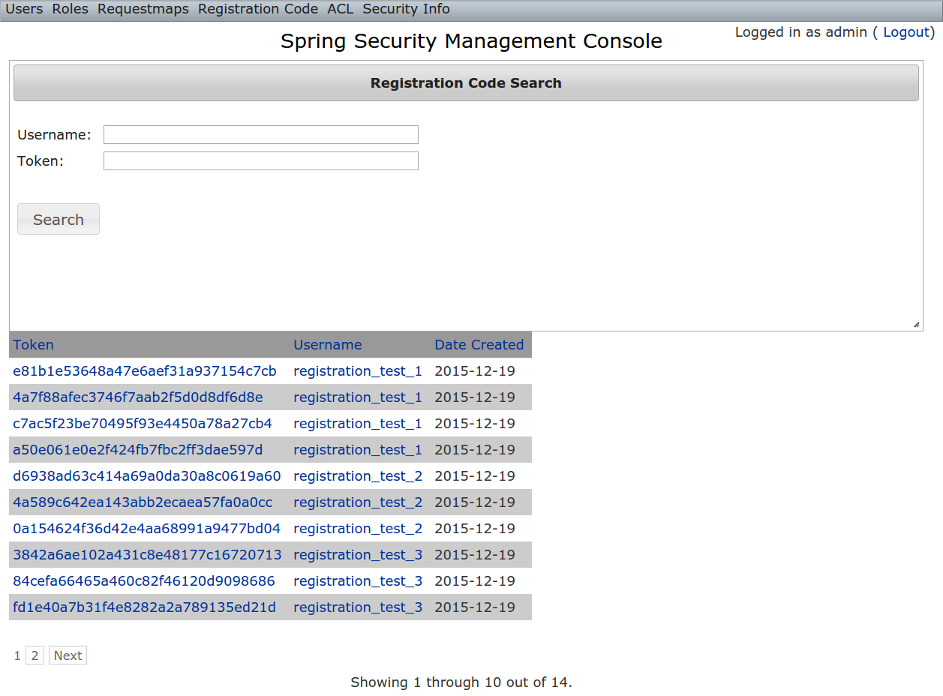
10.6.4. RegistrationCode edit
After clicking through to a RegistrationCode you get to the edit page (there are no view pages):
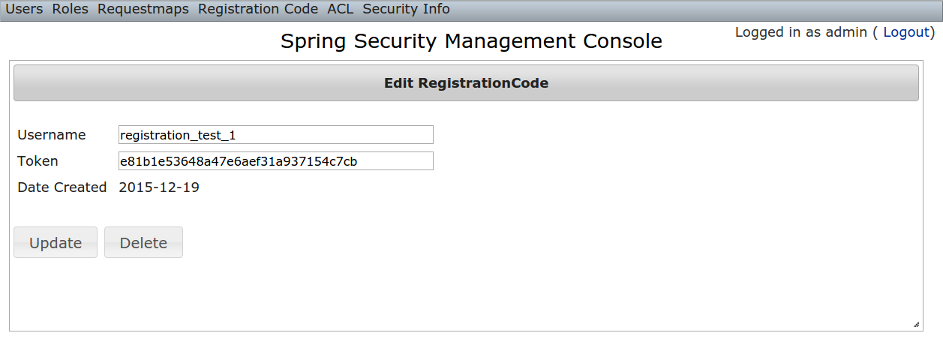
You can update the username or token attribute or delete the RegistrationCode.
Since instances are created during the "User Registration" and "Forgot Password" workflows, there is no functionality in this plugin to create new instances.
10.7. Forgot Password
Like the Registration workflow, the Forgot Password workflow is expected to be user-facing. So it’s not available in the admin menu like the User, Role, and other backend functionality - you’ll need to expose them to your users.
One way to do this is to replace the default login.gsp that’s provided by the Spring Security Core plugin with this plugin’s version. You can do this by running grails s2ui-override auth - see the section on Customization for more details. If you do this your users will have links to both workflows from the login screen:
10.7.1. Forgot Password
Navigate to /register/forgotPassword:
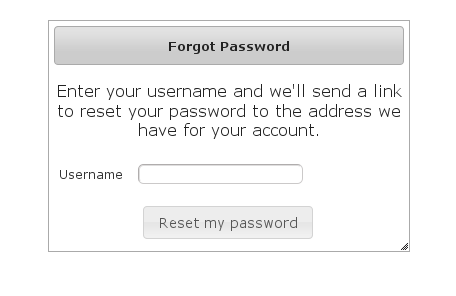
The default is to have e-mail validation for forgetting a password. This is now configurable which will be explained below.
After entering a valid username an email will be sent and you’ll see a success screen:
Click on the link in the email:

and you’ll open the reset password form:
After entering a valid password you’ll finalize the process, which involves storing the new password hashed in the user table and pre-authenticating, then redirecting to the configured destination:
10.7.2. Configuration
The post-reset destination url is configurable in grails-app/conf/application.groovy using the postResetUrl attribute:
grails.plugin.springsecurity.ui.forgotPassword.postResetUrl = '/reset'If you don’t specify a value then the defaultTargetUrl value will be used, which is '/' by default.
10.7.3. Email Validation Configuration
You can customize if you want to have the user get e-mails for validation before they can reset their password. To turn off
e-mail validation set the parameter requireForgotPassEmailValidation to false. If not set it will default to true. This
can be set in grails-app/conf/application.groovy or grails-app/conf/application.yml under
grails.plugin.springsecurity.ui.forgotPassword.requireForgotPassEmailValidation = falseIf e-mail validation is turned off, it is recommended to use the forgotPasswordExtraValidation below.
10.7.4. Challenge Questions Configuration
It is recommended the provided script named s2ui-create-challenge-questions be used to generate challenge questions.
All the answers will be encrypted and it will use the same encryption settings as the what is used to store the password for each user. The service to handle this listener is automatically created and configured when you use the plugin.
The option to add challenge questions can be turned on will work independent of e-mail validation. If the e-mail validation is turned on this step will occur before the e-mail is sent out.
To make this work, the domain object must have a link to your User Object. This is done by setting the validationUserLookUpProperty which defaults to user.
This can be customized in either grails-app/conf/application.groovy or grails-app/conf/application.yml
grails.plugin.springsecurity.ui.forgotPassword.validationUserLookUpProperty = 'user'Each list item in the forgotPasswordExtraValidation has three options, though each should only have two. If you have both
labelDomain and labelMessage then labelDomain will be used as it takes precedences.
| Header 1 | Header 2 |
|---|---|
labelDomain |
This is the property in the domain object that will used to ask the question |
labelMessage |
If labelDomain is not present then this can be used as a message property to ask a question (ie if your questions are static). |
prop |
This is used as the property of the domain object to determine if the answer is correct. |
This can be customized in either grails-app/conf/application.groovy or grails-app/conf/application.yml
grails:
plugin:
springsecurity:
ui:
forgotPassword:
forgotPasswordExtraValidation:
-
labelDomain: myQuestion
prop: myAnswer
-
labelMessage: securityvalidations.labelMessage.label1
prop: myAnswer2If the above is configured you will see a menu item to List and Create Challenge questions for each user.
To use the challenge questions functionality please set the domain class which will hold the answers with the
forgotPasswordExtraValidationDomainClassName property. This is Domain object that contains any reference that is needed by prop (question) and labelDomain (answer).
grails:
plugin:
springsecurity:
ui:
forgotPassword:
forgotPasswordExtraValidationDomainClassName: com.mycompany.Profile
10.7.5. Mail configuration
By default the plugin uses the Mail plugin to send emails, but only if it is installed. This is configurable by registering your own MailStrategy implementation - see the section on Customization for more information. The plugin assumes that the Mail plugin and an SMTP server are already configured.
You can customize the subject, body, and from address of the reset email by overriding the default values in grails-app/conf/application.groovy, for example:
grails.plugin.springsecurity.ui.forgotPassword.emailBody = '...'
grails.plugin.springsecurity.ui.forgotPassword.emailFrom = '...'
grails.plugin.springsecurity.ui.forgotPassword.emailSubject = '...'The emailBody property should be a GString and will have the User domain class instance in scope in the user variable, and the generated url to click to reset the password in the url variable.
10.7.6. Notes
Like the registration code, consider this workflow as starter code. Run grails s2ui-override register to copy the registration controller and GSPs into your application to be customized.
|
|
10.8. ACL Management
ACL management should be done using the API exposed by AclService and AclUtilService. Both services have a much more intuitive and convenient high-level approach to managing ACLs, ACEs, etc. The functionality in this plugin is to provide a CRUD interface for fine-grained ACL management.
The ACL menu is only available if the ACL plugin is installed.
10.8.1. AclClass Management
The default action for the AclClass controller is search. By default only the standard fields are available but this is customizable with the s2ui-override script - see the Customization section for details.
The className field has an Ajax autocomplete to assist in finding instances. Leave the field empty to return all instances.
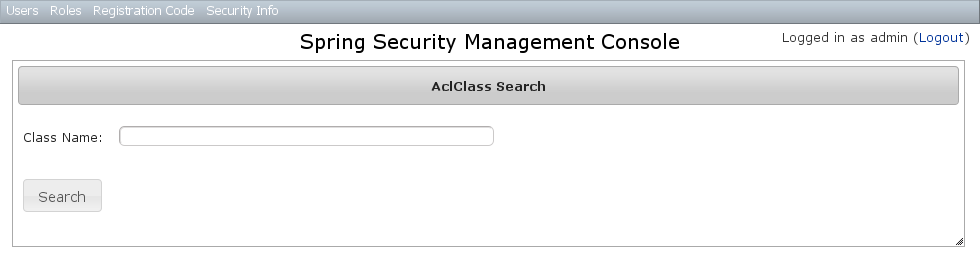
Searching is case-insensitive and the search string can appear anywhere in the field. Results are shown paginated in groups of 10 and you can click on the className column header to sort the results by that field:
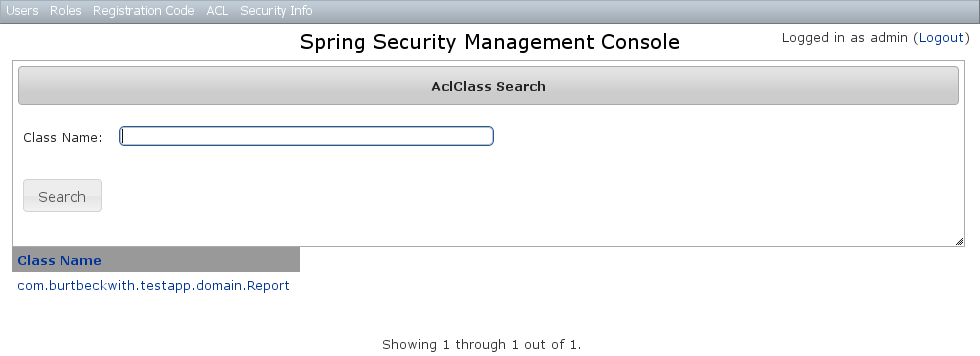
AclClass Edit
After clicking through an AclClass you get to the edit page (there are no view pages):
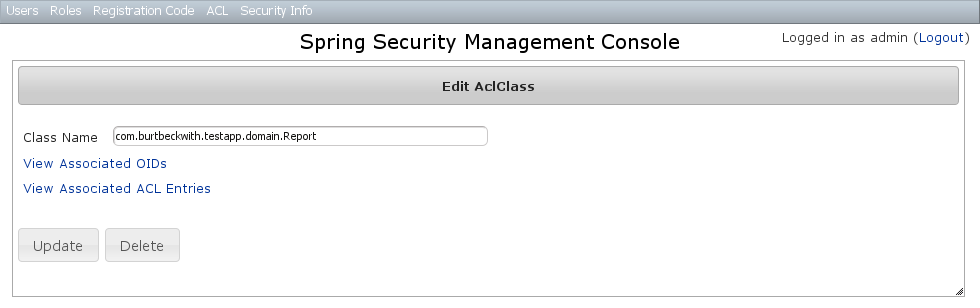
You can update the name, and delete the instance if there aren’t any associated AclObjectIdentity or AclEntry instances - by default there is no support for cascading.
You can also see the associated AclObjectIdentity instances (OIDs) or AclEntry instances.
AclClass Create
You can create new instances by going to /aclClass/create or by clicking the Create action in the Class menu under ACL.
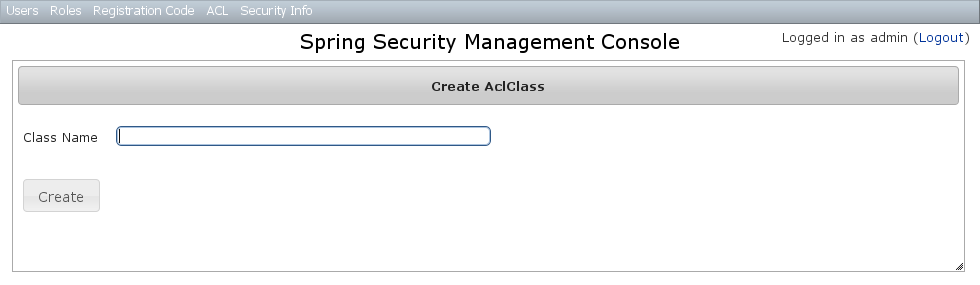
10.8.2. AclSid Management
The default action for the AclSid controller is search. By default only the standard fields are available but this is customizable with the s2ui-override script - see the Customization section for details.
The sid field has an Ajax autocomplete to assist in finding instances. Leave the field empty and principal set to Either to return all instances.
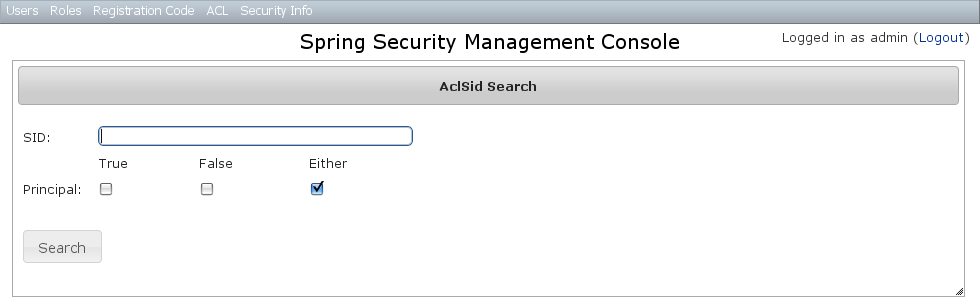
Results are shown paginated in groups of 10. The column headers are clickable and will sort the results by that field:
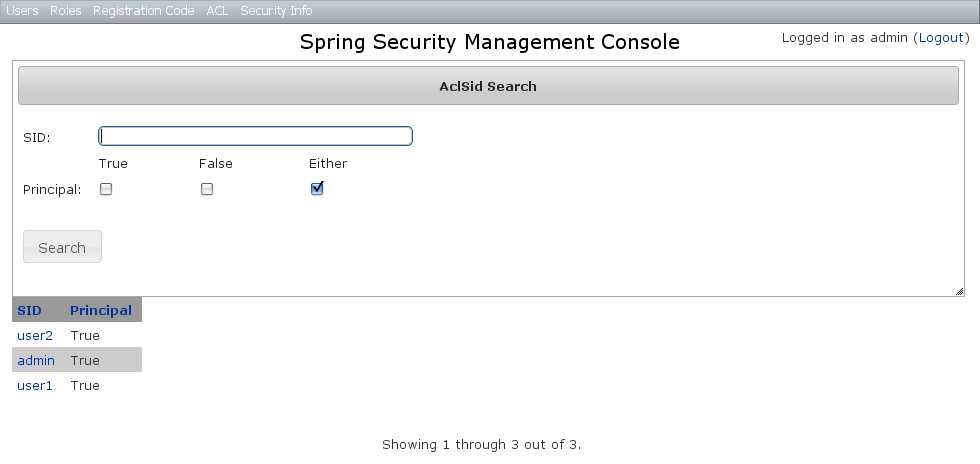
AclSid Edit
After clicking through to a sid you get to the edit page (there are no view pages):
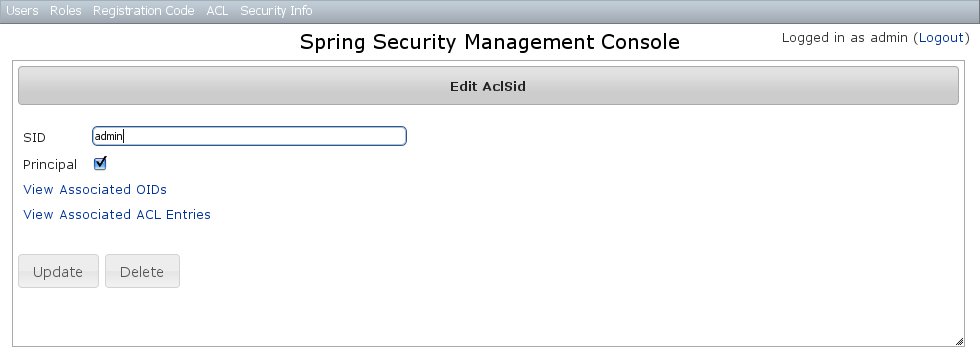
You can update the name and whether it’s a Principal sid or a Role sid, and delete the instance if there aren’t any associated AclObjectIdentity or AclEntry instances - by default there is no support for cascading.
You can also see the associated AclObjectIdentity instances (OIDs) or AclEntry instances.
AclSid Create
You can create new instances by going to /aclSid/create or by clicking the Create action in the SID menu under ACL.
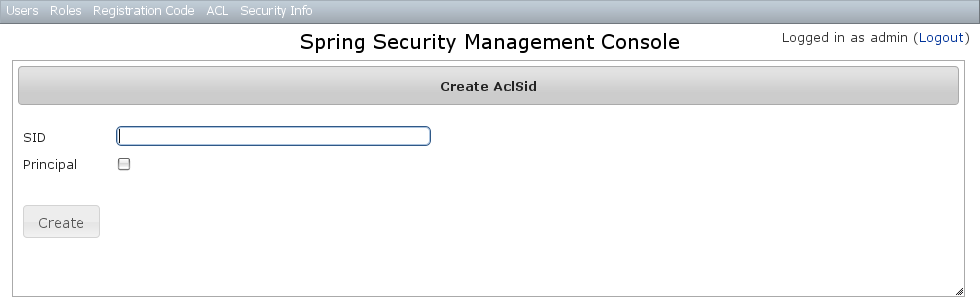
10.8.3. AclObjectIdentity Management
The default action for the AclObjectIdentity controller is search. By default only the standard fields are available but this is customizable with the s2ui-override script - see the Customization section for details.
Leave all fields at their default values to return all instances.
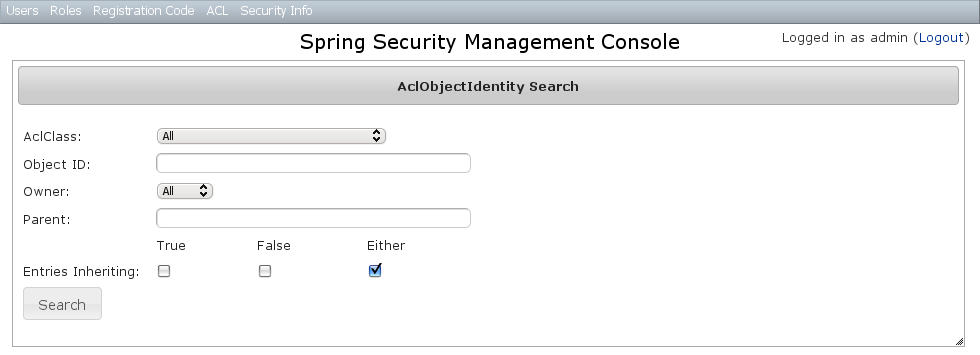
Results are shown paginated in groups of 10 and you can click on any header to sort by that field:

AclObjectIdentity Edit
After clicking through to an AclObjectIdentity you get to the edit page (there are no view pages):
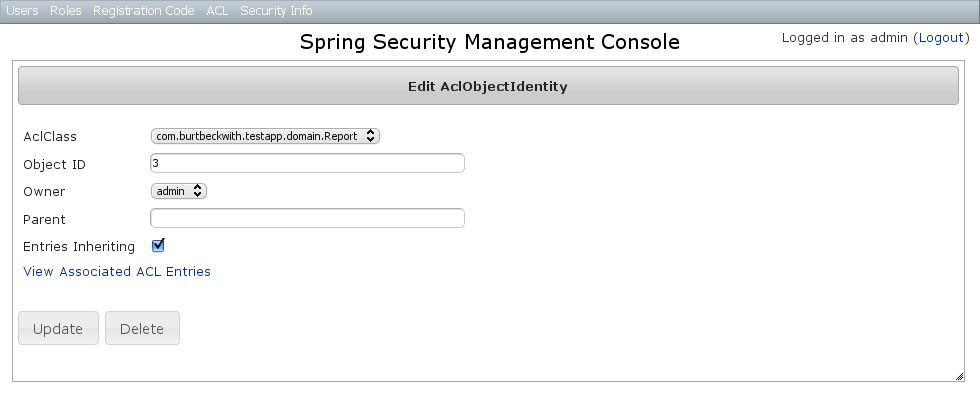
You can update any of the attributes, and can delete the instance if there aren’t any associated AclEntry instances - by default there is no support for cascading.
You can also see the associated AclEntry instances.
AclObjectIdentity Create
You can create new instances by going to /aclObjectIdentity/create or by clicking the Create action in the OID menu under ACL.
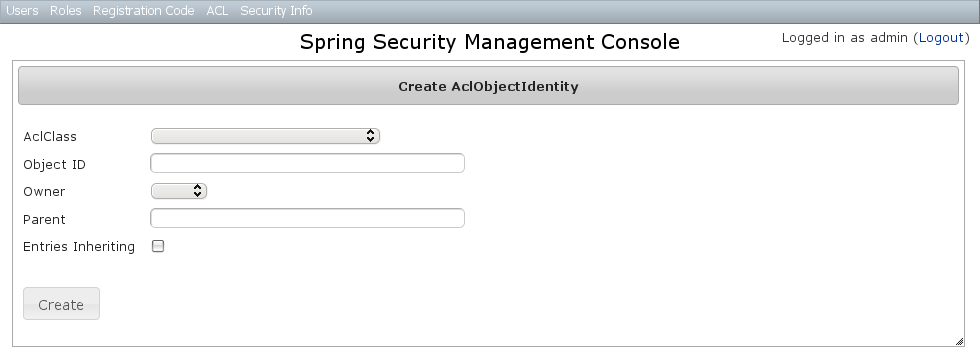
10.8.4. AclEntry Management
The default action for the AclEntry controller is search. By default only the standard fields are available but this is customizable with the s2ui-override script - see the Customization section for details.
Leave all fields at their default values to return all instances.
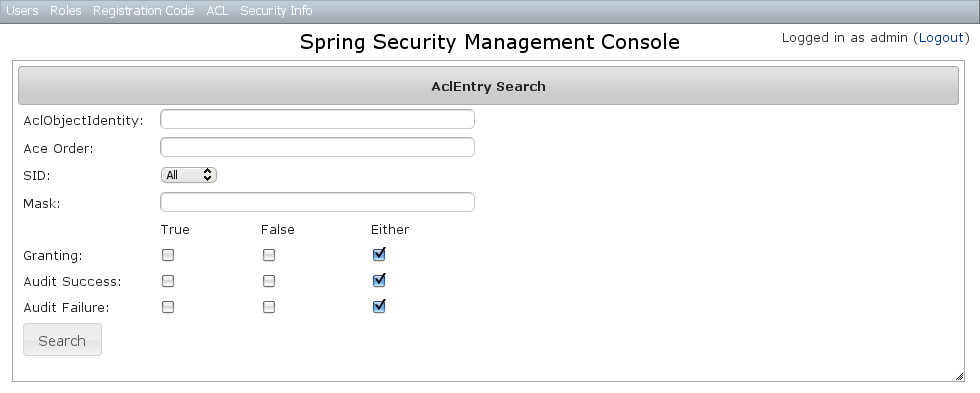
Results are shown paginated in groups of 10 and you can click on any header to sort by that field:
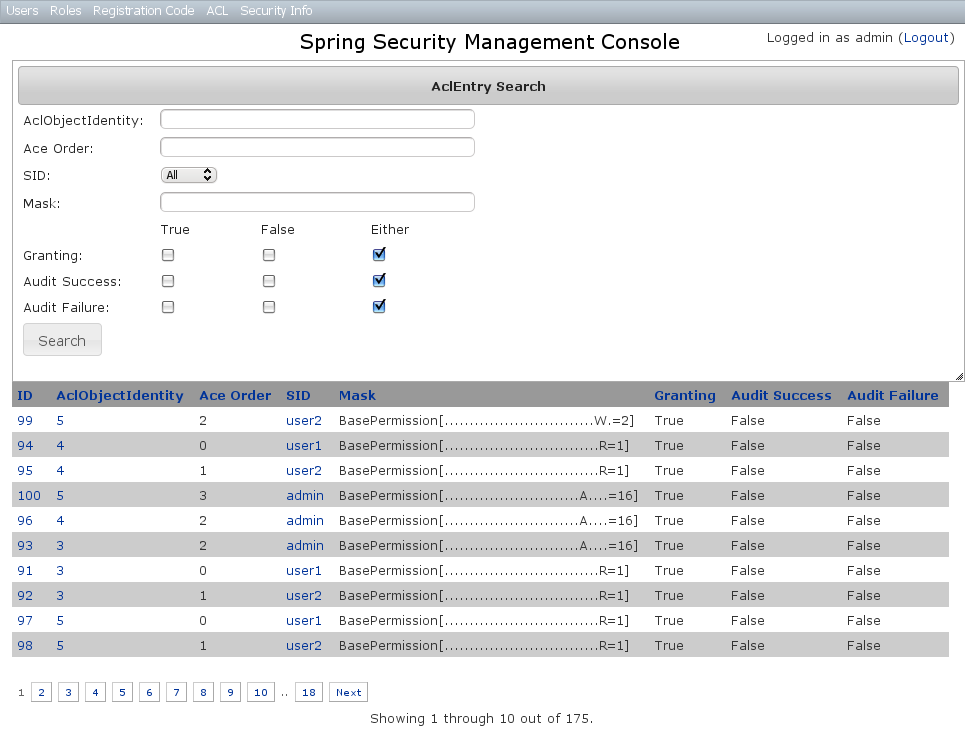
AclEntry Edit
After clicking through to an AclEntry you get to the edit page (there are no view pages):
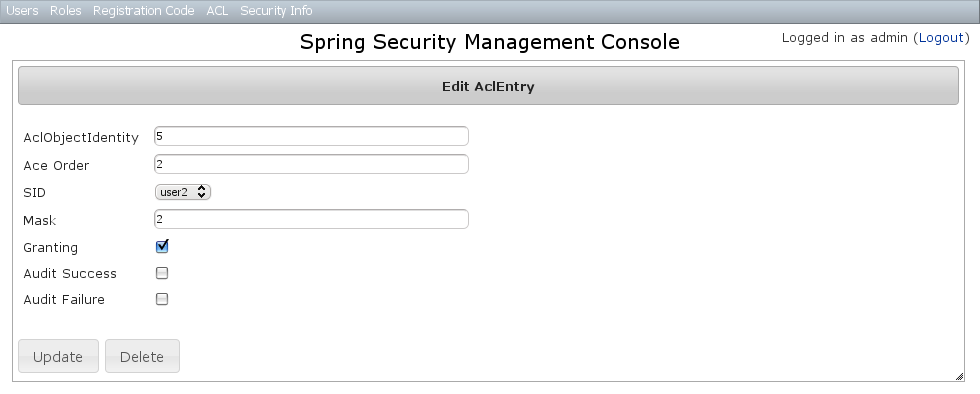
You can update any of the attributes or delete the AclEntry.
AclEntry Create
You can create new instances by going to /aclEntry/create or by clicking the Create action in the Entry menu under ACL.
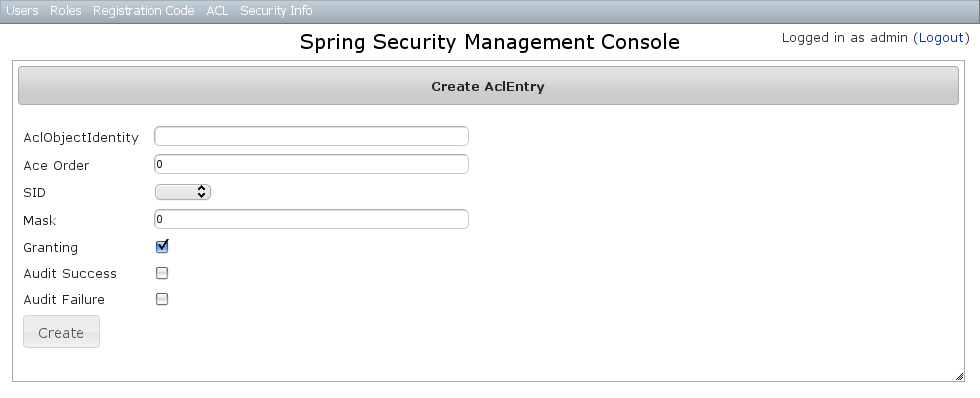
10.9. Persistent Cookie Management
Persistent cookies aren’t enabled by default - you must enable them by running the s2-create-persistent-token script. See the Spring Security Core Plugin documentation for details about this feature.
The Persistent Logins menu is only shown if this feature is enabled.
10.9.1. Persistent logins search
The default action for the PersistentLogin controller is search. By default only the standard fields (username, token, and series) are available but this is customizable with the s2ui-override script - see the Customization section for details.
You can search by any combination of fields, and all fields have an Ajax autocomplete to assist in finding instances. Leave all fields empty to return all instances.
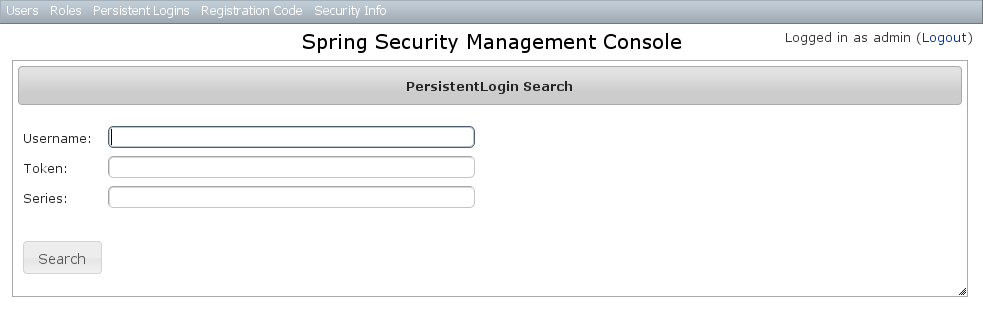
Searching is case-insensitive and the search string can appear anywhere in the field. Results are shown paginated in groups of 10 and you can click on any header to sort by that field:
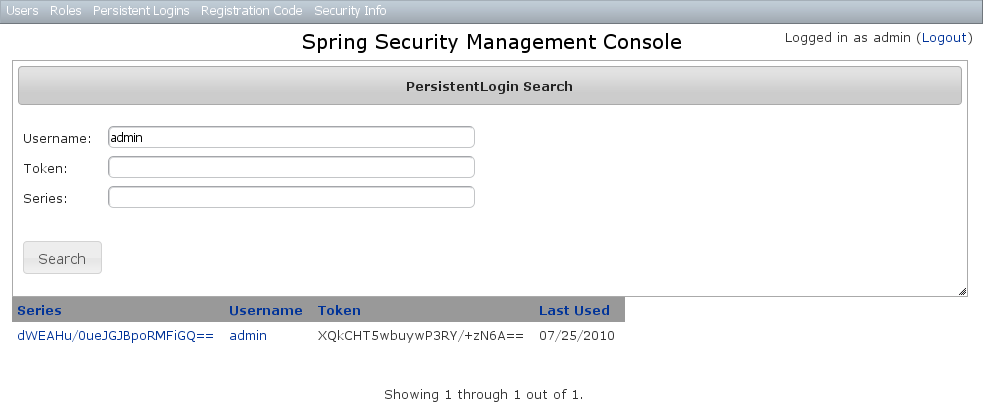
10.9.2. Persistent logins edit
After clicking through to an instance you get to the edit page (there are no view pages):
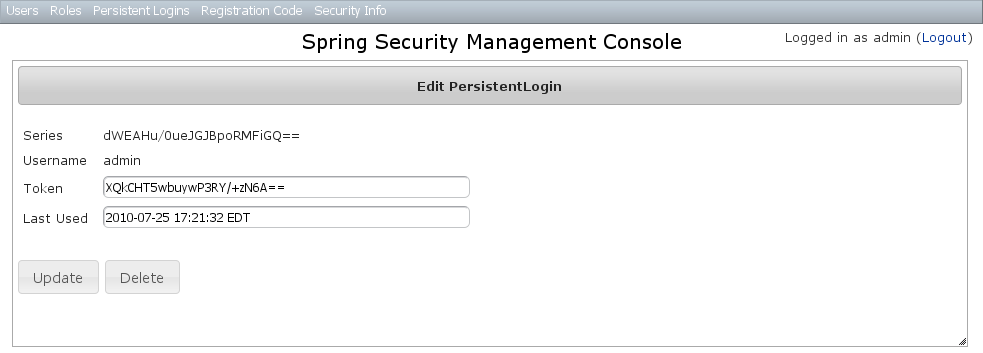
You can update the token or lastUsed attribute or delete the instance.
10.9.3. Persistent logins creation
Since instances are created during authentication by the spring-security-core plugin, there is no functionality in this plugin to create new instances.
10.10. Security Configuration UI
The Security Info menu has links for several pages that contain read-only views of much of the Spring Security configuration:
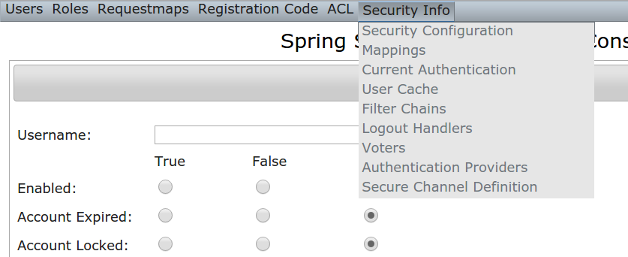
10.10.1. Security Configuration
The Security Configuration menu item displays all security-related attributes in application.groovy. The names omit the grails.plugin.springsecurity prefix:
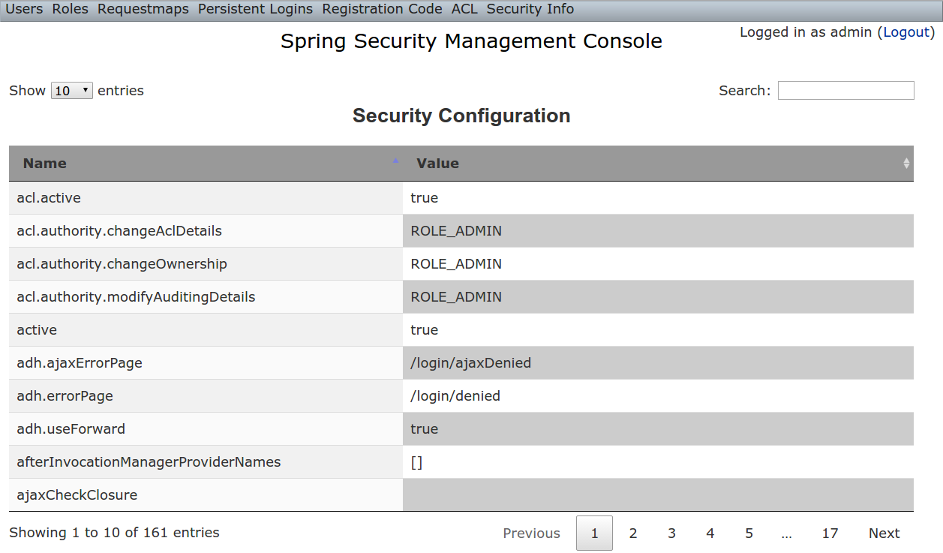
10.10.2. Mappings
The Mappings menu item displays the current request mapping mode (Annotation, Requestmap, or Static) and all current mappings:
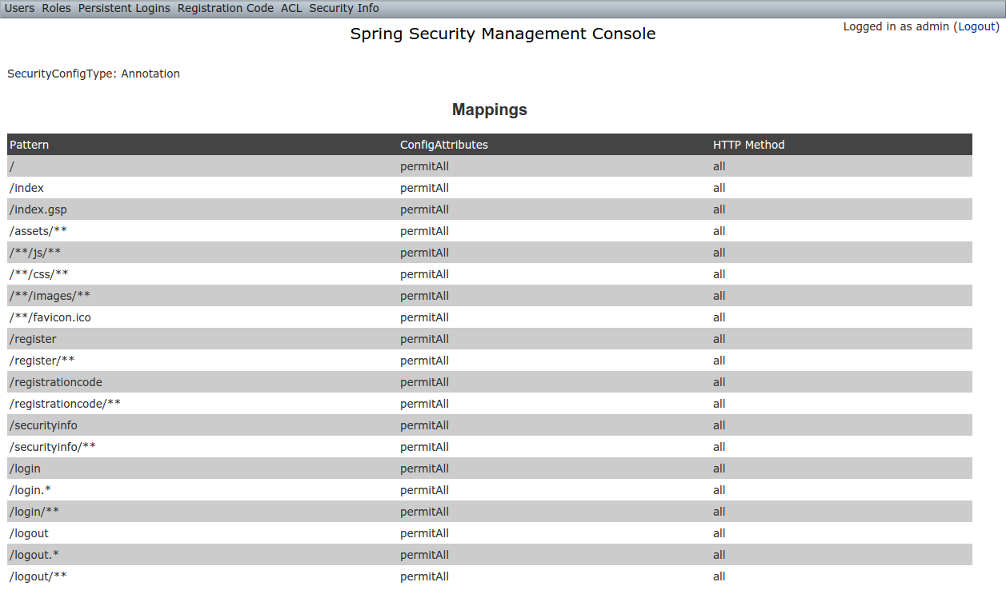
10.10.3. Current Authentication
The Current Authentication menu item displays your Authentication information, mostly for reference to see what a typical one contains:
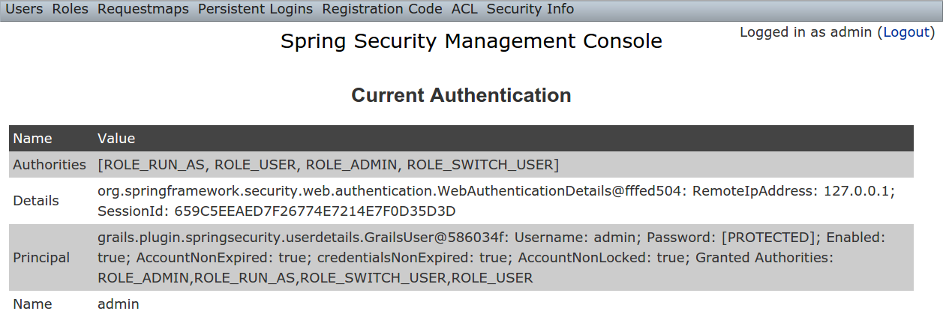
10.10.4. User Cache
The User Cache menu item displays information about cached users if the feature is enabled (it is disabled by default).
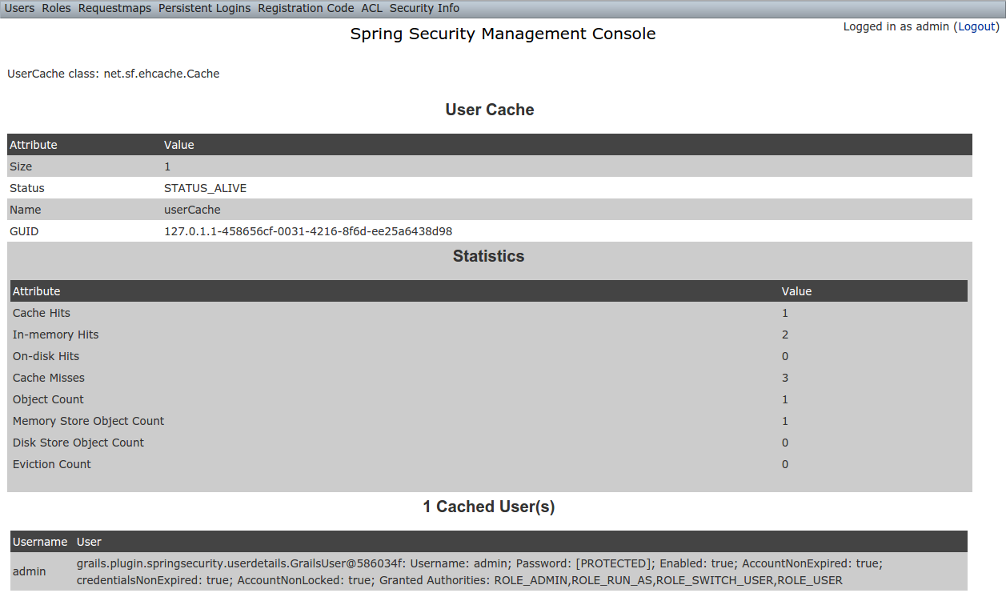
10.10.5. Filter Chains
The Filter Chains menu item displays your configured Filter chains. It is possible to have multiple URL patterns each with its own filter chain, for example when using HTTP Basic Auth for a web service. By default since the 3.0.0 release the spring-security-core s2-quickstart script configures empty filter chains for static assets to avoid unnecessary security checks (although of course if you need to secure some or all of your static assets you should reconfigure these).
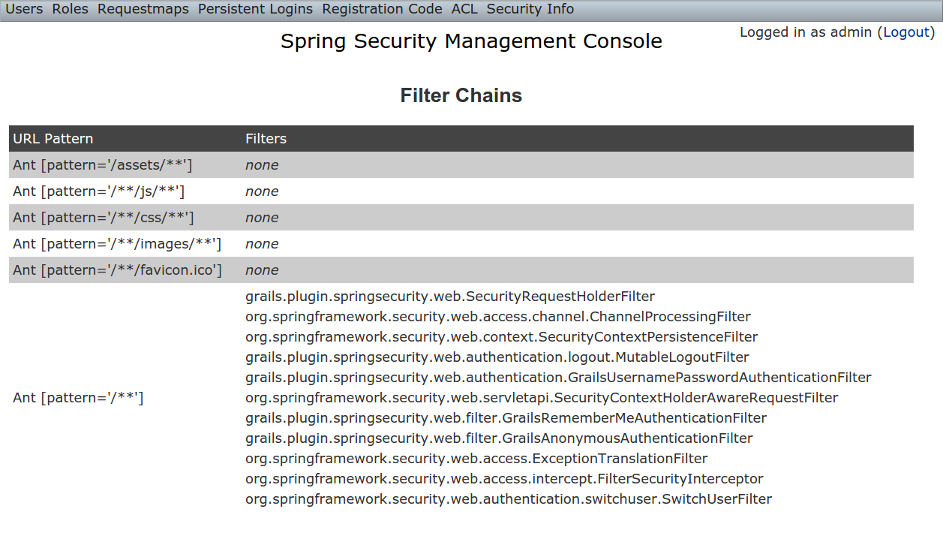
10.10.6. Logout Handlers
The Logout Handlers menu item displays your registered ``LogoutHandler``s. Typically there will be just the ones shown here, but you can register your own custom implementations, or a plugin might contribute more:
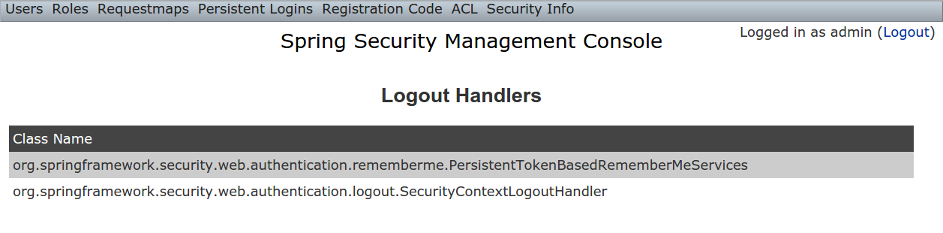
10.10.7. Voters
The Voters menu item displays your registered ``AccessDecisionVoter``s. Typically there will be just the ones shown here, but you can register your own custom implementations, or a plugin might contribute more:
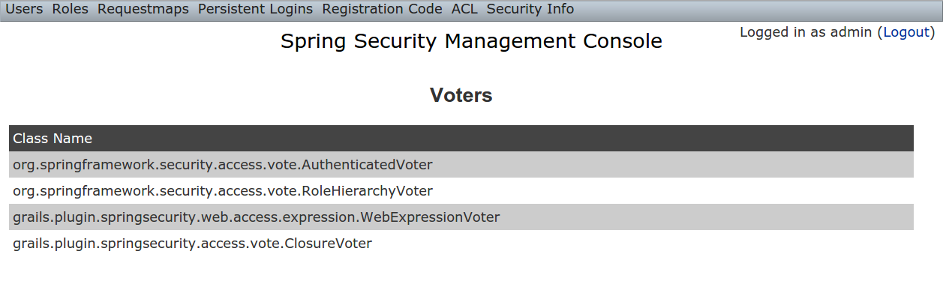
10.10.8. Authentication Providers
The Authentication Providers menu item displays your registered ``AuthenticationProvider``s. Typically there will be just the ones shown here, but you can register your own custom implementations, or a plugin (e.g. LDAP) might contribute more:
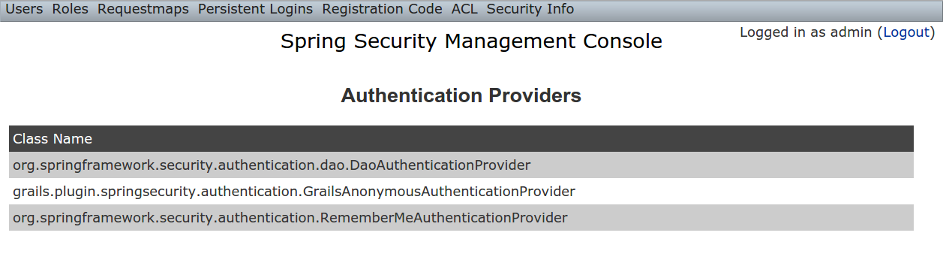
10.10.9. Secure Channel Definition
The Secure Channel Definition menu item displays your registered channel security mappings.
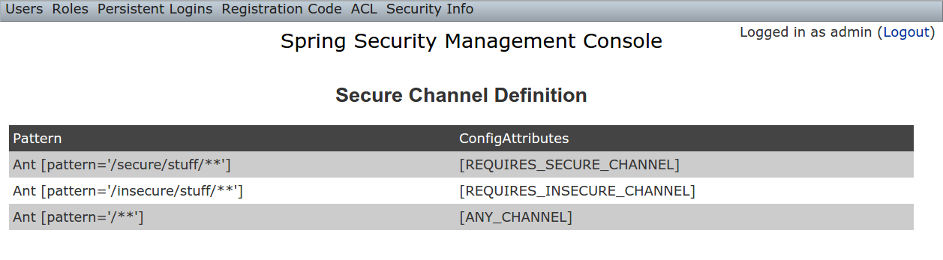
10.11. Customization
Most aspects of the plugin are configurable.
10.11.1. s2ui-override script
The plugin’s controllers and GSPs are easily overridden using the s2ui-override script. The general syntax for running the script is
grails s2ui-override <type> [<controller-package>]
The script will copy an empty controller that extends the corresponding plugin controller into your application so you can override individual actions and methods as needed. It also copies the controller’s GSPs. The exceptions are auth and layout which only copy GSPs.
For auth and layout, you do not supply a package name.
For example:
grails s2ui-override auth
For the other types aclclass, aclentry, aclobjectidentity, aclsid, persistentlogin,register, registrationcode, requestmap, role, securityinfo, user, you supply a package name as command parameter. That it is to say:
grails s2ui-override persistentlogin com.company.myapp
The files copied for each type are summarized here:
-
aclclass
-
controller/AclClassController.groovy -
views/aclClass/create.gsp -
views/aclClass/edit.gsp -
views/aclClass/search.gsp
-
-
aclentry
-
controller/AclEntryController.groovy -
views/aclEntry/create.gsp -
views/aclEntry/edit.gsp -
views/aclEntry/search.gsp
-
-
aclobjectidentity
-
controller/AclObjectIdentityController.groovy -
views/aclObjectIdentity/create.gsp -
views/aclObjectIdentity/edit.gsp -
views/aclObjectIdentity/search.gsp
-
-
aclsid
-
controller/AclSidController.groovy -
views/aclSid/create.gsp -
views/aclSid/edit.gsp -
views/aclSid/search.gsp
-
-
auth
-
views/login/auth.gsp
-
-
layout
-
views/layouts/springSecurityUI.gsp -
views/includes/_ajaxLogin.gsp
-
-
persistentlogin
-
controller/PersistentLoginController.groovy -
views/persistentLogin/edit.gsp -
views/persistentLogin/search.gsp
-
-
register
-
controller/RegisterController.groovy -
views/layouts/email.gsp -
views/register/forgotPassword.gsp -
views/register/_forgotPasswordMail.gsp -
views/register/register.gsp -
views/register/resetPassword.gsp -
views/register/_verifyRegistrationMail.gsp
-
-
registrationcode
-
controller/RegistrationCodeController.groovy -
views/registrationCode/edit.gsp -
views/registrationCode/search.gsp
-
-
requestmap
-
controller/RequestmapController.groovy -
views/requestmap/create.gsp -
views/requestmap/edit.gsp -
views/requestmap/search.gsp
-
-
role
-
controller/RoleController.groovy -
views/role/create.gsp -
views/role/edit.gsp -
views/role/search.gsp
-
-
securityinfo
-
controller/SecurityInfoController.groovy -
views/securityInfo/config.gsp -
views/securityInfo/currentAuth.gsp -
views/securityInfo/filterChains.gsp -
views/securityInfo/logoutHandlers.gsp -
views/securityInfo/mappings.gsp -
views/securityInfo/providers.gsp -
views/securityInfo/secureChannel.gsp -
views/securityInfo/usercache.gsp -
views/securityInfo/voters.gsp
-
-
user
-
controller/UserController.groovy -
views/user/create.gsp -
views/user/edit.gsp -
views/user/search.gsp
-
10.11.2. I18N
All of the plugin’s displayed strings are localized and stored in the plugin’s grails-app/i18n/messages.spring-security-ui.properties file. You can override any of these values by putting an override in your application’s grails-app/i18n/messages.properties file.
10.11.3. application.groovy attributes
There are a few configuration options specified in DefaultUiSecurityConfig.groovy that can be overridden in your application’s grails-app/conf/application.groovy
Registration attributes
These settings are used in the registration workflow; see the User Registration section for more details:
-
grails.plugin.springsecurity.ui.register.defaultRoleNames
-
grails.plugin.springsecurity.ui.register.emailBody
-
grails.plugin.springsecurity.ui.register.emailFrom
-
grails.plugin.springsecurity.ui.register.emailSubject
-
grails.plugin.springsecurity.ui.register.postRegisterUrl
Forgot Password attributes
These settings are used in the forgot-password workflow; see the Forgot Password section for more details:
-
grails.plugin.springsecurity.ui.forgotPassword.emailBody
-
grails.plugin.springsecurity.ui.forgotPassword.emailFrom
-
grails.plugin.springsecurity.ui.forgotPassword.emailSubject
-
grails.plugin.springsecurity.ui.forgotPassword.postResetUrl
GSP layout attributes
The layout attribute in the GSPs is configurable. If this is the only change you want to make in some or all of the GSPs then you can avoid copying the GSPs into your application just to make this change.
The default value for the registration workflow GSPs (forgotPassword.gsp, register.gsp, and resetPassword.gsp) is "register" and the default for the rest is "springSecurityUI". These values can be overridden with the grails.plugin.springsecurity.ui.gsp.layoutRegister and grails.plugin.springsecurity.ui.gsp.layoutUi settings.
Miscellaneous attributes
The role name required to be able to run as another user defaults to ROLE_SWITCH_USER but you can override this name with the grails.plugin.springsecurity.ui.switchUserRoleName setting.
10.11.4. CSS and JavaScript
The plugin uses the Asset Pipeline plugin to manage its resources. This makes it very easy to provide your own version of some or all of the static resources since asset-pipeline will always use a file in the application’s assets directory instead of a plugin’s if it exists.
Instead of depending on either the jQuery or jQuery UI plugins, this plugin includes its own copy of jquery.js, jquery-ui.js, and jquery-ui.css. Note that the versions are not hard-coded, but instead they take advantage of the feature in asset-pipeline where you can embed Groovy code in a file to specify the name and path.
The layouts use grails-app/assets/javascripts/jquery.js, which contains this:
//=require jquery/jquery-${grails.plugin.springsecurity.ui.Constants.JQUERY_VERSION}.jsThis resolves to grails-app/assets/javascripts/jquery/jquery-2.1.4.js, and to use your own version, either use the same approach in a file called jquery.js or rename your file to jquery.js.
Likewise for jQuery UI, the JavaScript file is grails-app/assets/javascripts/jquery-ui.js, which contains this
//=require jquery-ui/jquery-ui-${grails.plugin.springsecurity.ui.Constants.JQUERY_UI_VERSION}.jsand the CSS file grails-app/assets/stylesheets/jquery-ui.css, which contains
/*
*= require smoothness/jquery-ui-${grails.plugin.springsecurity.ui.Constants.JQUERY_UI_VERSION}.css
*/The JavaScript file resolves to grails-app/assets/javascripts/jquery-ui/jquery-ui-1.10.3.custom.js, and to use your own version, either use the same approach in a file called jquery-ui.js or rename your file to jquery-ui.js.
The CSS file resolves to grails-app/assets/stylesheets/smoothness/jquery-ui-1.10.3.custom.css, and to use your own version, either use the same approach in a file called jquery-ui.js or rename your file to jquery-ui.js.
Use your own jquery-ui.js and/or jquery-ui.css to override the plugin’s.
The springSecurityUI.gsp layout includes grails-app/assets/stylesheets/spring-security-ui.css, which has no style declarations and only includes other CSS files:
/*
*= require reset.css
*= require jquery-ui.css
*= require jquery.jdMenu.css
*= require jquery.jdMenu.slate.css
*= require jquery.jgrowl.css
*= require spring-security-ui-common.css
*/and grails-app/assets/javascripts/spring-security-ui.js which has no JavaScript code and only includes other JavaScript files:
//= require jquery.js
//= require jquery-ui.js
//= require jquery/jquery.jgrowl.js
//= require jquery/jquery.positionBy.js
//= require jquery/jquery.bgiframe.js
//= require jquery/jquery.jdMenu.js
//= require jquery/jquery.form.js
//= require spring-security-ui-ajaxLogin.jsThe register.gsp layout layout includes grails-app/assets/stylesheets/spring-security-ui-register.css, which has no style declarations and only includes other CSS files:
/*
*= require reset.css
*= require jquery-ui.css
*= require jquery.jgrowl.css
*= require spring-security-ui-common.css
*/and grails-app/assets/javascripts/spring-security-ui-register.js which has no JavaScript code and only includes other JavaScript files:
//= require jquery.js
//= require jquery-ui.js
//= require jquery/jquery.jgrowl.jsThe remaining JavaScript files are
-
grails-app/assets/javascripts/spring-security-ui-ajaxLogin.js
-
grails-app/assets/javascripts/jquery/jquery.bgiframe.js
-
grails-app/assets/javascripts/jquery/jquery.dataTables.js
-
grails-app/assets/javascripts/jquery/jquery.form.js
-
grails-app/assets/javascripts/jquery/jquery.jdMenu.js
-
grails-app/assets/javascripts/jquery/jquery.jgrowl.js
-
grails-app/assets/javascripts/jquery/jquery.positionBy.js
and the remaining CSS files are
-
grails-app/assets/stylesheets/jquery.dataTables.css
-
grails-app/assets/stylesheets/jquery.jdMenu.css
-
grails-app/assets/stylesheets/jquery.jdMenu.slate.css
-
grails-app/assets/stylesheets/jquery.jgrowl.css
-
grails-app/assets/stylesheets/reset.css
-
grails-app/assets/stylesheets/spring-security-ui-auth.css
-
grails-app/assets/stylesheets/spring-security-ui-common.css
10.11.5. Password Hashing
In recent versions of the Spring Security Core plugin, the "User" domain class is generated by the s2-quickstart script with code to automatically hash the password. This makes the code simpler (for example in controllers where you create users or update user passwords) but older generated classes don’t have this generated code. This presents a problem for plugins like this one since it’s not possible to reliably determine if the domain class hashes the password or if you use the older approach of explicitly calling springSecurityService.encodePassword().
The unfortunate consequence of mixing a newer domain class that does password hashing with controllers that call springSecurityService.encodePassword() is the the passwords get double-hashed, and users aren’t able to login. So to get around this there’s a configuration option you can set to tell this plugin’s controllers whether to hash or not: grails.plugin.springsecurity.ui.encodePassword.
This option defaults to false, so if you have an older domain class that doesn’t handle hashing just enable this plugin’s hashing:
grails.plugin.springsecurity.ui.encodePassword = trueh4. Strategy classes
The plugin’s SpringSecurityUiService implements several "strategy" interfaces to make it possible to override its functionality in a more fine-grained way.
These are defined by interfaces in the grails.plugin.springsecurity.ui.strategy package:
-
AclStrategy -
ErrorsStrategy -
MailStrategy -
PersistentLoginStrategy -
PropertiesStrategy -
QueryStrategy -
RegistrationCodeStrategy -
RequestmapStrategy -
RoleStrategy -
UserStrategy
The controllers, taglib, and even the service never call strategy methods directly on the service, only via a strategy interface.
Each interface has a default implementation, e.g. DefaultAclStrategy, DefaultErrorsStrategy, etc., and these simply delegate to SpringSecurityUiService (except for MailStrategy, which has MailPluginMailStrategy as its default implementation which uses the Mail plugin to send emails). Each of the default implementations is registered as a Spring bean:
-
uiAclStrategy -
uiErrorsStrategy -
uiMailStrategy -
uiPersistentLoginStrategy -
uiPropertiesStrategy -
uiQueryStrategy -
uiRegistrationCodeStrategy -
uiRequestmapStrategy -
uiRoleStrategy -
uiUserStrategy
To override the functionality defined in one of the strategy interfaces, register your own implementation of the interface in your application’s grails-app/conf/spring/resources.groovy, e.g.
import com.myapp.MyRequestmapStrategy
beans = {
uiRequestmapStrategy(MyRequestmapStrategy)
}and yours will be used instead.
10.11.6. Password Verification
By default the registration controller has rather strict requirements for valid passwords; they must be between 8 and 64 characters and must include at least one uppercase letter, at least one number, and at least one symbol from "!@#$%^&". You can customize these rules with these application.groovy attributes:
| Property | Default Value |
|---|---|
grails.plugin.springsecurity.ui.password.minLength |
8 |
grails.plugin.springsecurity.ui.password.maxLength |
64 |
grails.plugin.springsecurity.ui.password.validationRegex |
"^.*(?=.*\\d)(?=.*[a-zA-Z])(?=.*[!@#$%^&]).*$" |
10.12. Scripts
10.12.1. s2ui-override
Generates controllers that extend the plugin’s controllers and copies their GSPs to your application for overriding of functionality.
The general format is:
grails s2ui-override <type> [controllerPackage]
The script will copy an empty controller that extends the corresponding plugin controller into your application so you can override individual actions and methods as needed. It also copies the controller’s GSPs. The exceptions are when type is auth or layout which only copy GSPs.
See the Customization section for more details.
10.12.2. s2ui-create-challenge-questions
Generates controllers, services, domain object, views, i18N, and application configuration to have challenge questions
The general format is:
grails s2ui-create-challenge-questions <domain-class-package> <challenge-qa-class-name> <user-domain-class-name> [number-of-questions]
-
domain-class-package is required and is the package where the Domain, Controller, and Services will be created. It is recommend to use the same class where your User class is created.
-
challenge-qa-class-name is required and is the Name of the domain class used to store this information
-
user-domain-class-name is required and is the package and name of the User class. It is recommend to ensure the first parameter is the same package as the User class.
-
number-of-questions is optional but if not given will default to 2.
Example: s2ui-create-challenge-questions com.mycompany Profile com.mycompany.User 4
This script will create one Domain Class. This will contain a link to the user and also contain one entry for each questions and answer. If you pass in either no package or the same package as the what is used for the Challenge Question domain it will not put a package in front of the User class. However, if you pass in a different package then it will add the package in front of the user class.
This script will create one controller which contains all the logic for handling the actions needed to provide a user interface to manage different users challenge questions and answers.
This script will create two services. The first service is to handle to be the implementation for the controller/domain object handling the data needed to set/get questions and answers. The second service is a listener service which ensures that anytime an answer is created or updated the value is encypted before it is stores in the database.
This script will create three views. Each of the three views (List/index, edit, and create) will support all the CRUD operations.
This script will add lines into your application.groovy file in order to ensure the questions and answers are properly configured.
This script will insert one line into messages.properties. This will be the menu item in the nav bar for spring security.
spring.security.ui.menu.<domain-class-package>.<challenge-qa-class-name>=<challenge-qa-class-name> Questions"
10.13. API Reference
The UI plugin Groovydoc API documentation is available at UI Plugin API Reference.